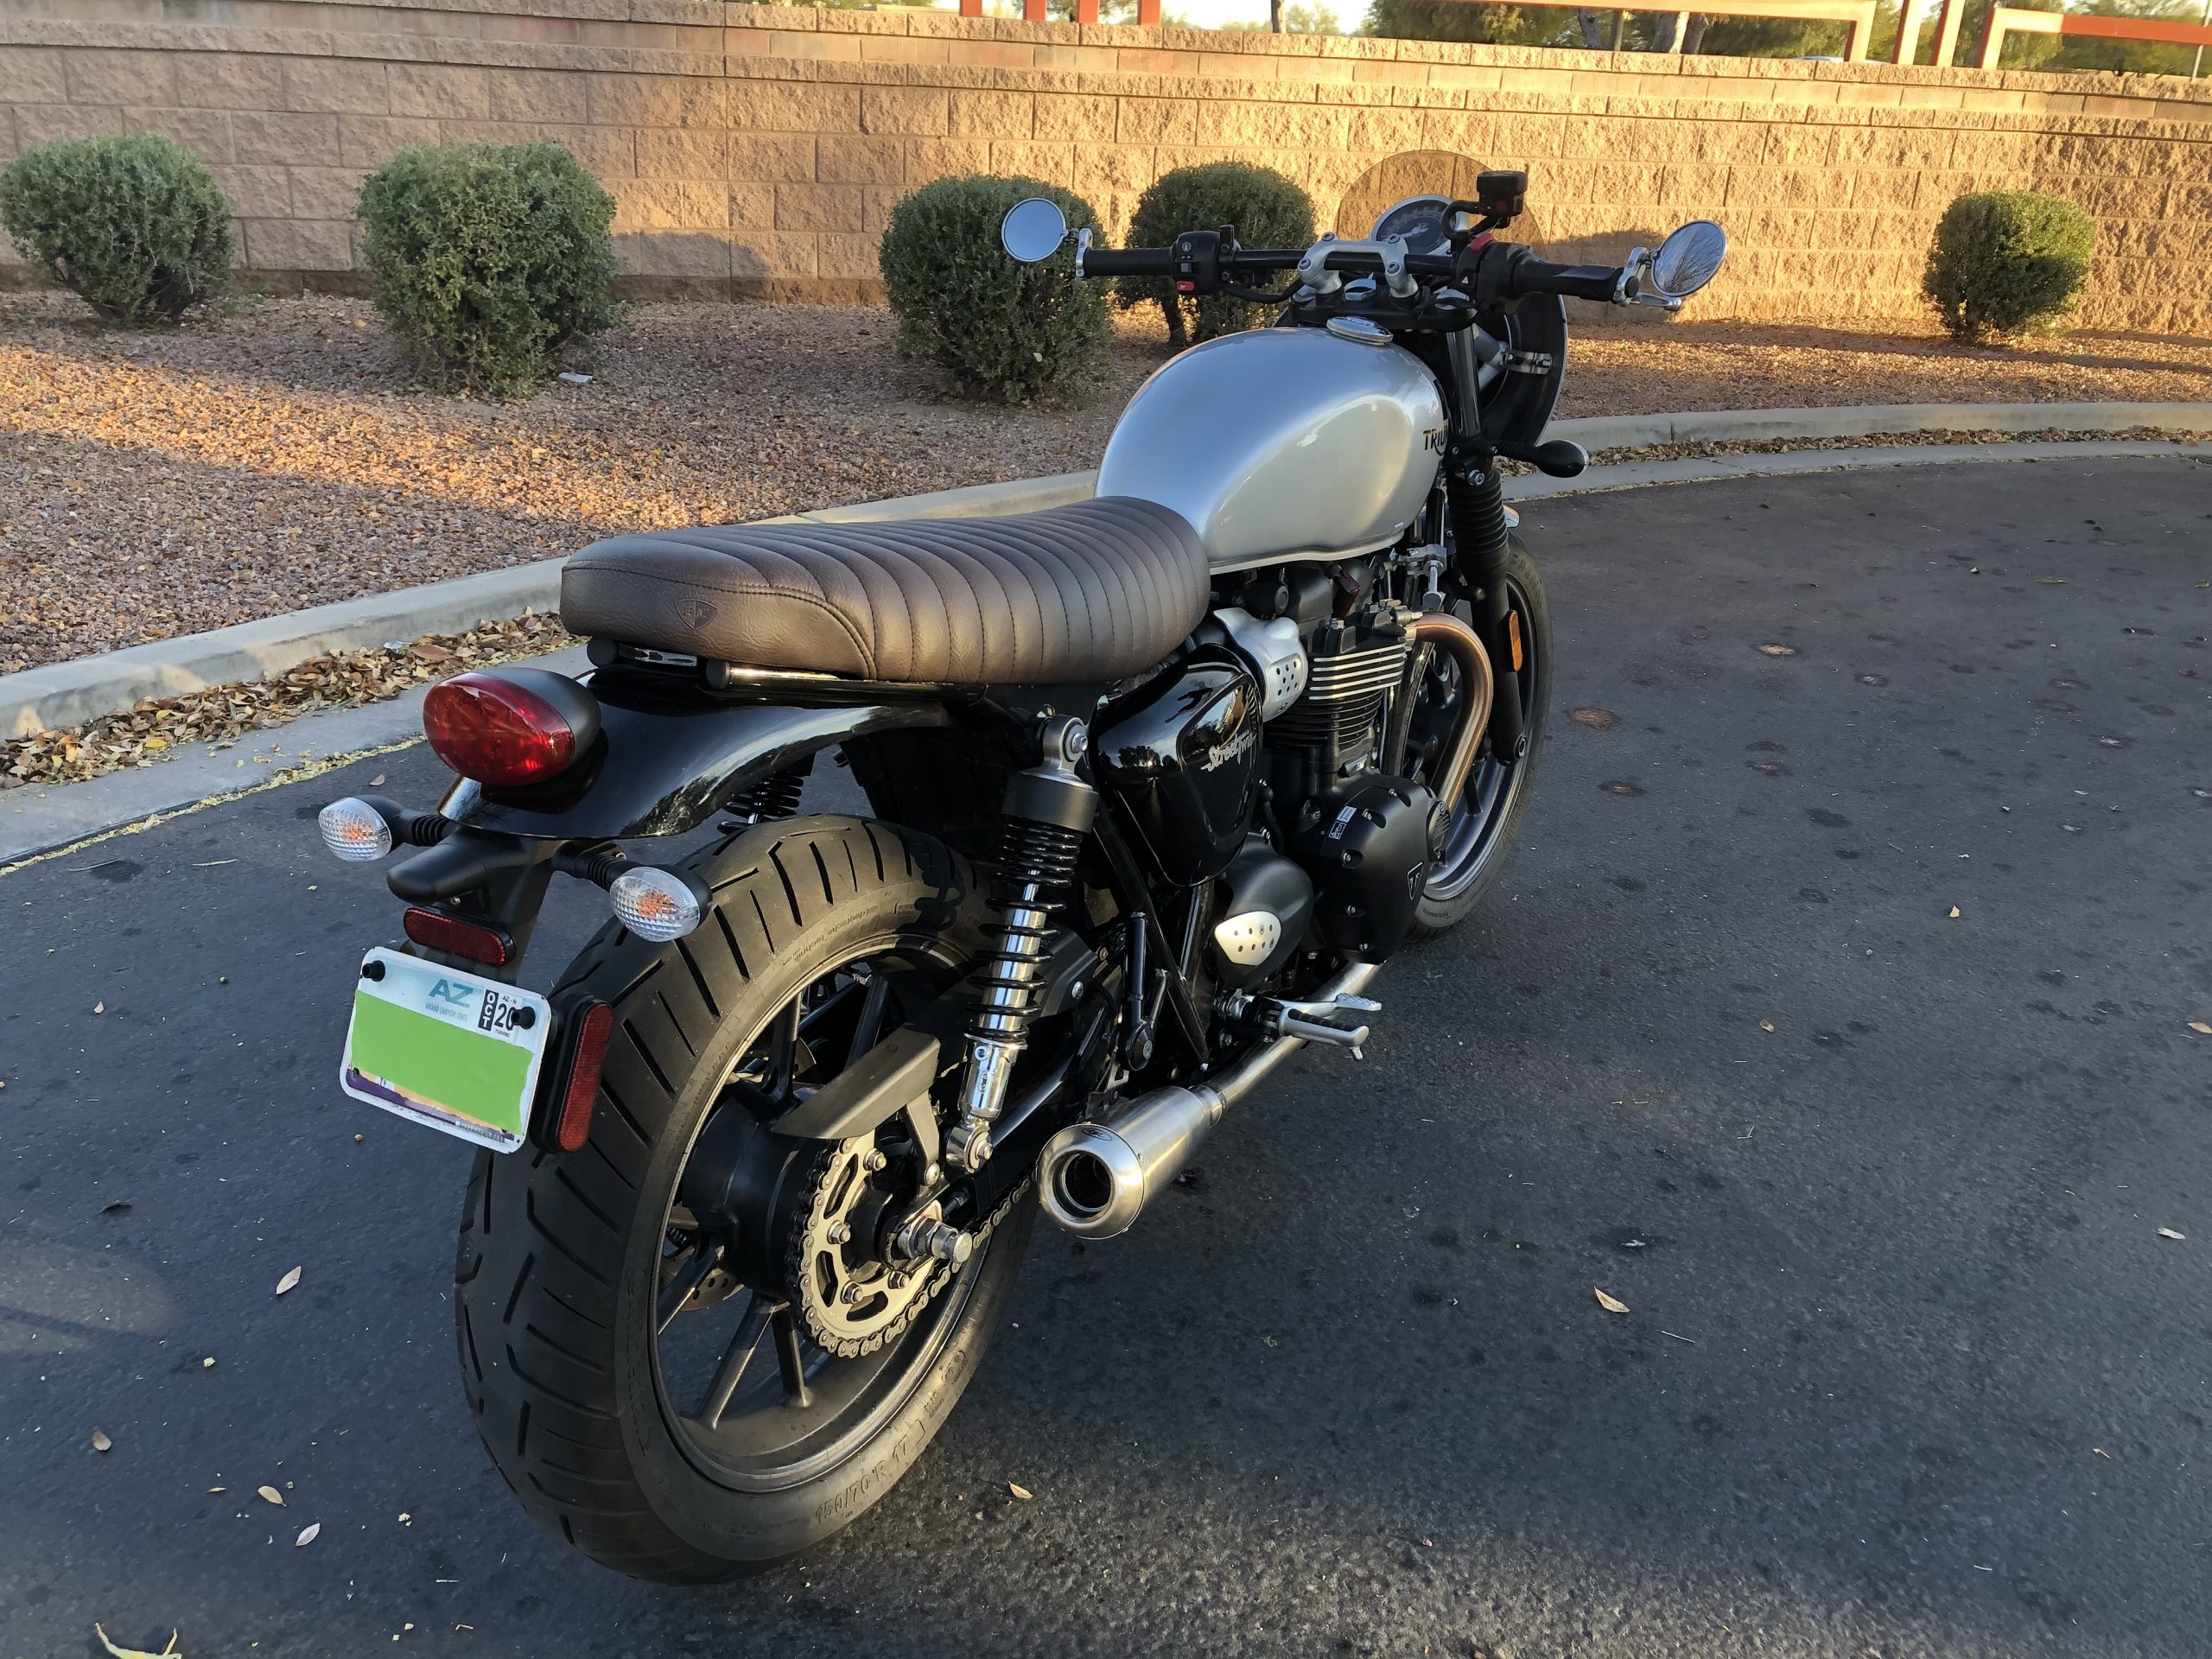
So, I’m one who actually likes having the rear fender on my 2018 Street Twin. What I didn’t like was having the rear turn signals so far back and attached to the too-large license plate holder that had too many reflectors and seemed too bulky. It all just seemed, well, untidy.
I set out to tidy up the rear fender & license plate area with some basic goals:
- Use all the original stock lighting.
- Minimize any wire splicing.
- Minize any fabrication.
- Add a bit of an industrial look.
- Keep it as low-cost as possible.
What did I do? I…
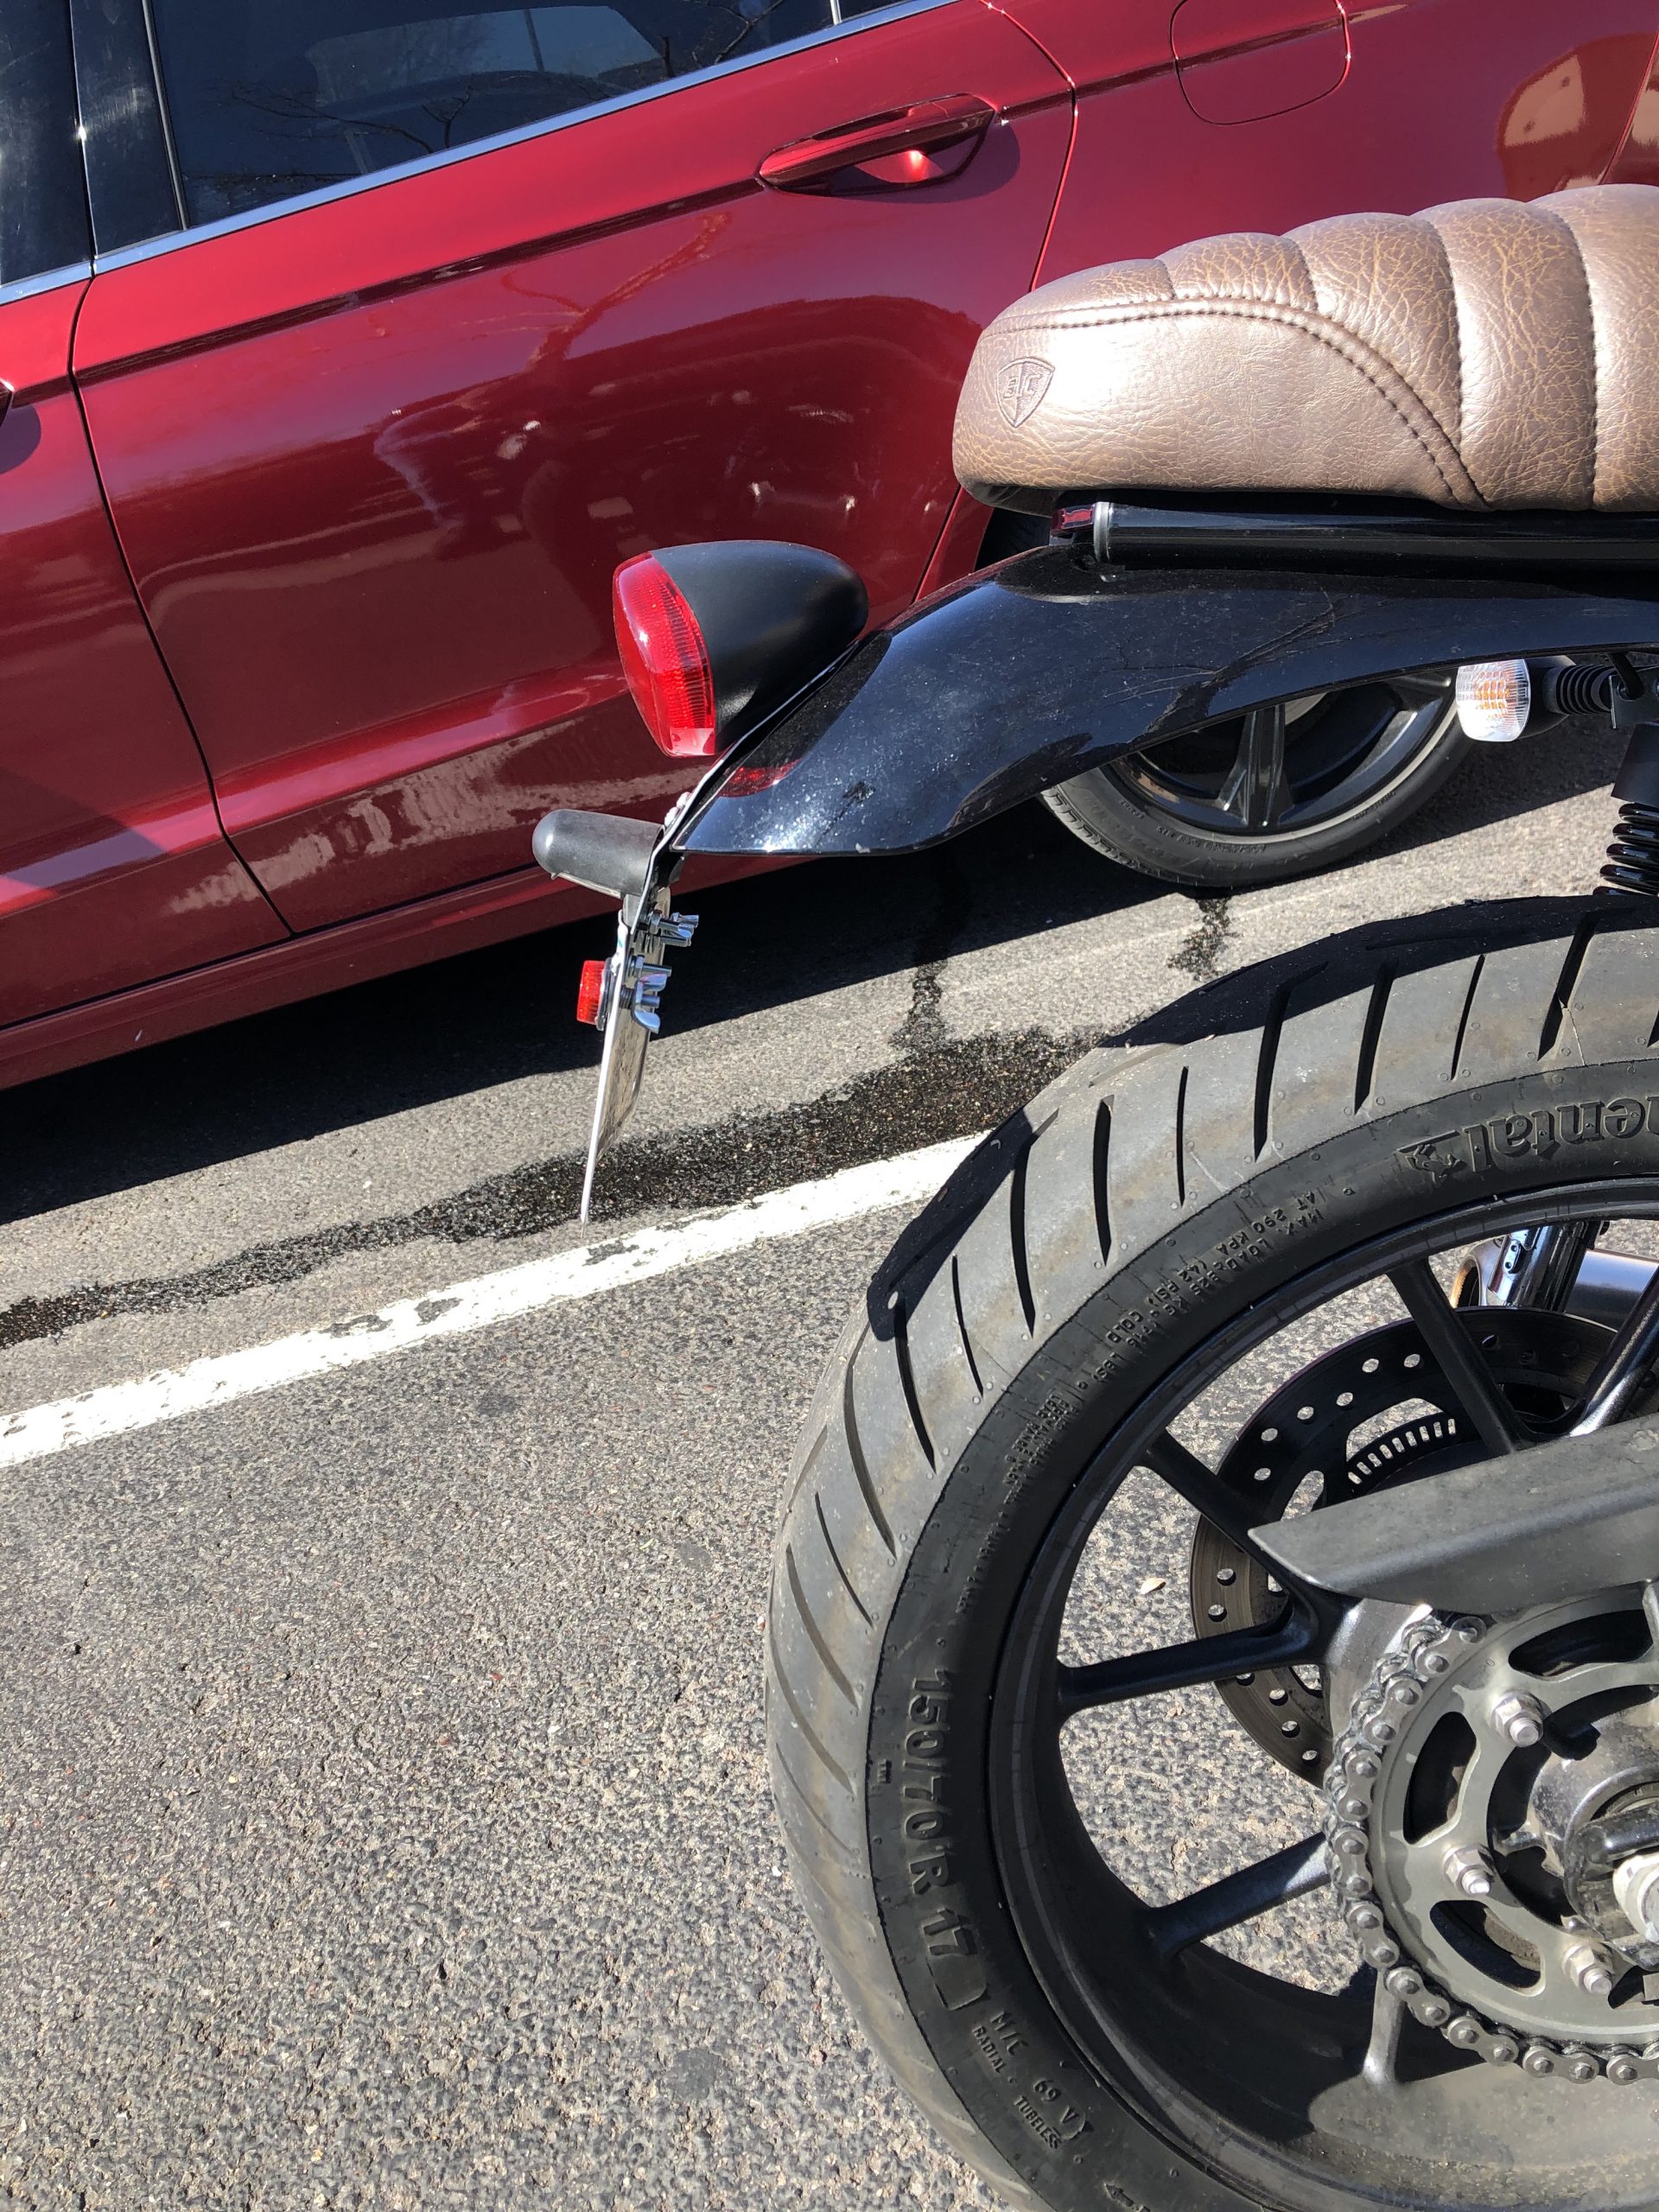
- Relocated the stock blinkers to the rear shock mounts.
- Removed the original licence plate/rear blinker holders.
- Kept the stock tail light in its original position on the fender.
- Created a simple license plate holder that allowed me to:
- Keep the stock tail light.
- Keep the stock license plate light.
- Attach a license plate.
- Have a rear reflector (Arizona state requirement).
How I did these things:
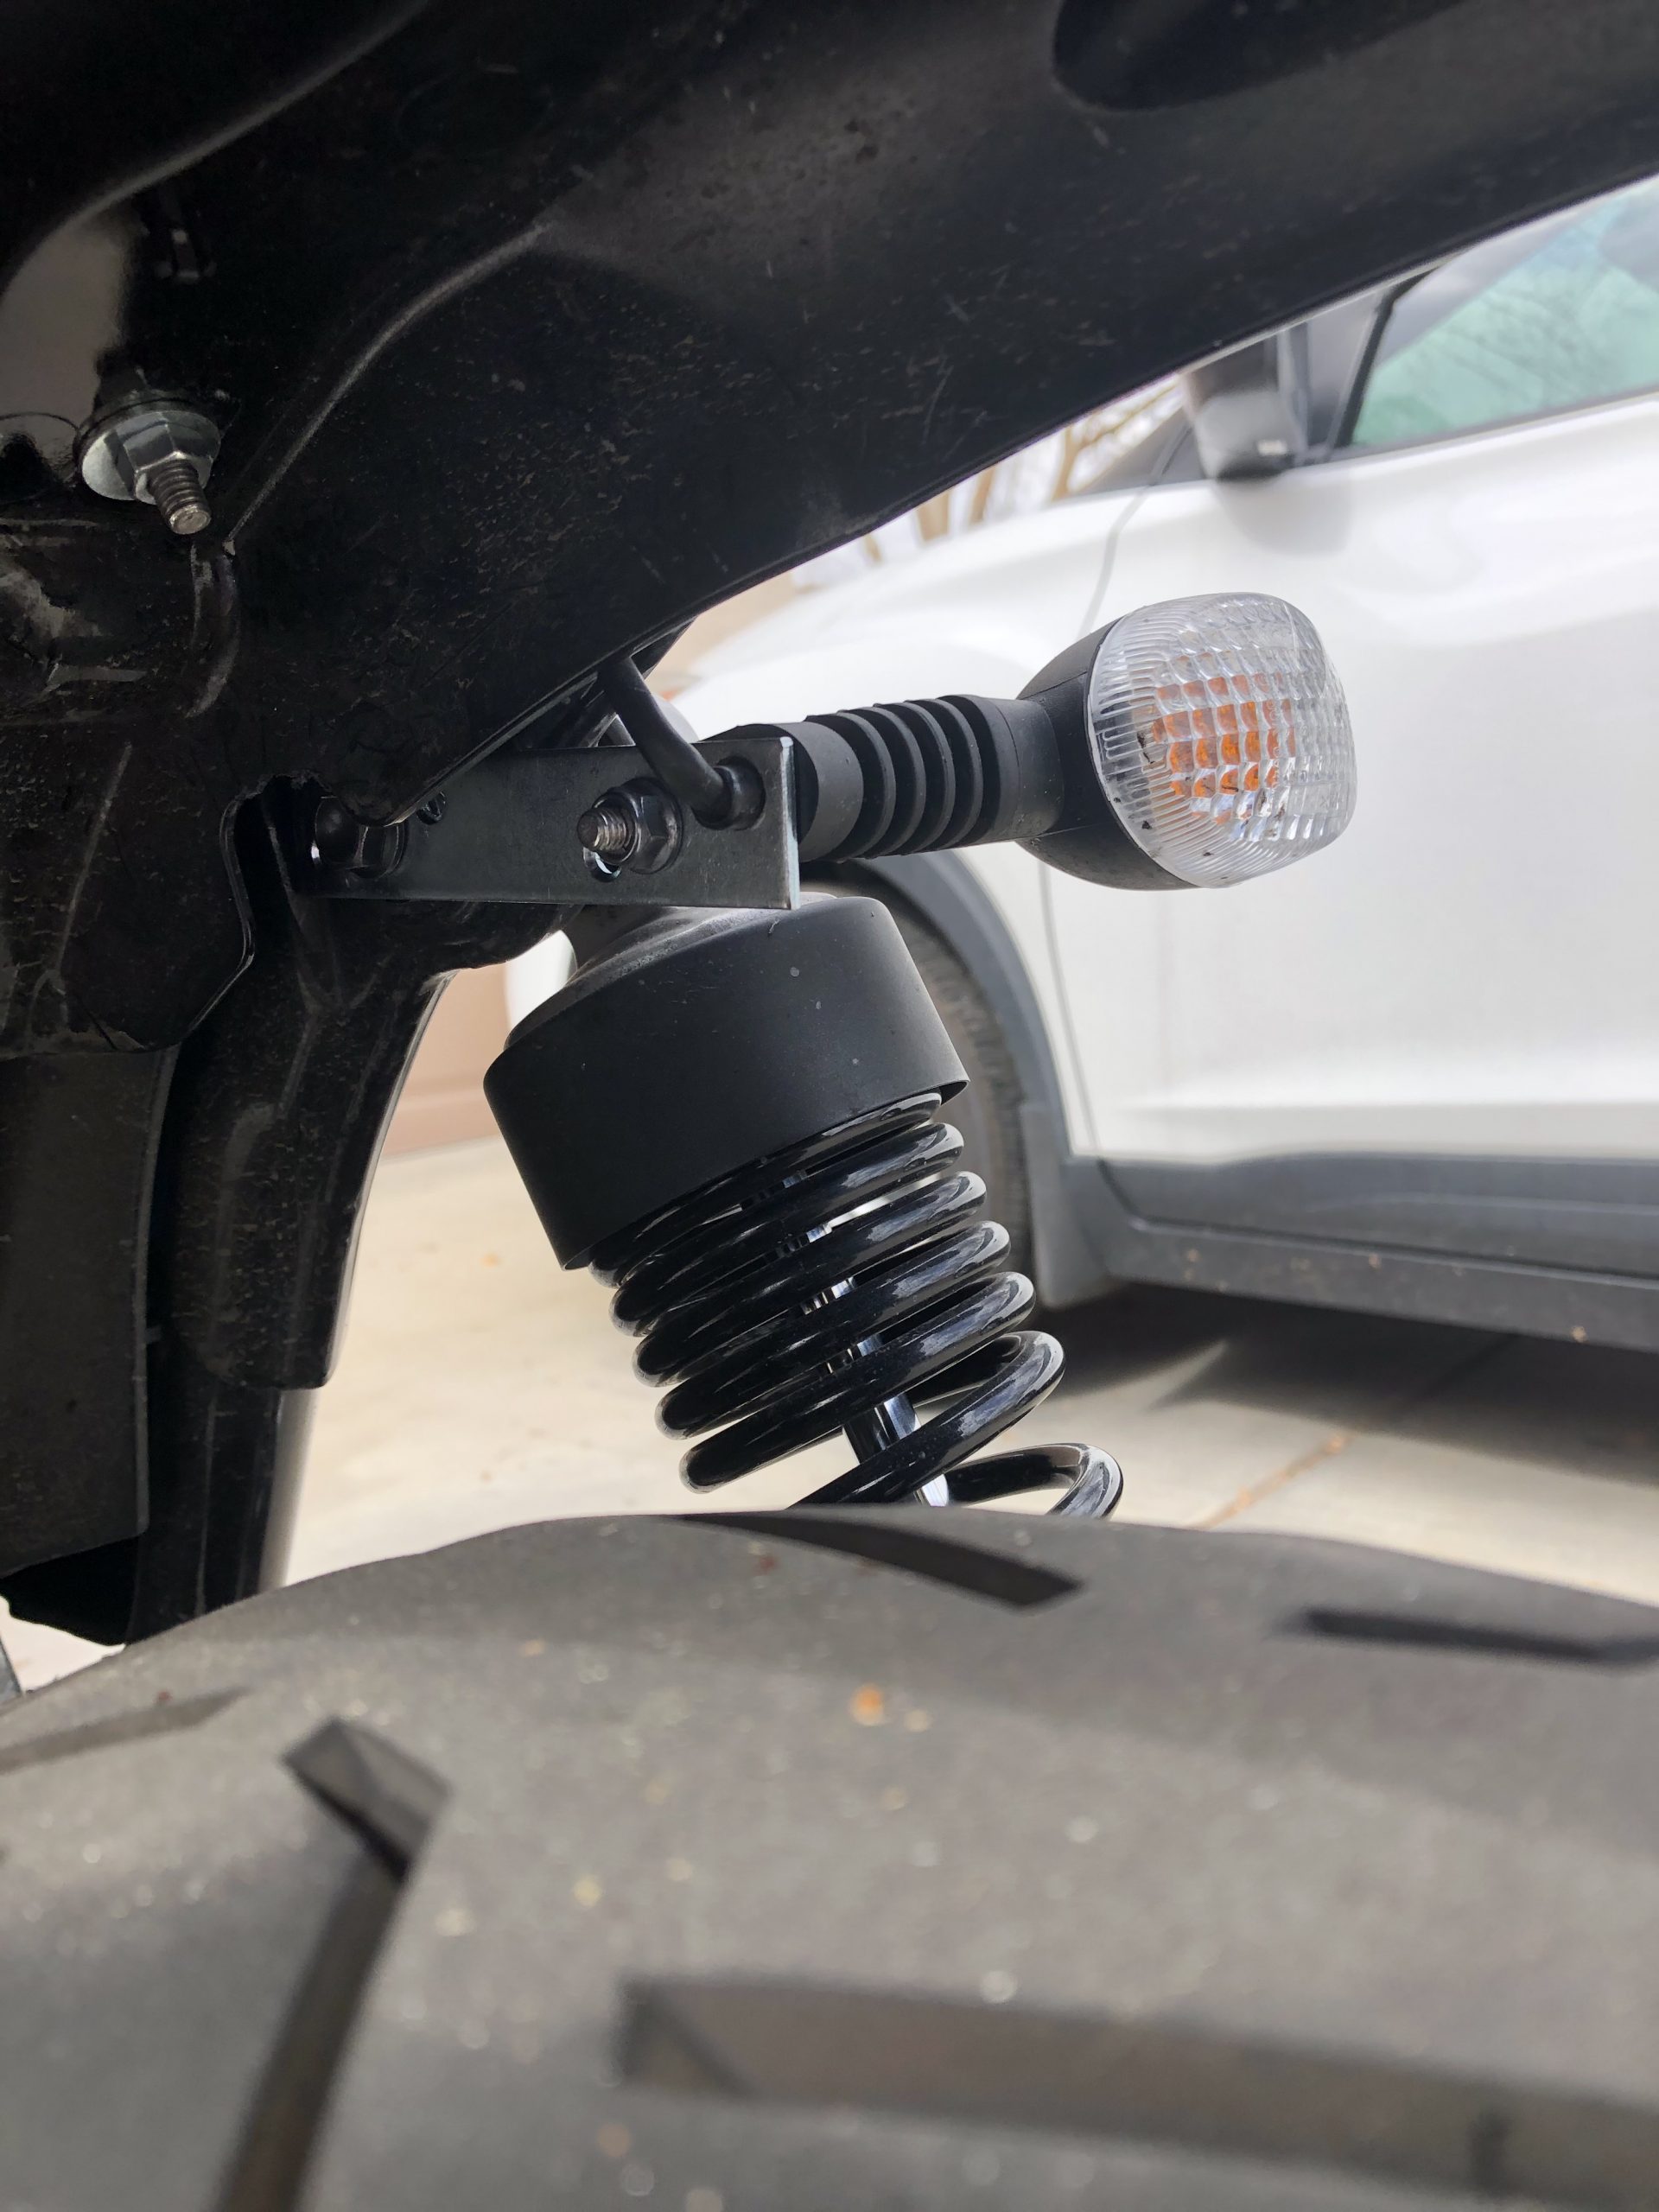
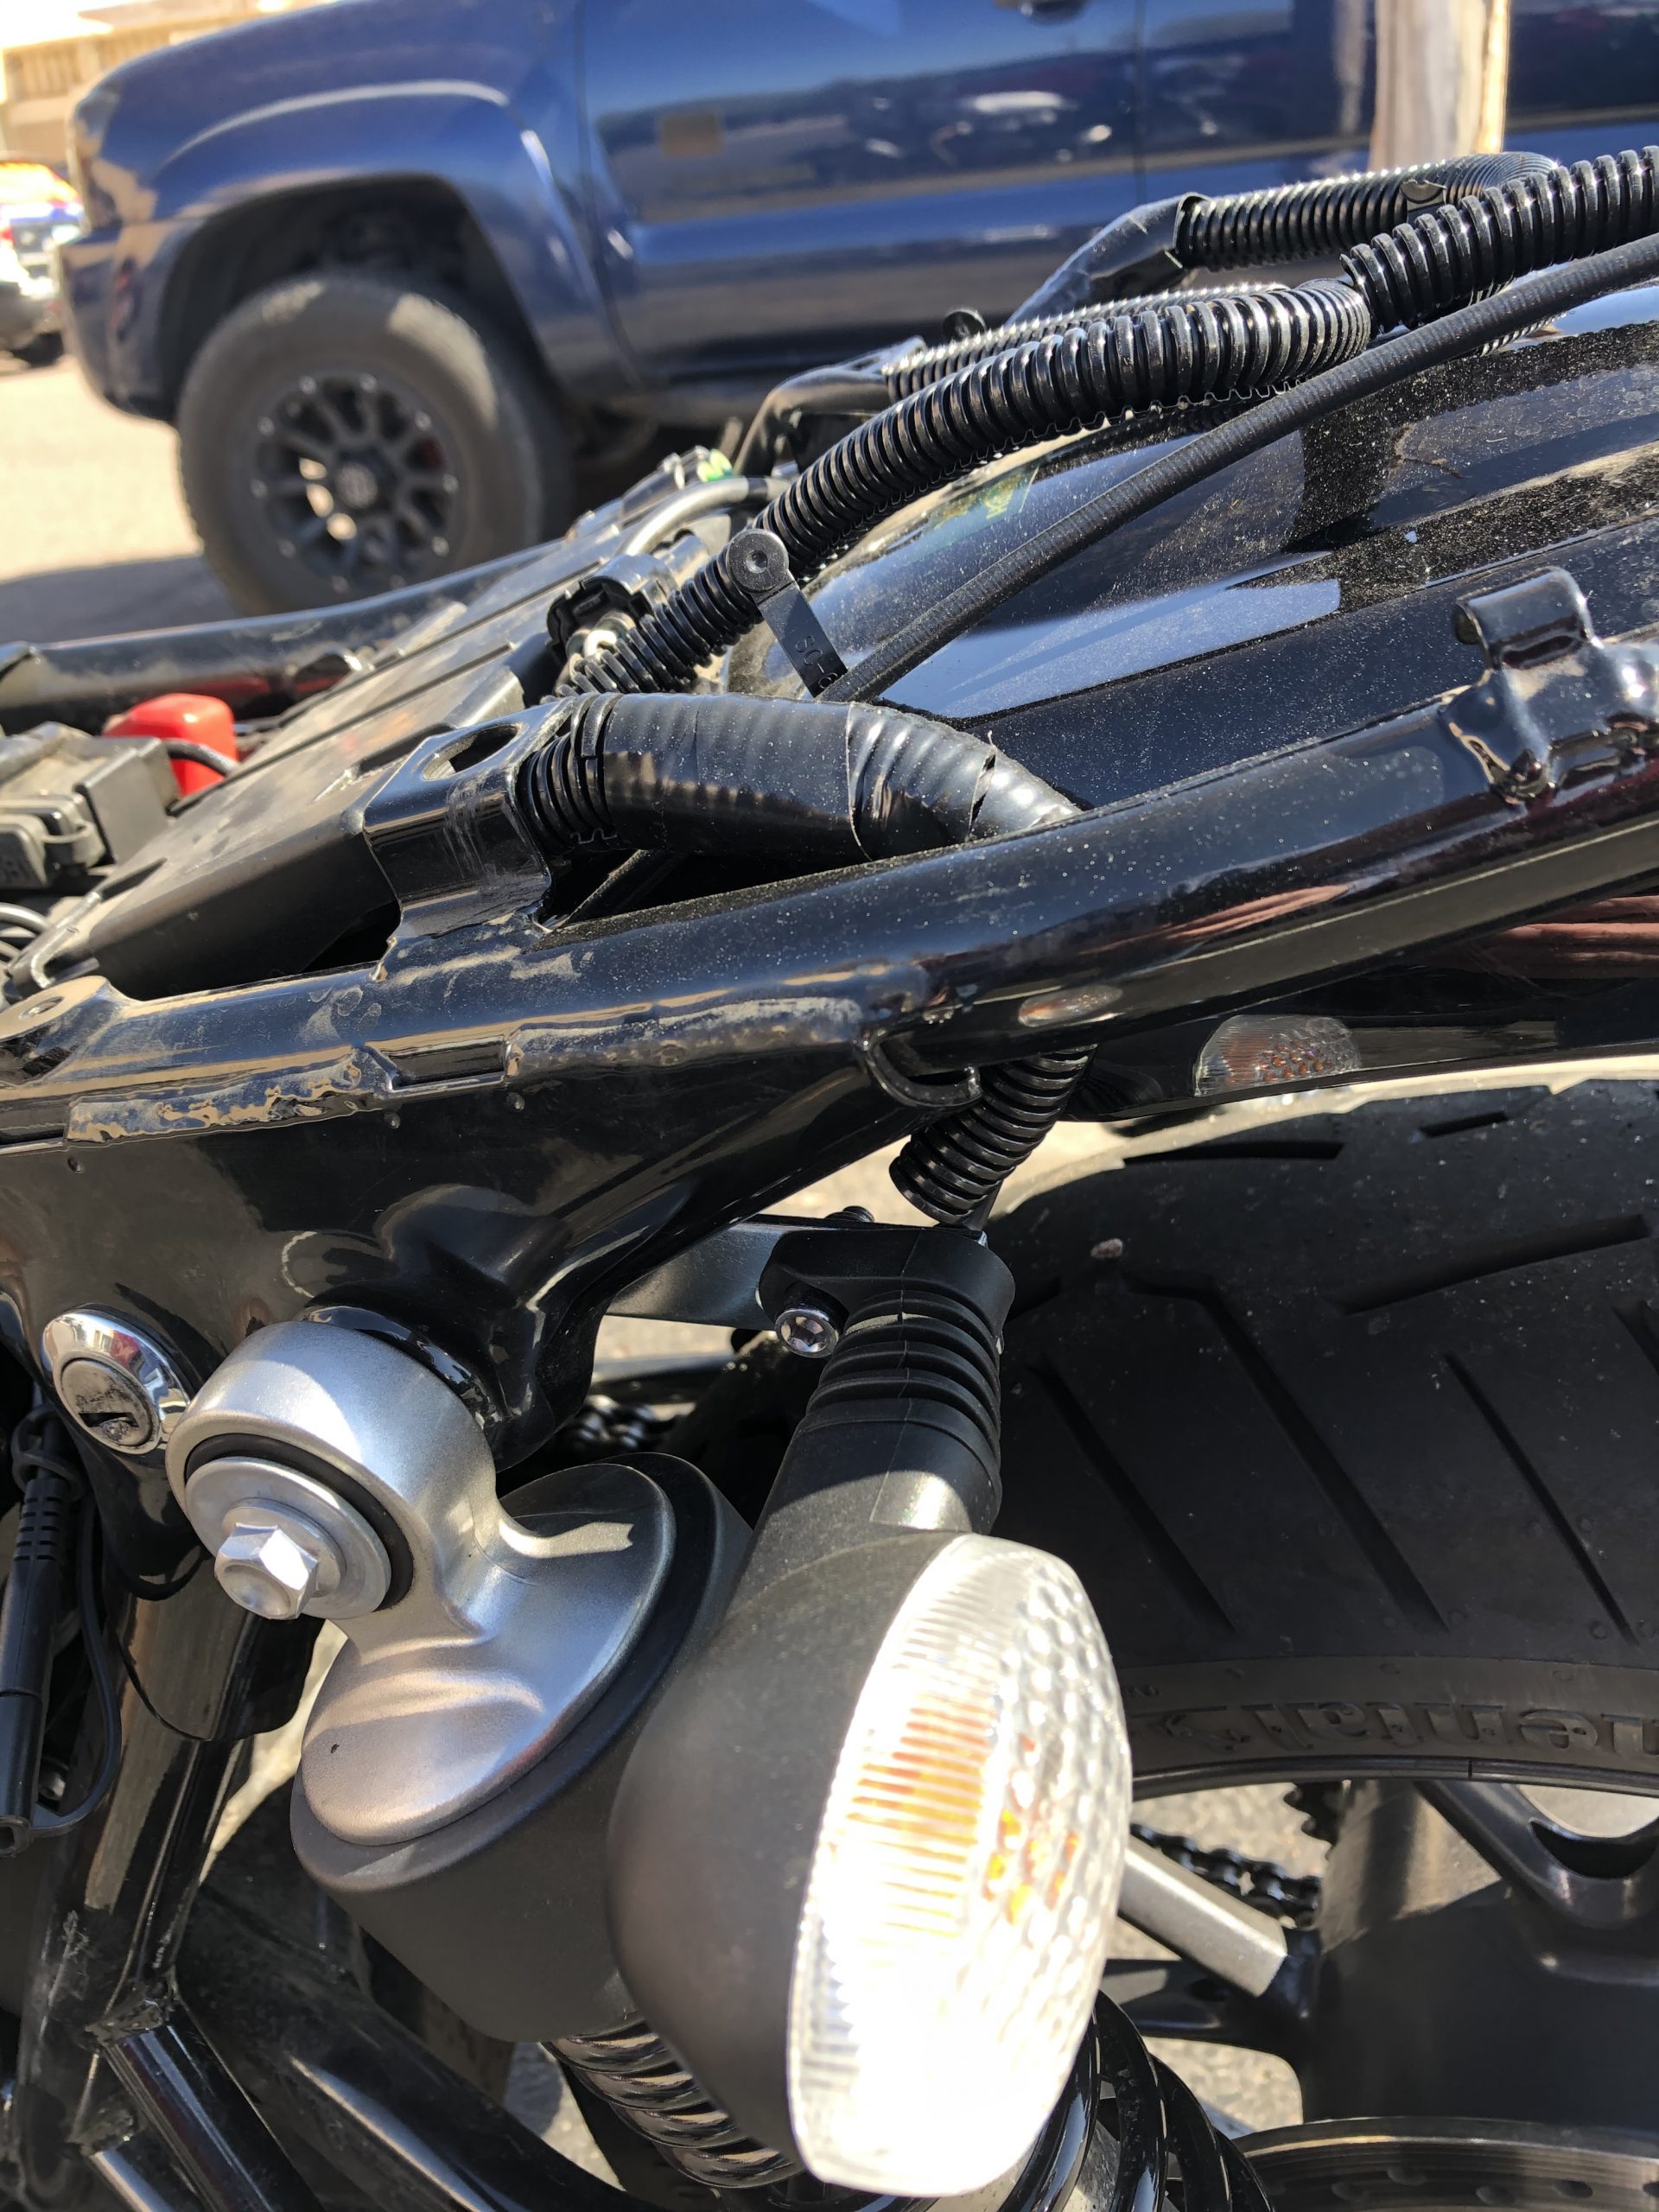
- Relocated the stock blinkers to the rear shock mounts. I purchases some mending plates from the Home Depot that seemed like a good length (Photo 1). I ended up having to drill out an existing hole to accommodate the bolt for the existing bolt holes on the inside of the top shock mount. I also had to drill a new hole and drill out the existing hole to accommodate the blinker mounting bolt and the wiring. I simply bolted this bracket to the inside bolt hole (those holes are there to allow attaching a luggage rack) and angled the bracket down slightly so the blinker would clear the fender (Photo 2).
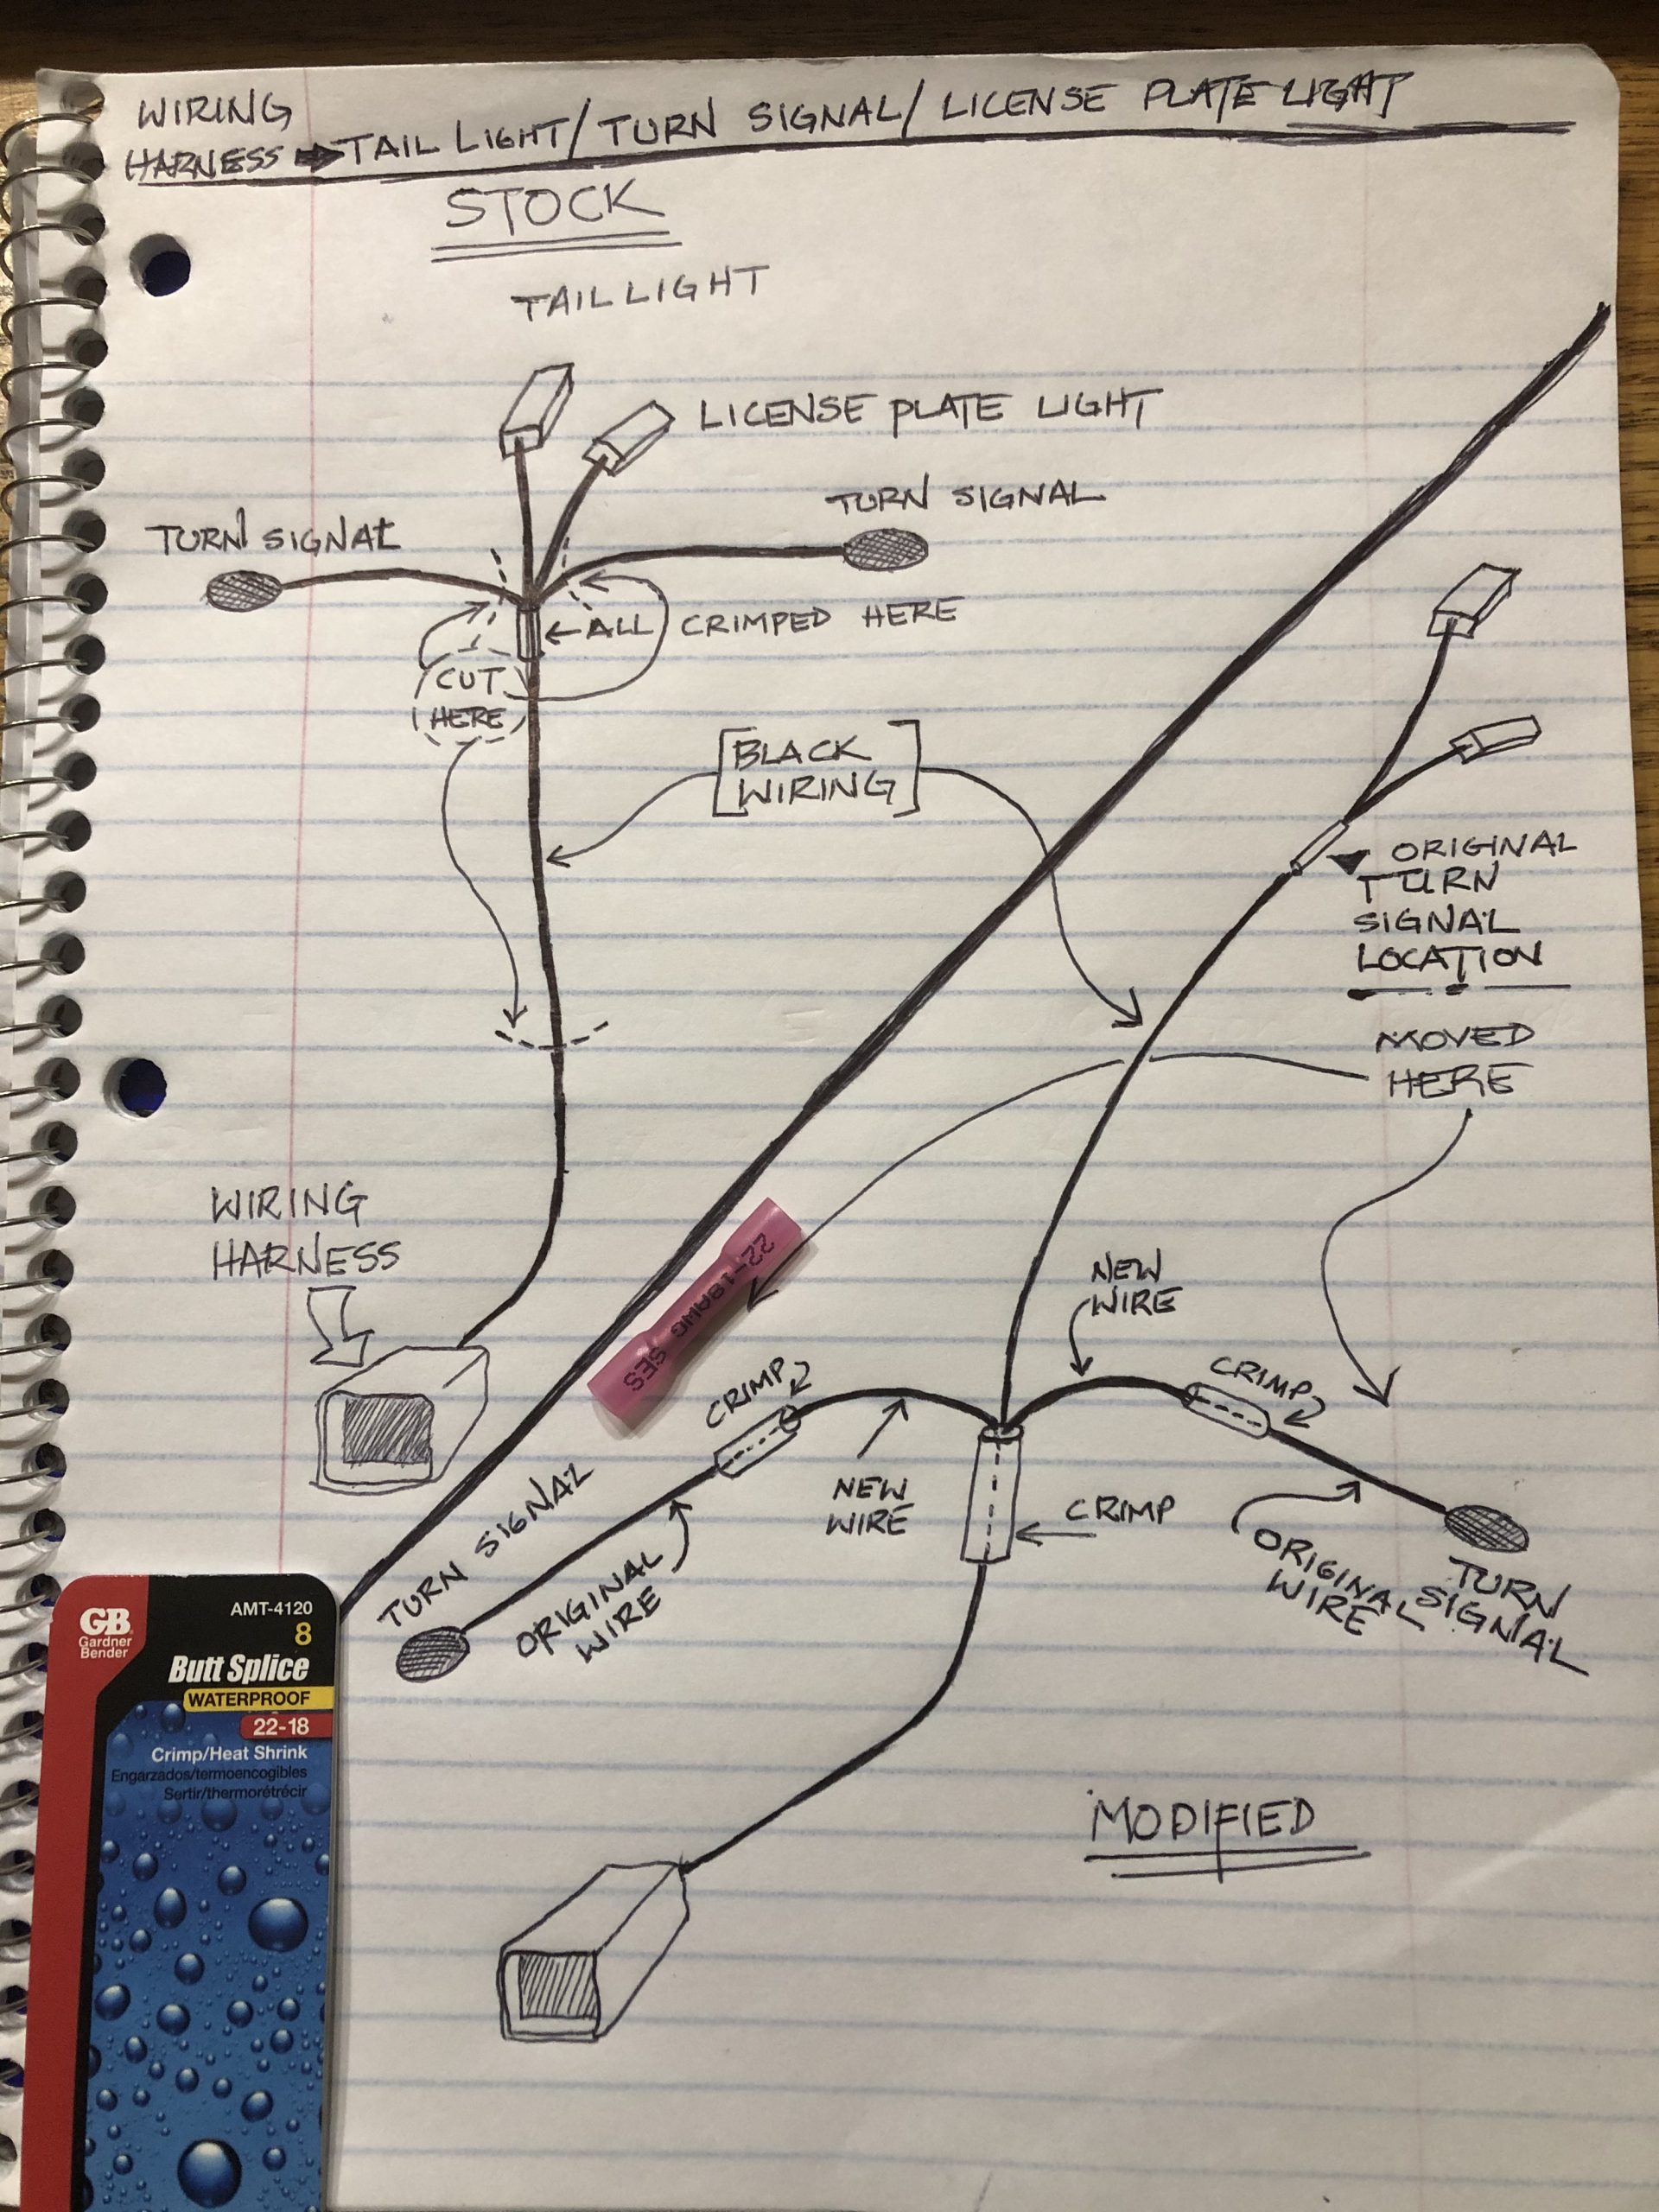
- I ended up having to splice the blinker wires – because when I removed the protective wrapping from the wiring harness I found that the blinker wires were connected to the power wire near the end of the wiring harness nearest the tail light and license plate light. I bought some wiring and used crimp/heat shrink connectors for all the new wiring connections. (Rick proper nomenclature).
- Then I added some wiring protection with corrogated wiring tubing (Photos 3 & 4).
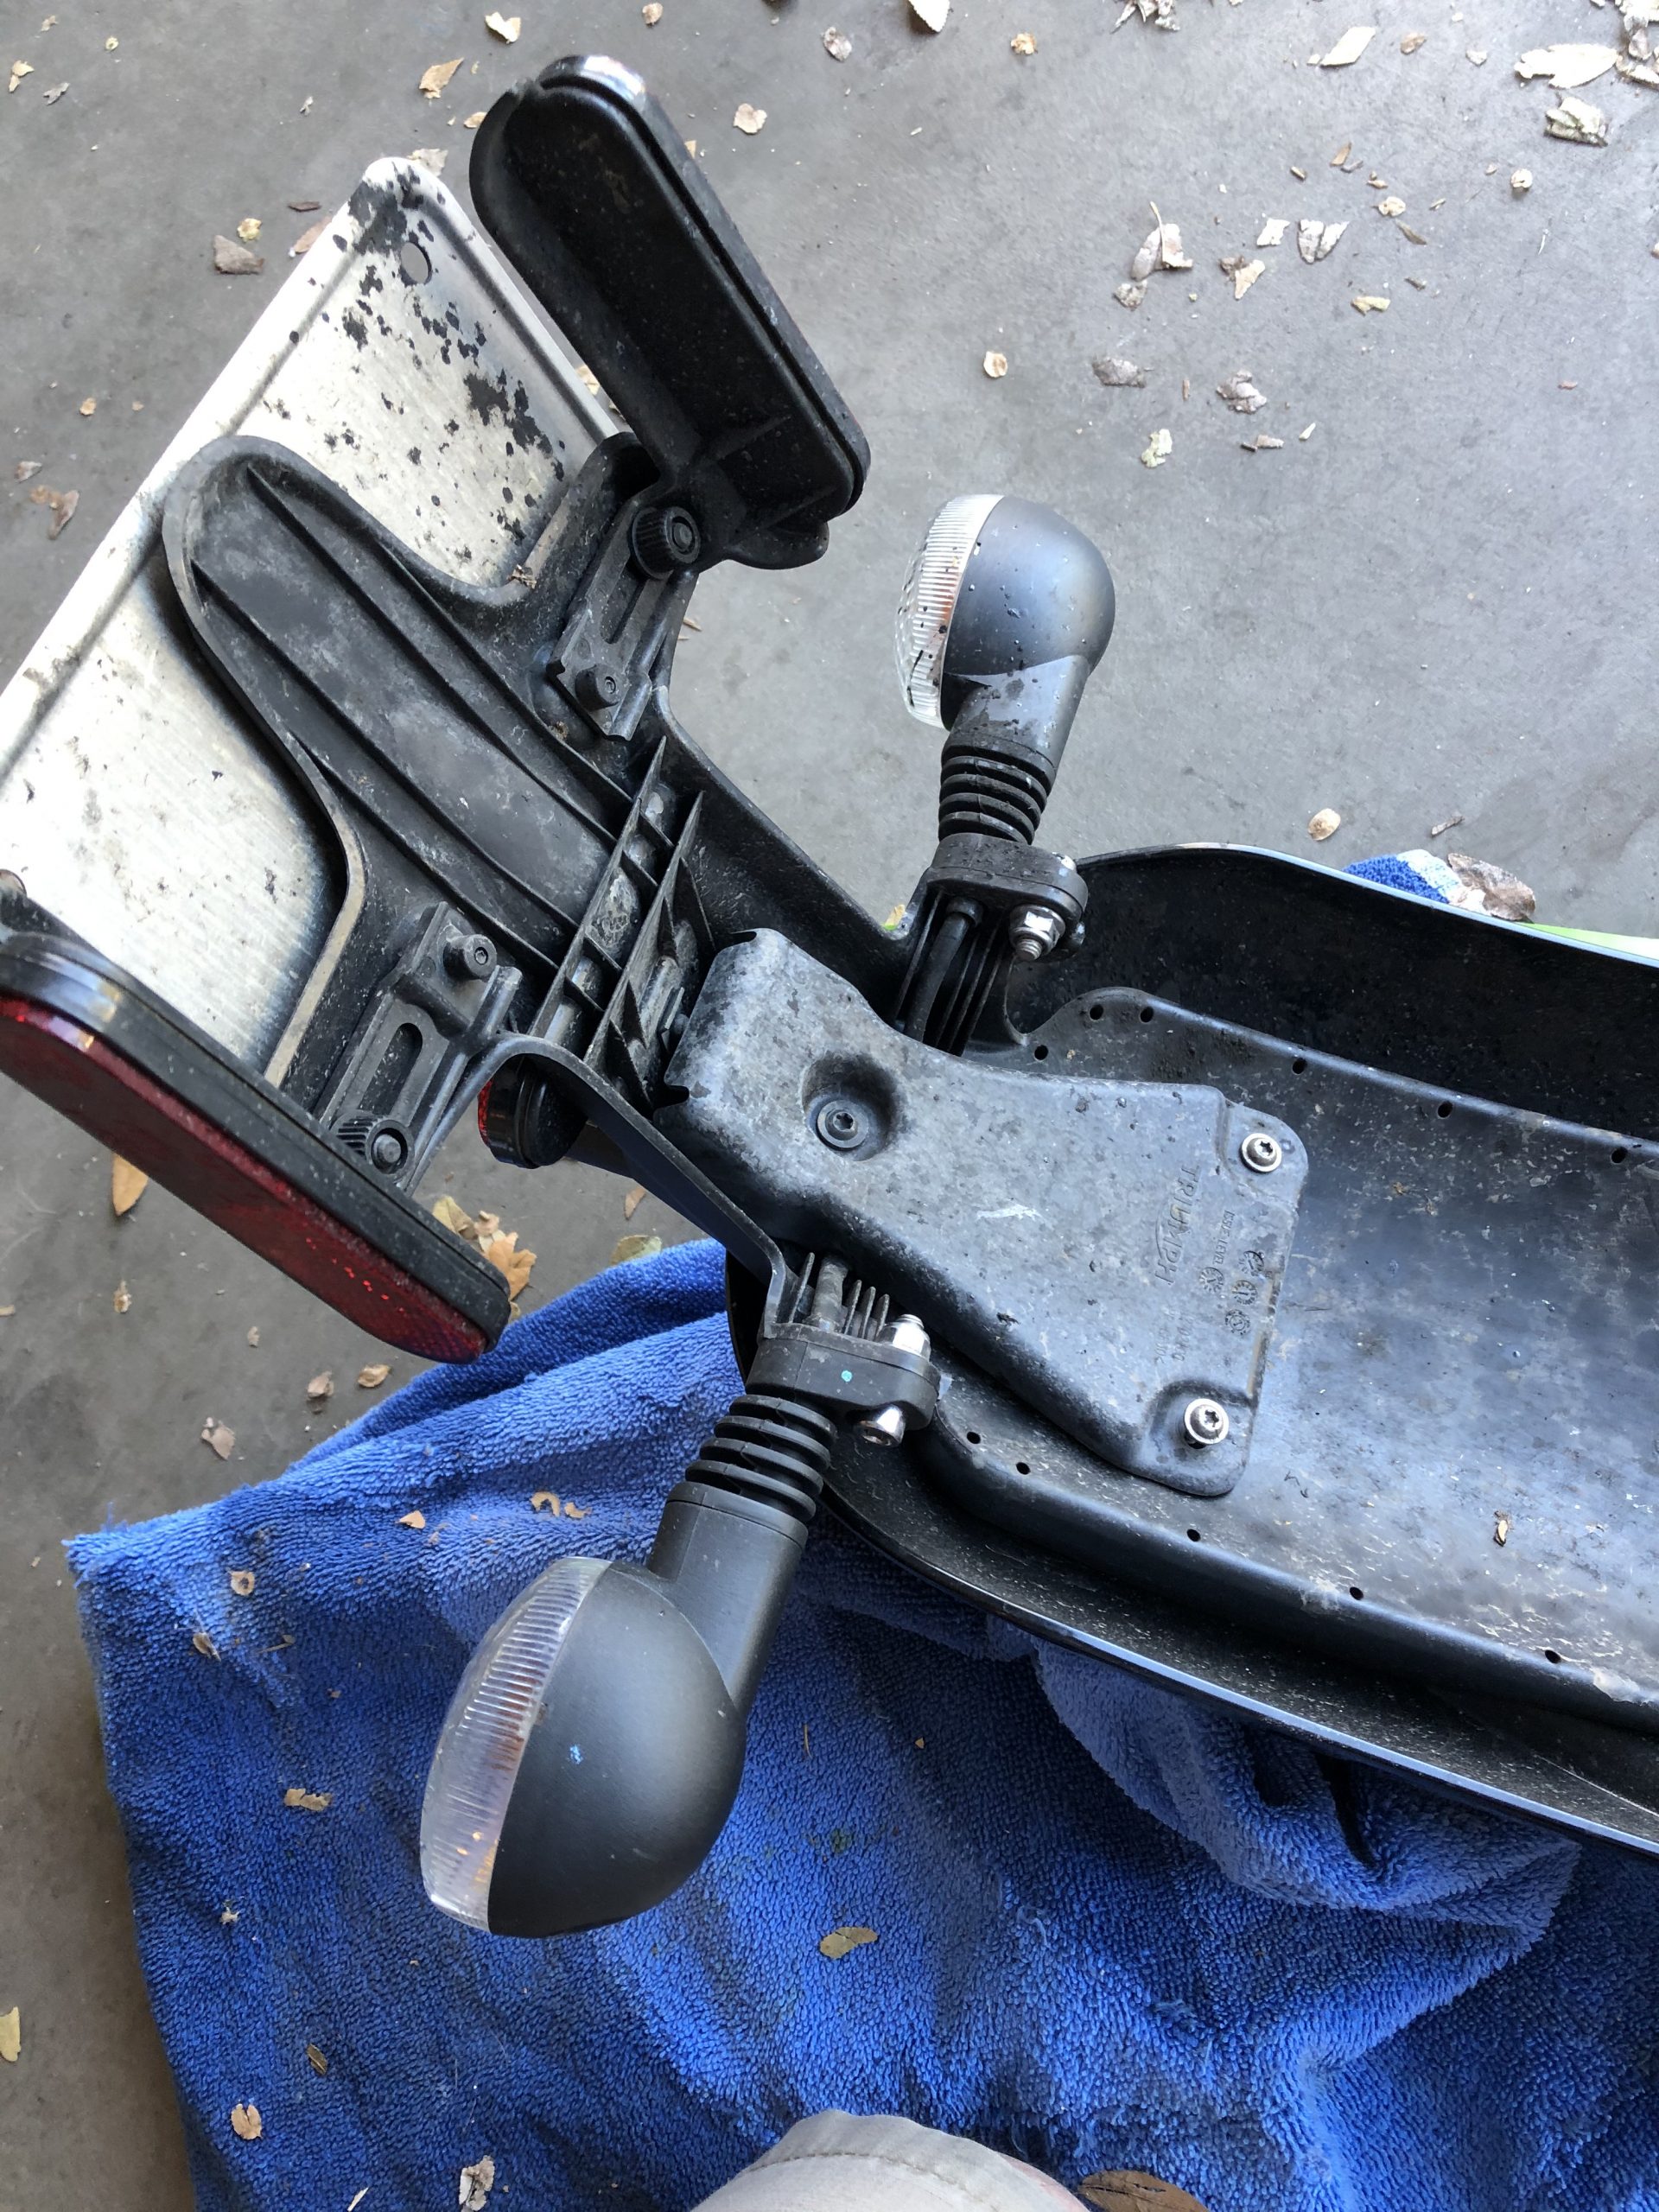
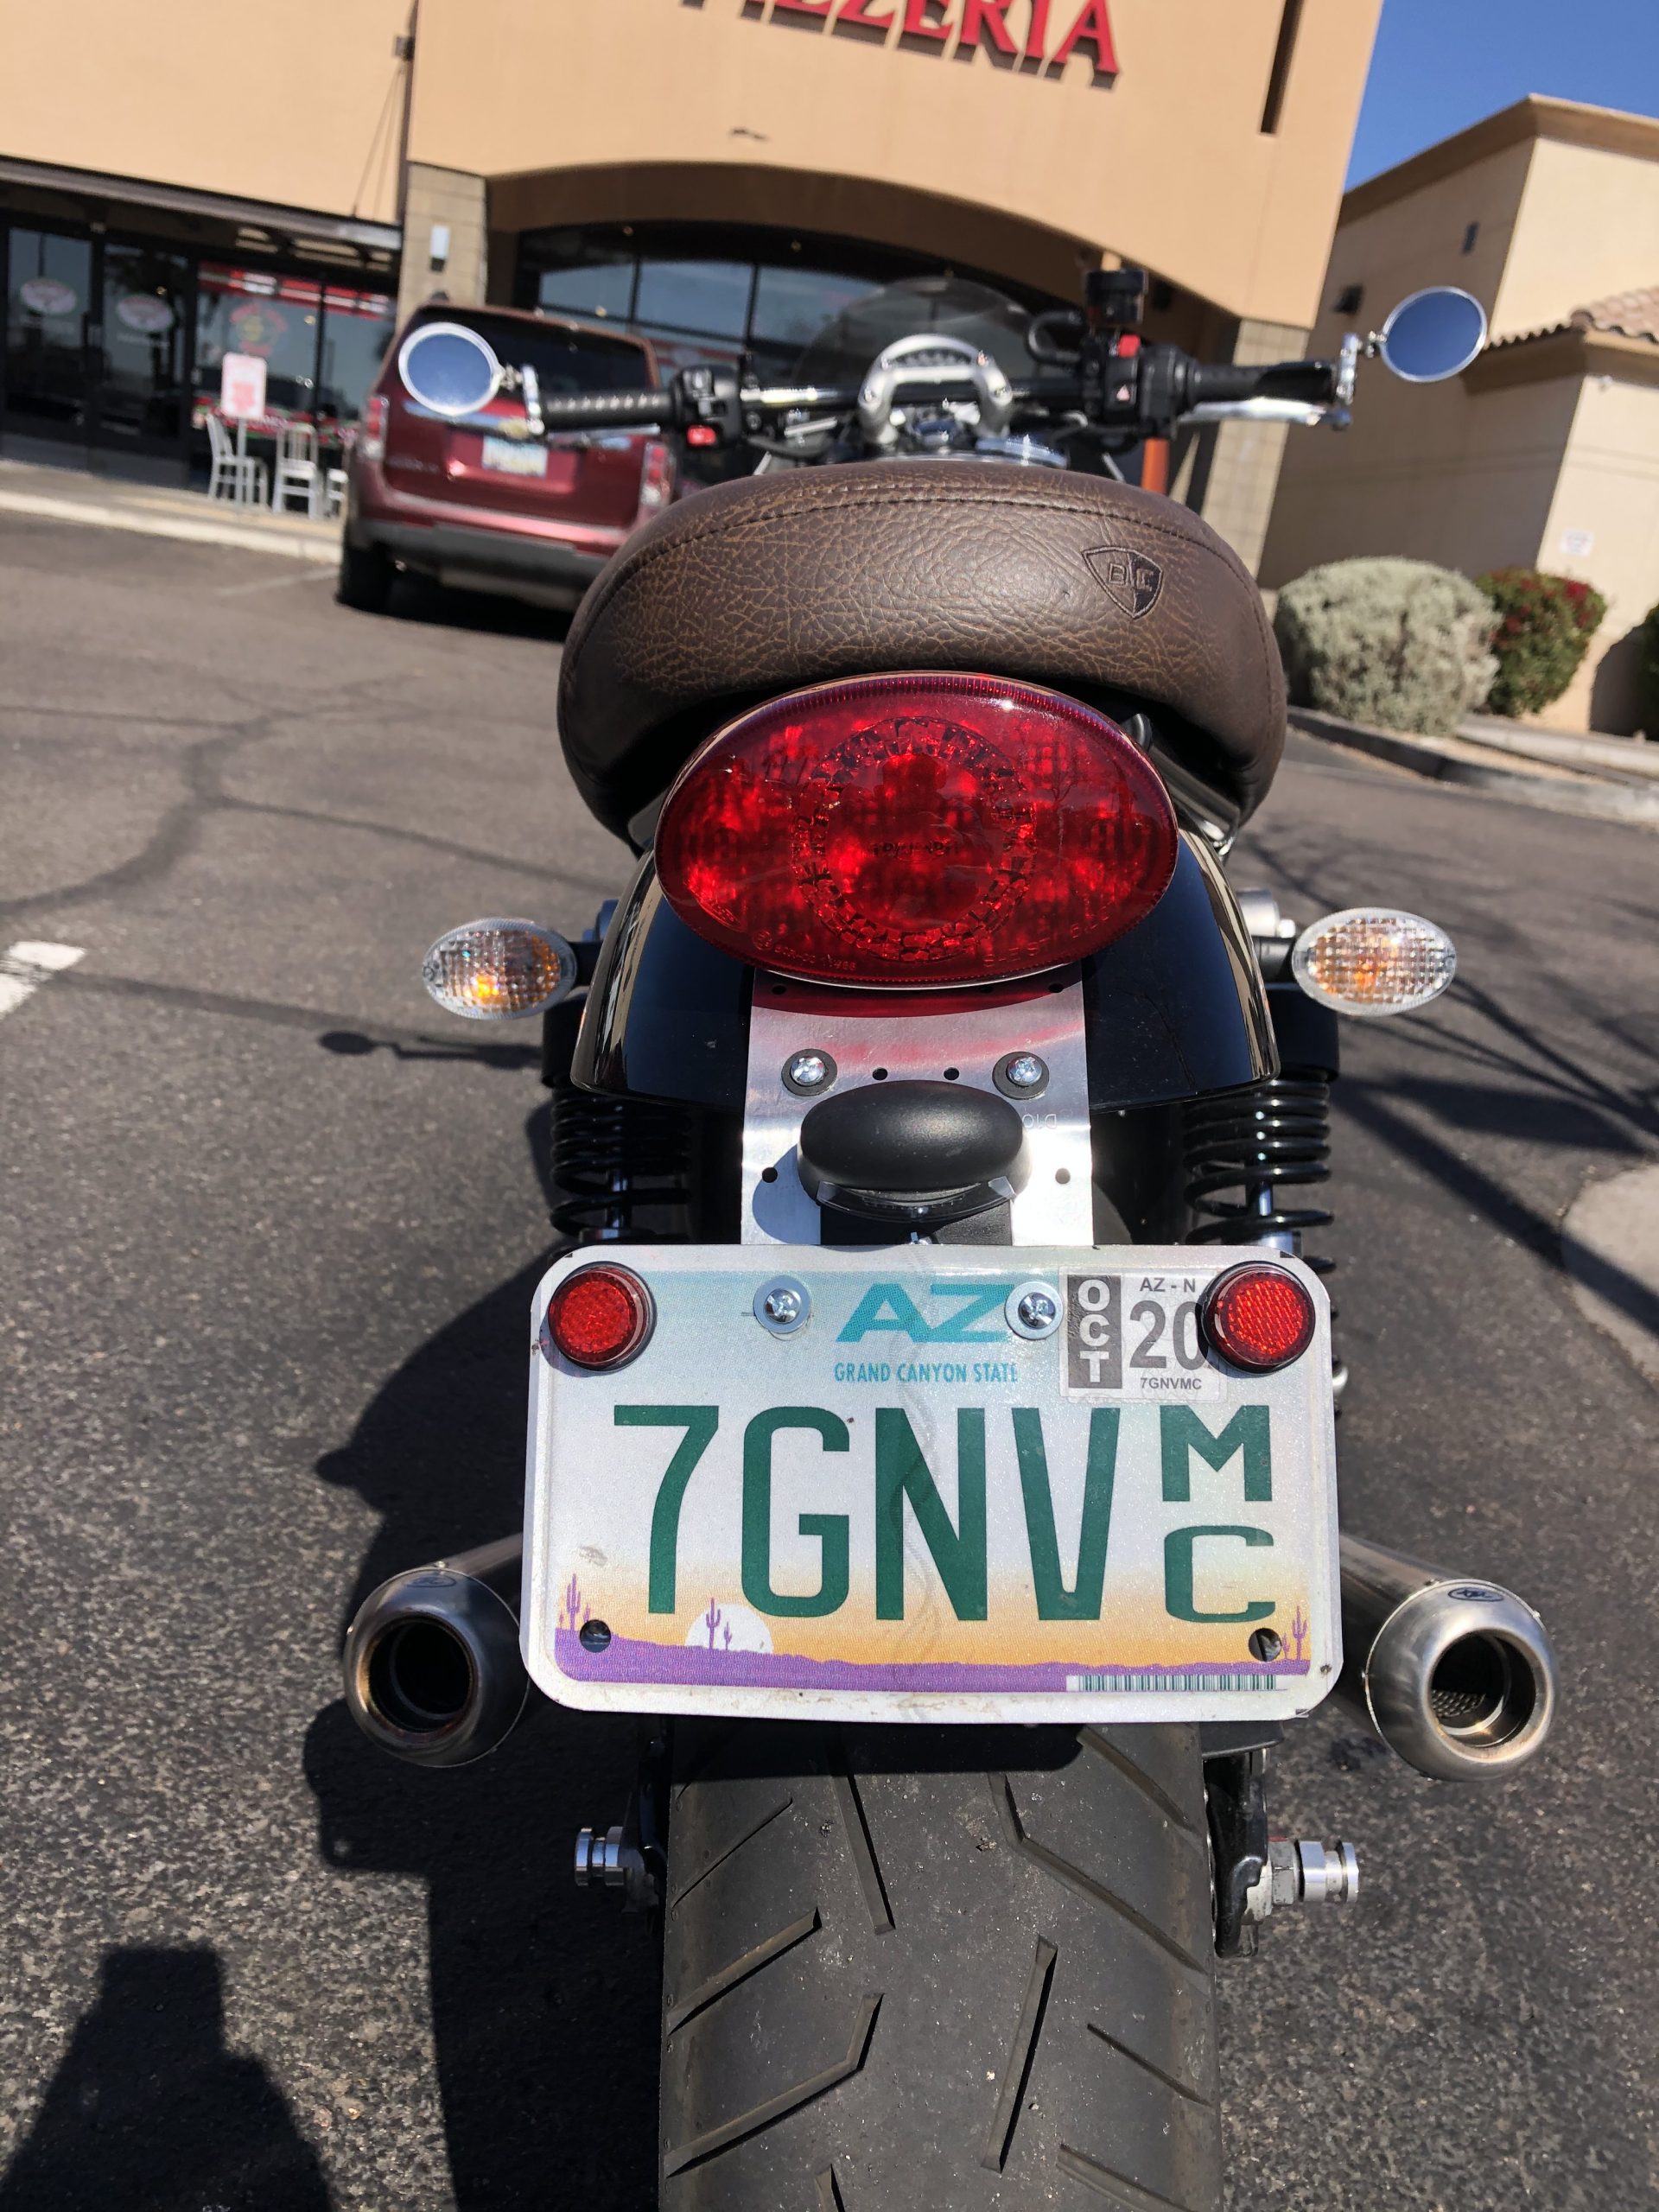
- I also removed the stock license plate and turn signal brackets. This was a simple matter of removing the fender then removing the additional plastic piece that was the blinker/license plate holder and removing the turn signals. (Photo 5).
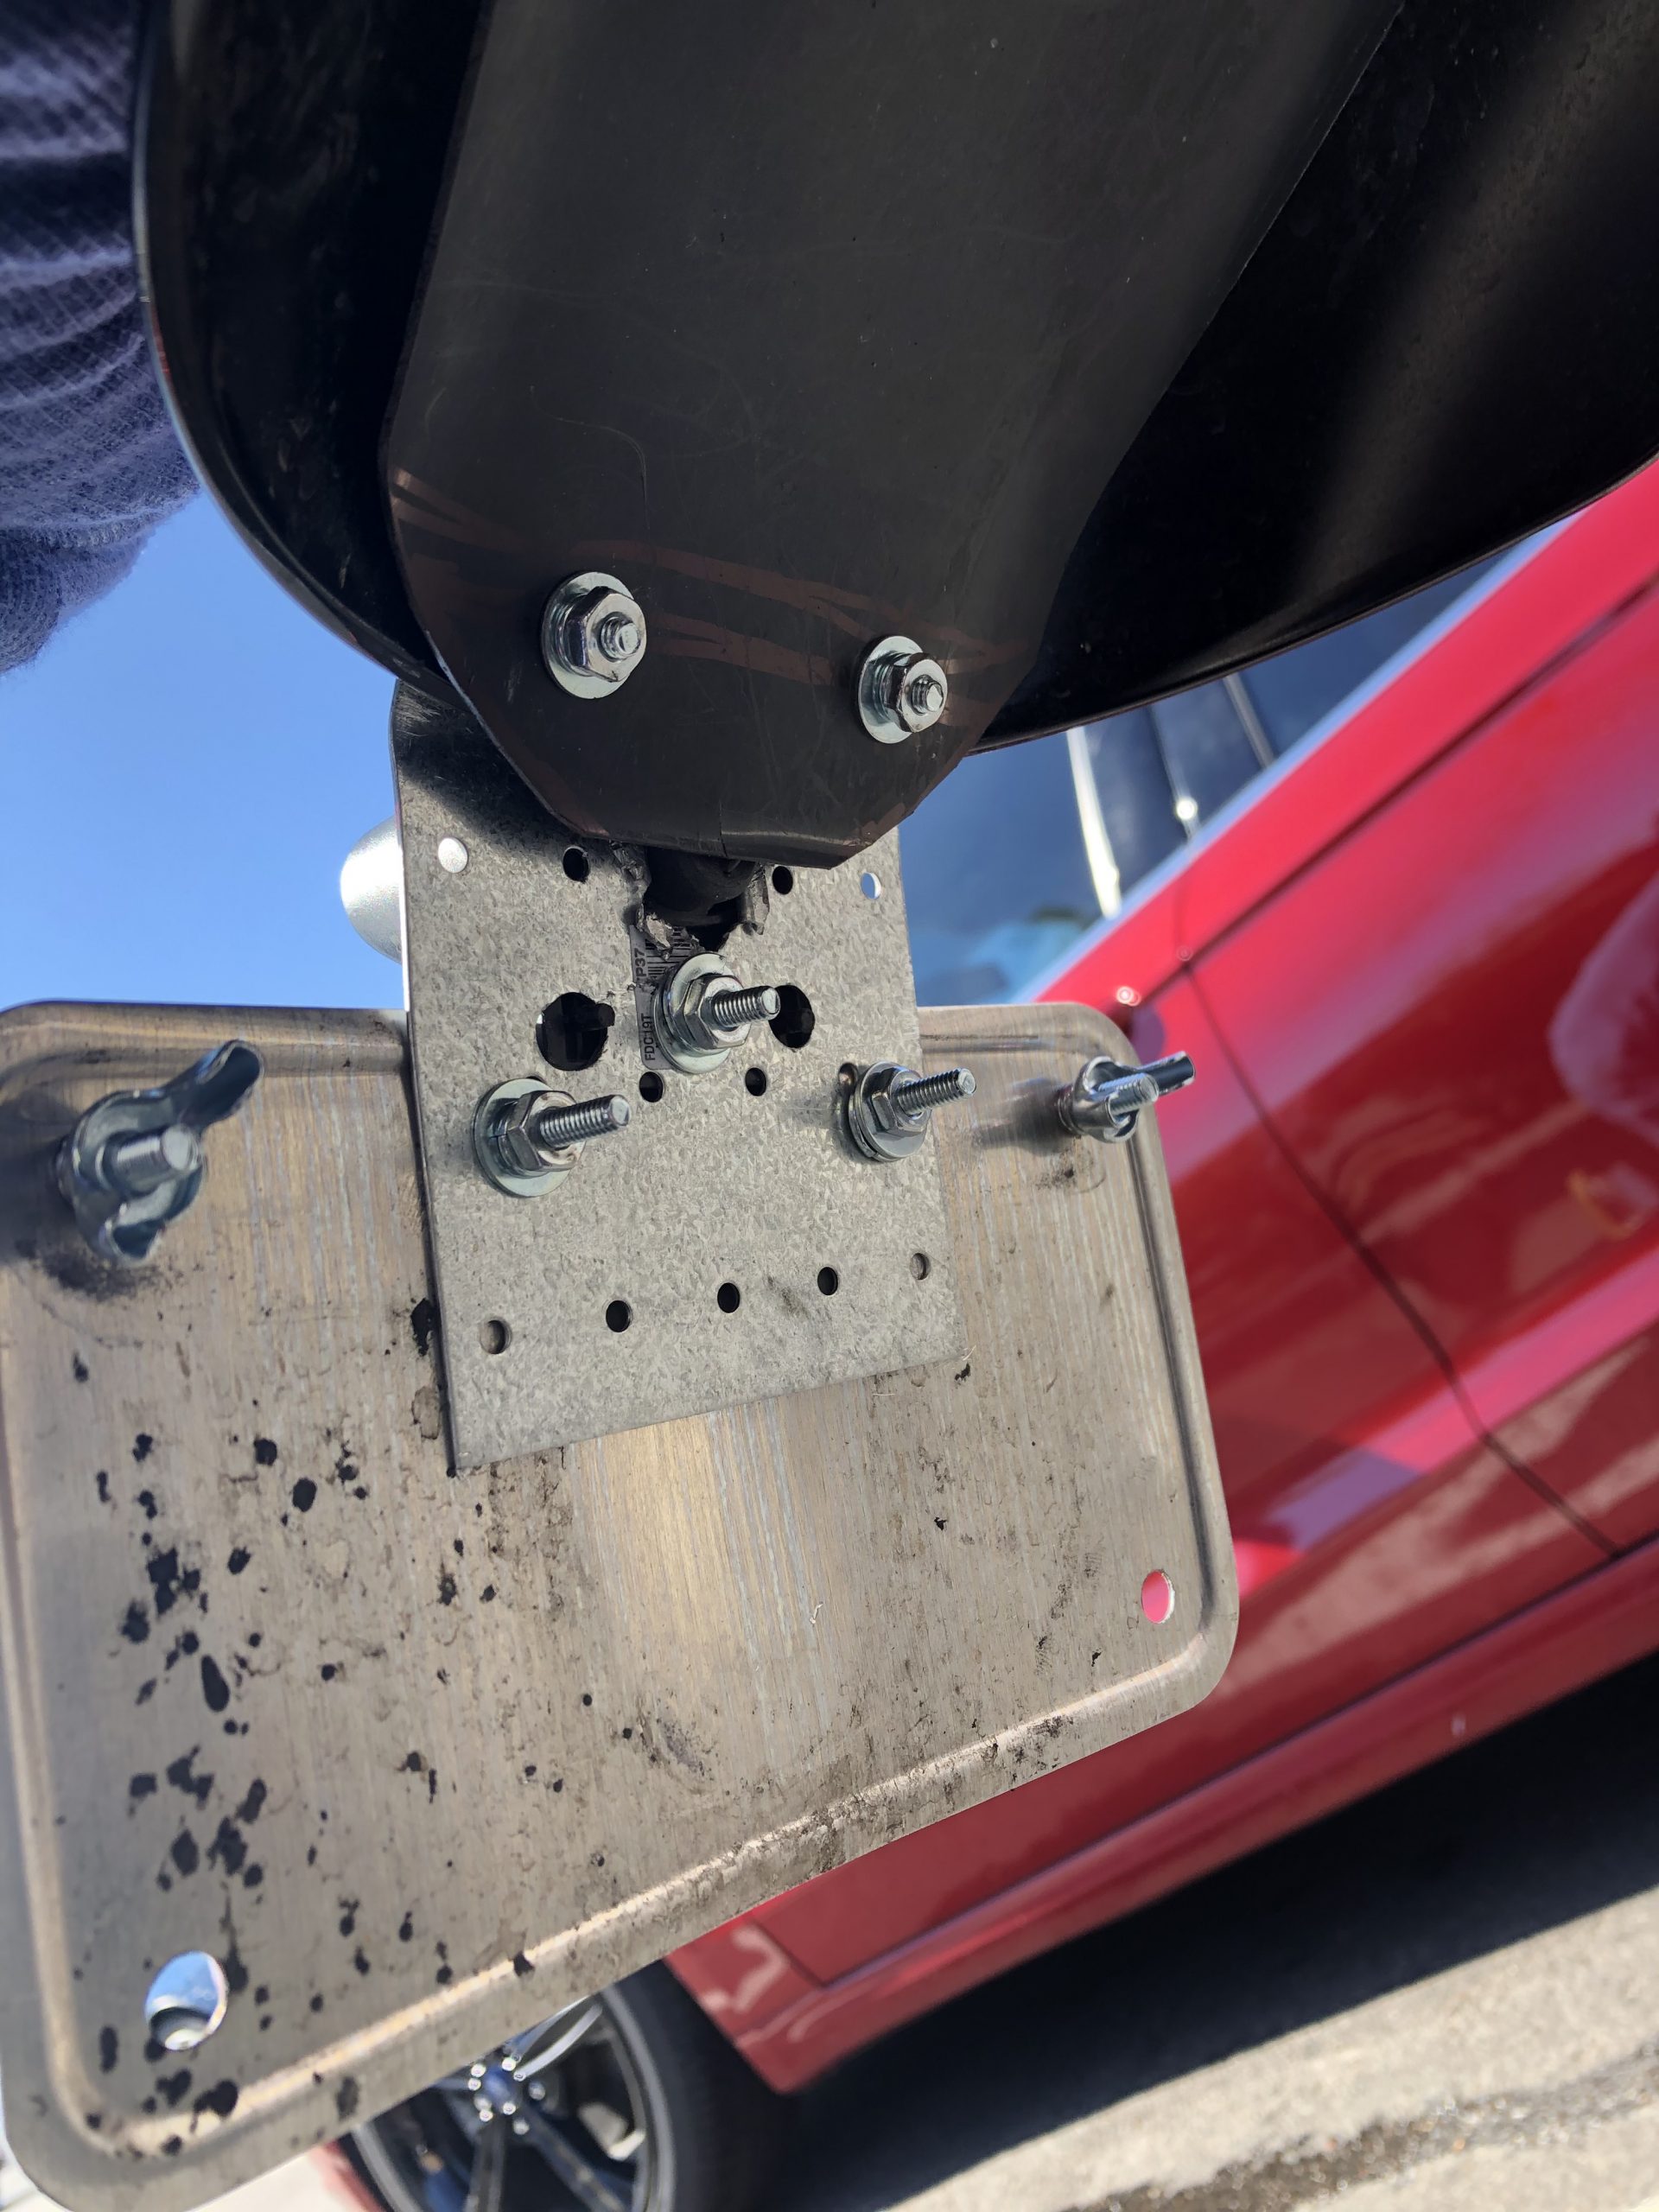
- I created a simple license plate holder. For this I wanted to keep from doing any fabrication – or as little fabrication as possible. I don’t have many tools – a battery-powered cutting tool and sheet metal shears – for cutting metal and a typical drill with bits that can drill holes in metal.
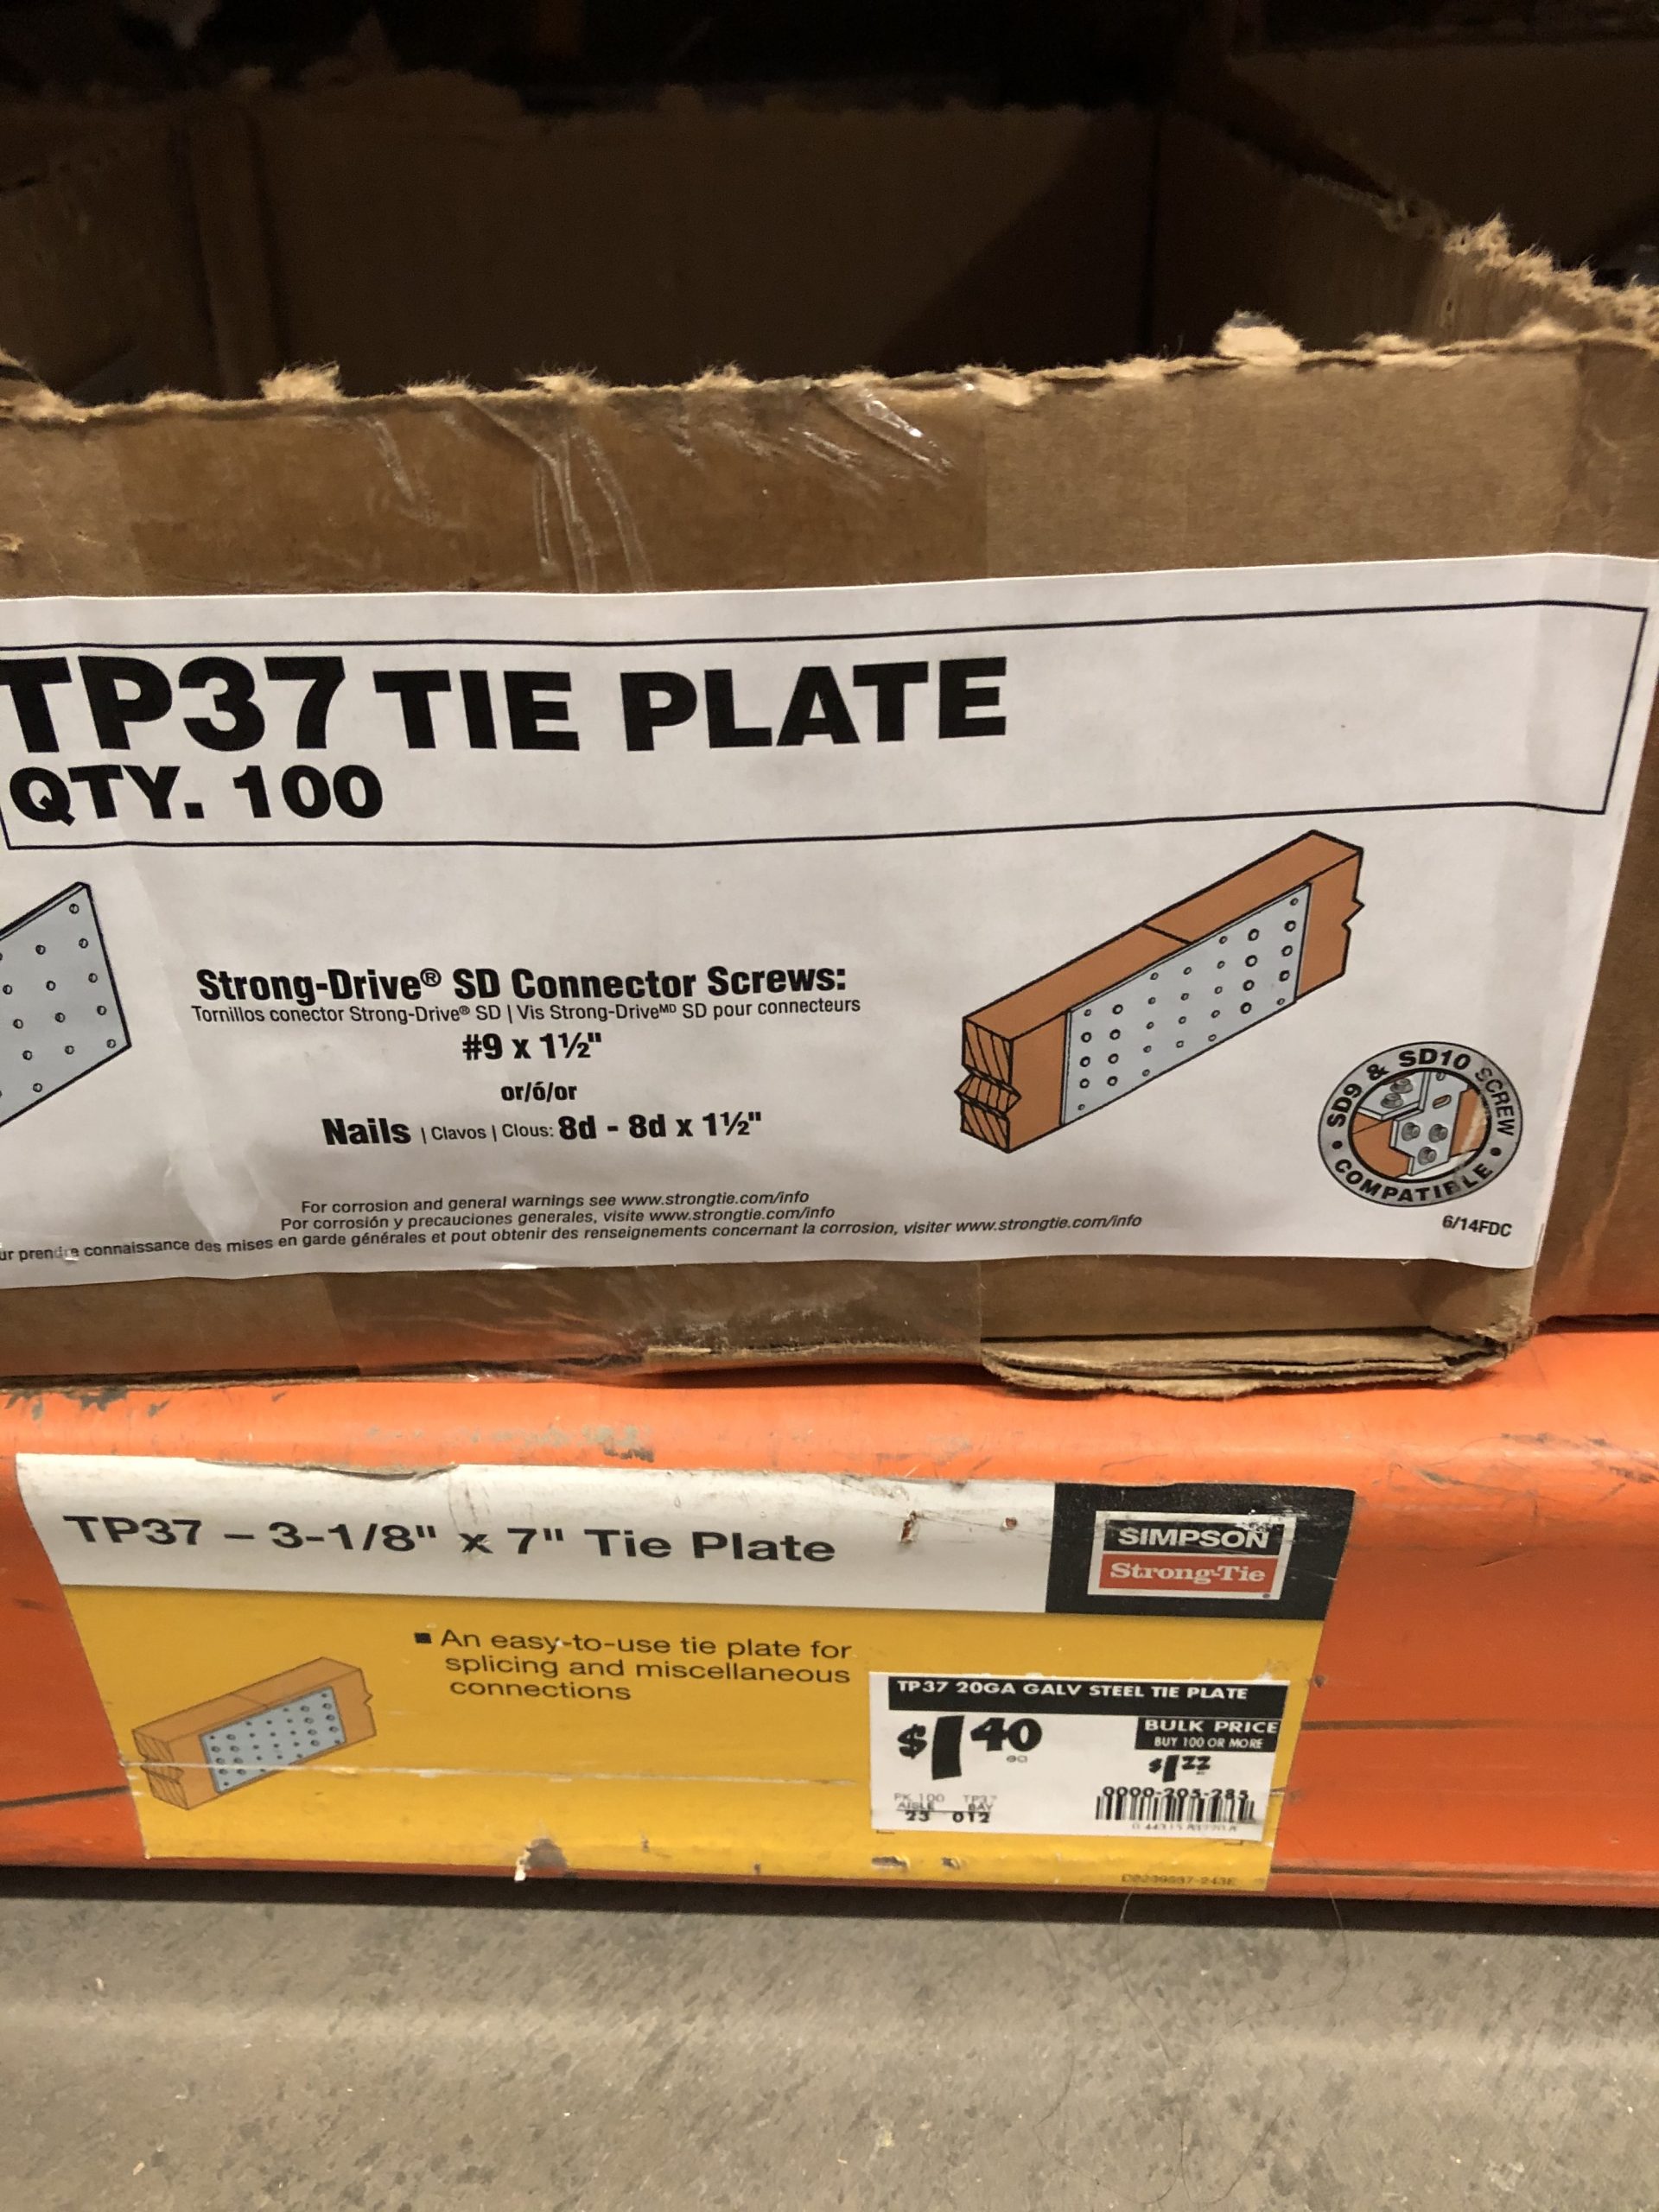
- So I went to the Home Depot to search for a solution. I found a “Tie Plate” — a small piece of sheet metal with a series of symmetrical pre-drilled holes. I liked its industrial look – similar to the intake covers (Photos 6 & 7).
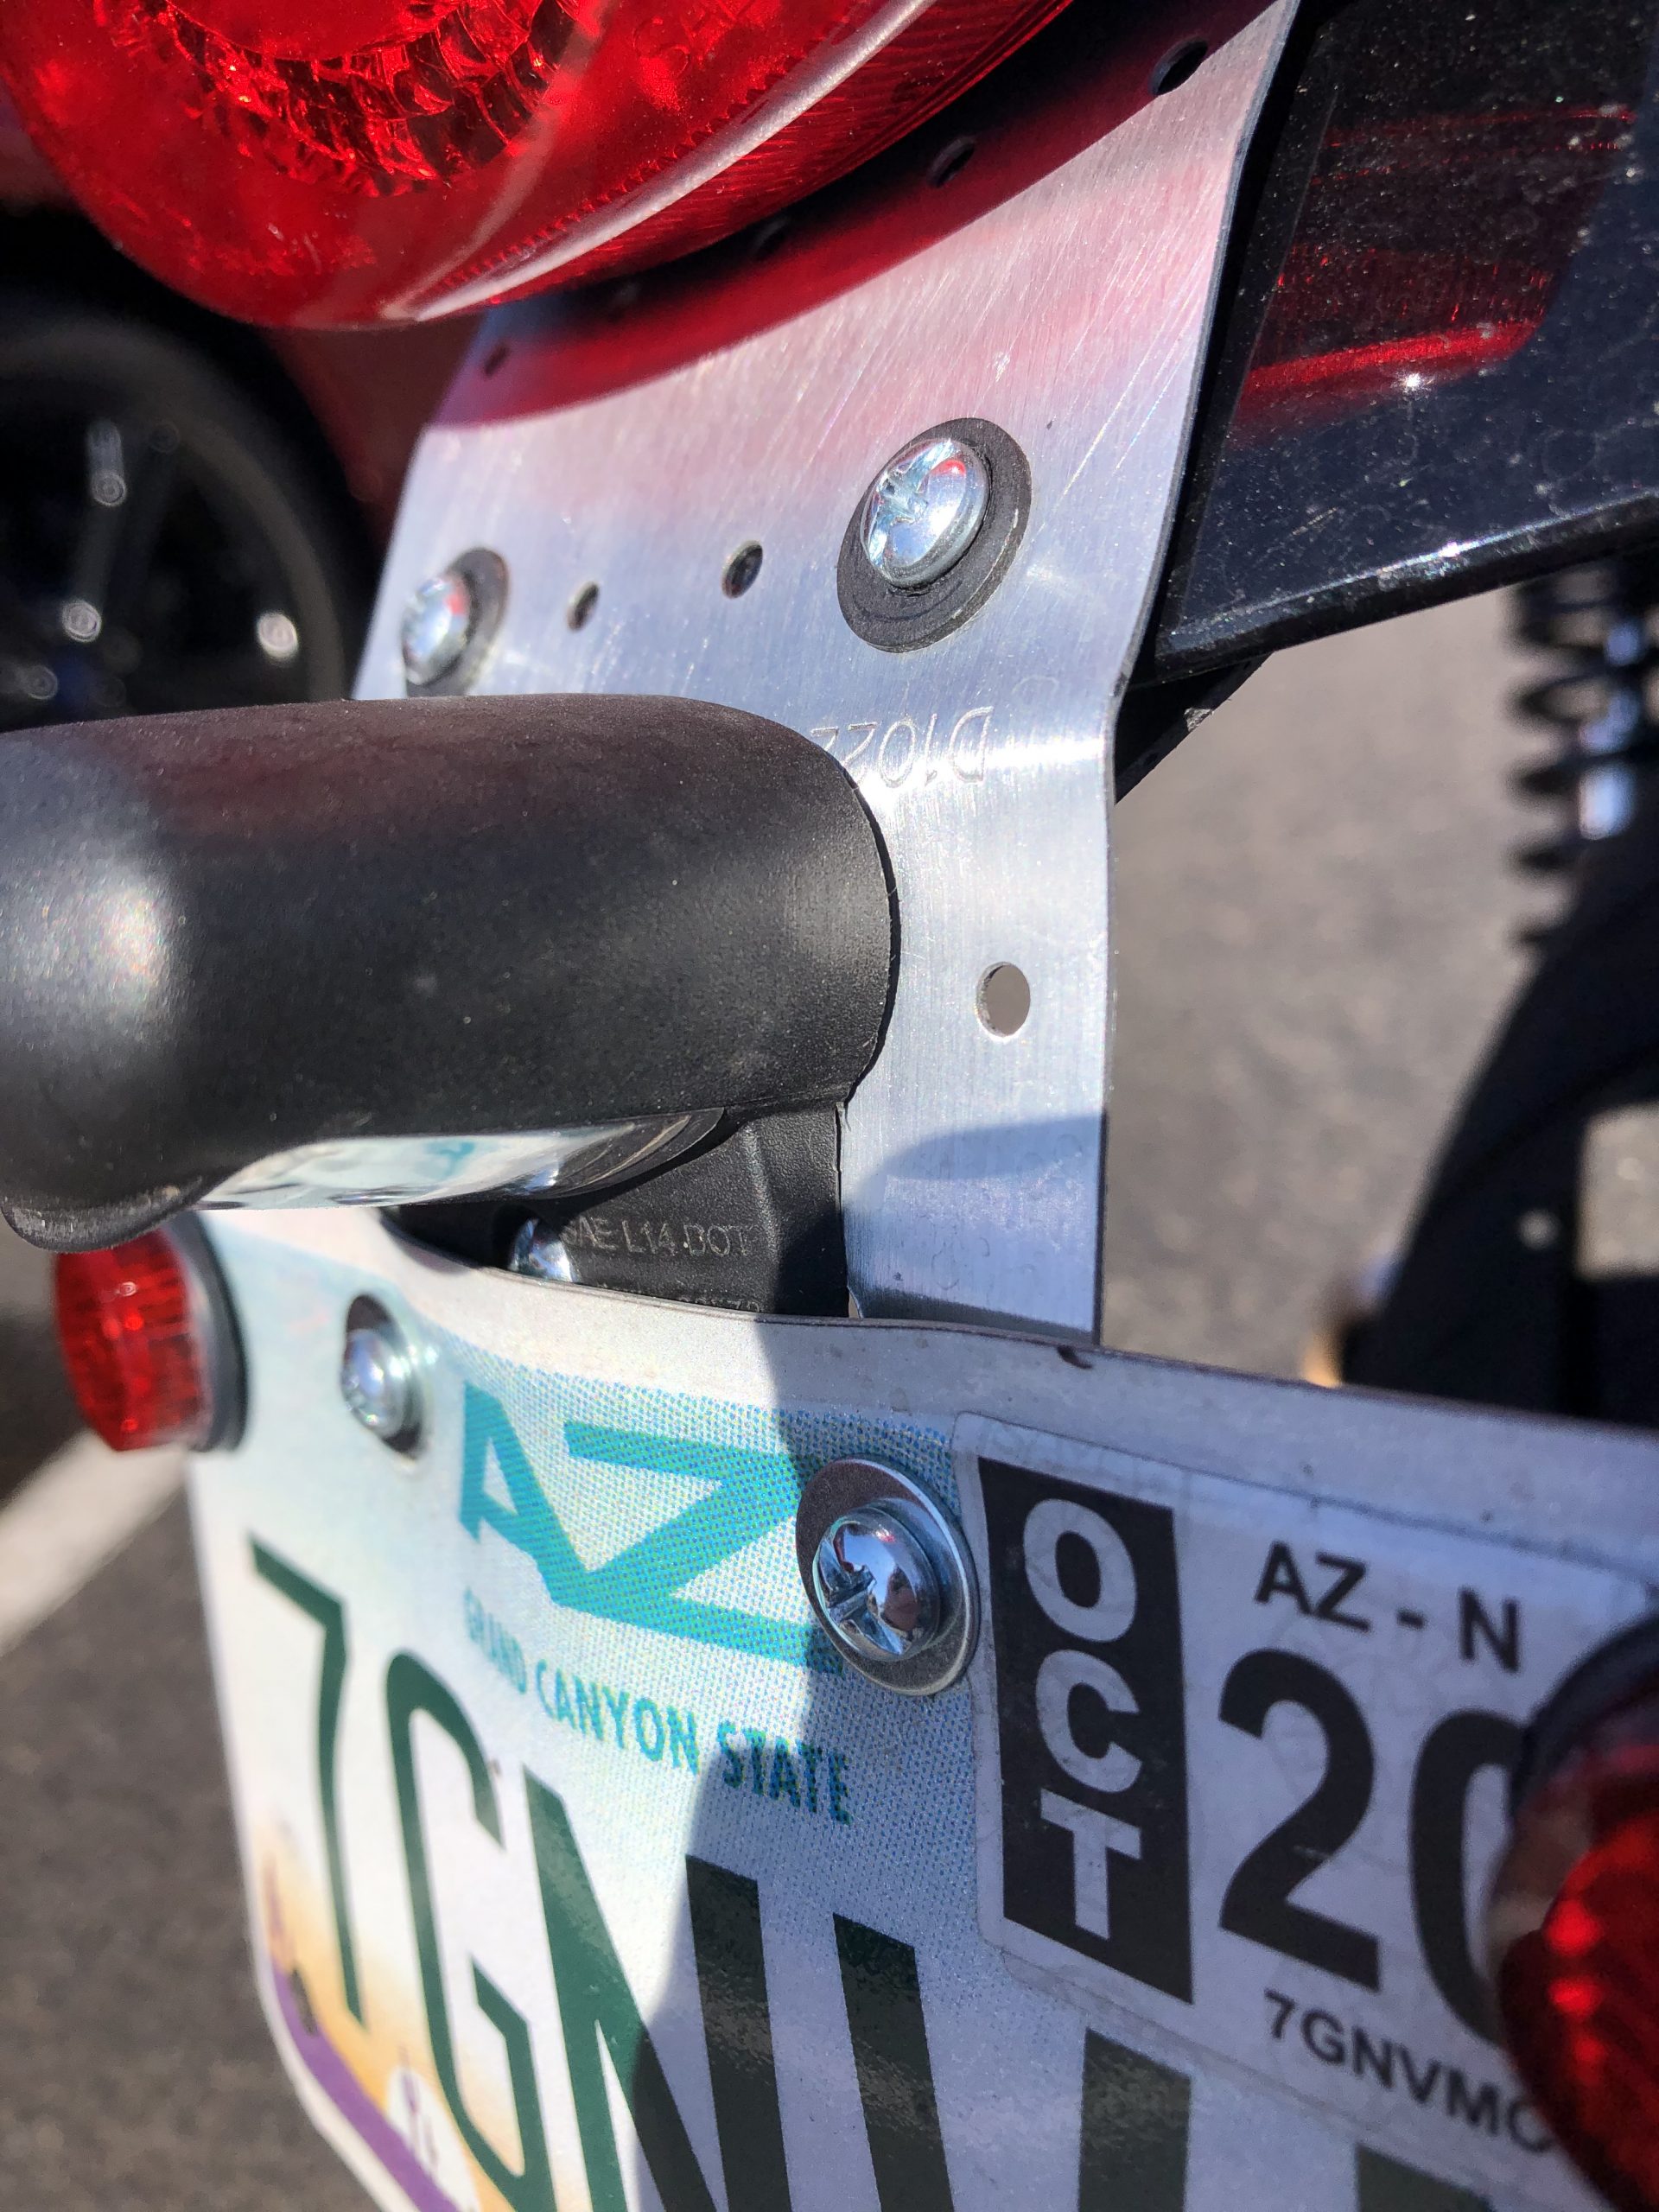
- I drilled holes to accommodate the stock tail light then holes to allow me to reuse the stock license plate light.
- I did have to drill 2 new holes in the license plate so I could attach it to this simple bracket because I liked this piece of sheet metal and didn’t want to create a bracket wide enough for the license plate (Photo 8).
- Then I used a sanding sponge to give the sheet metal a brushed-aluminum look.
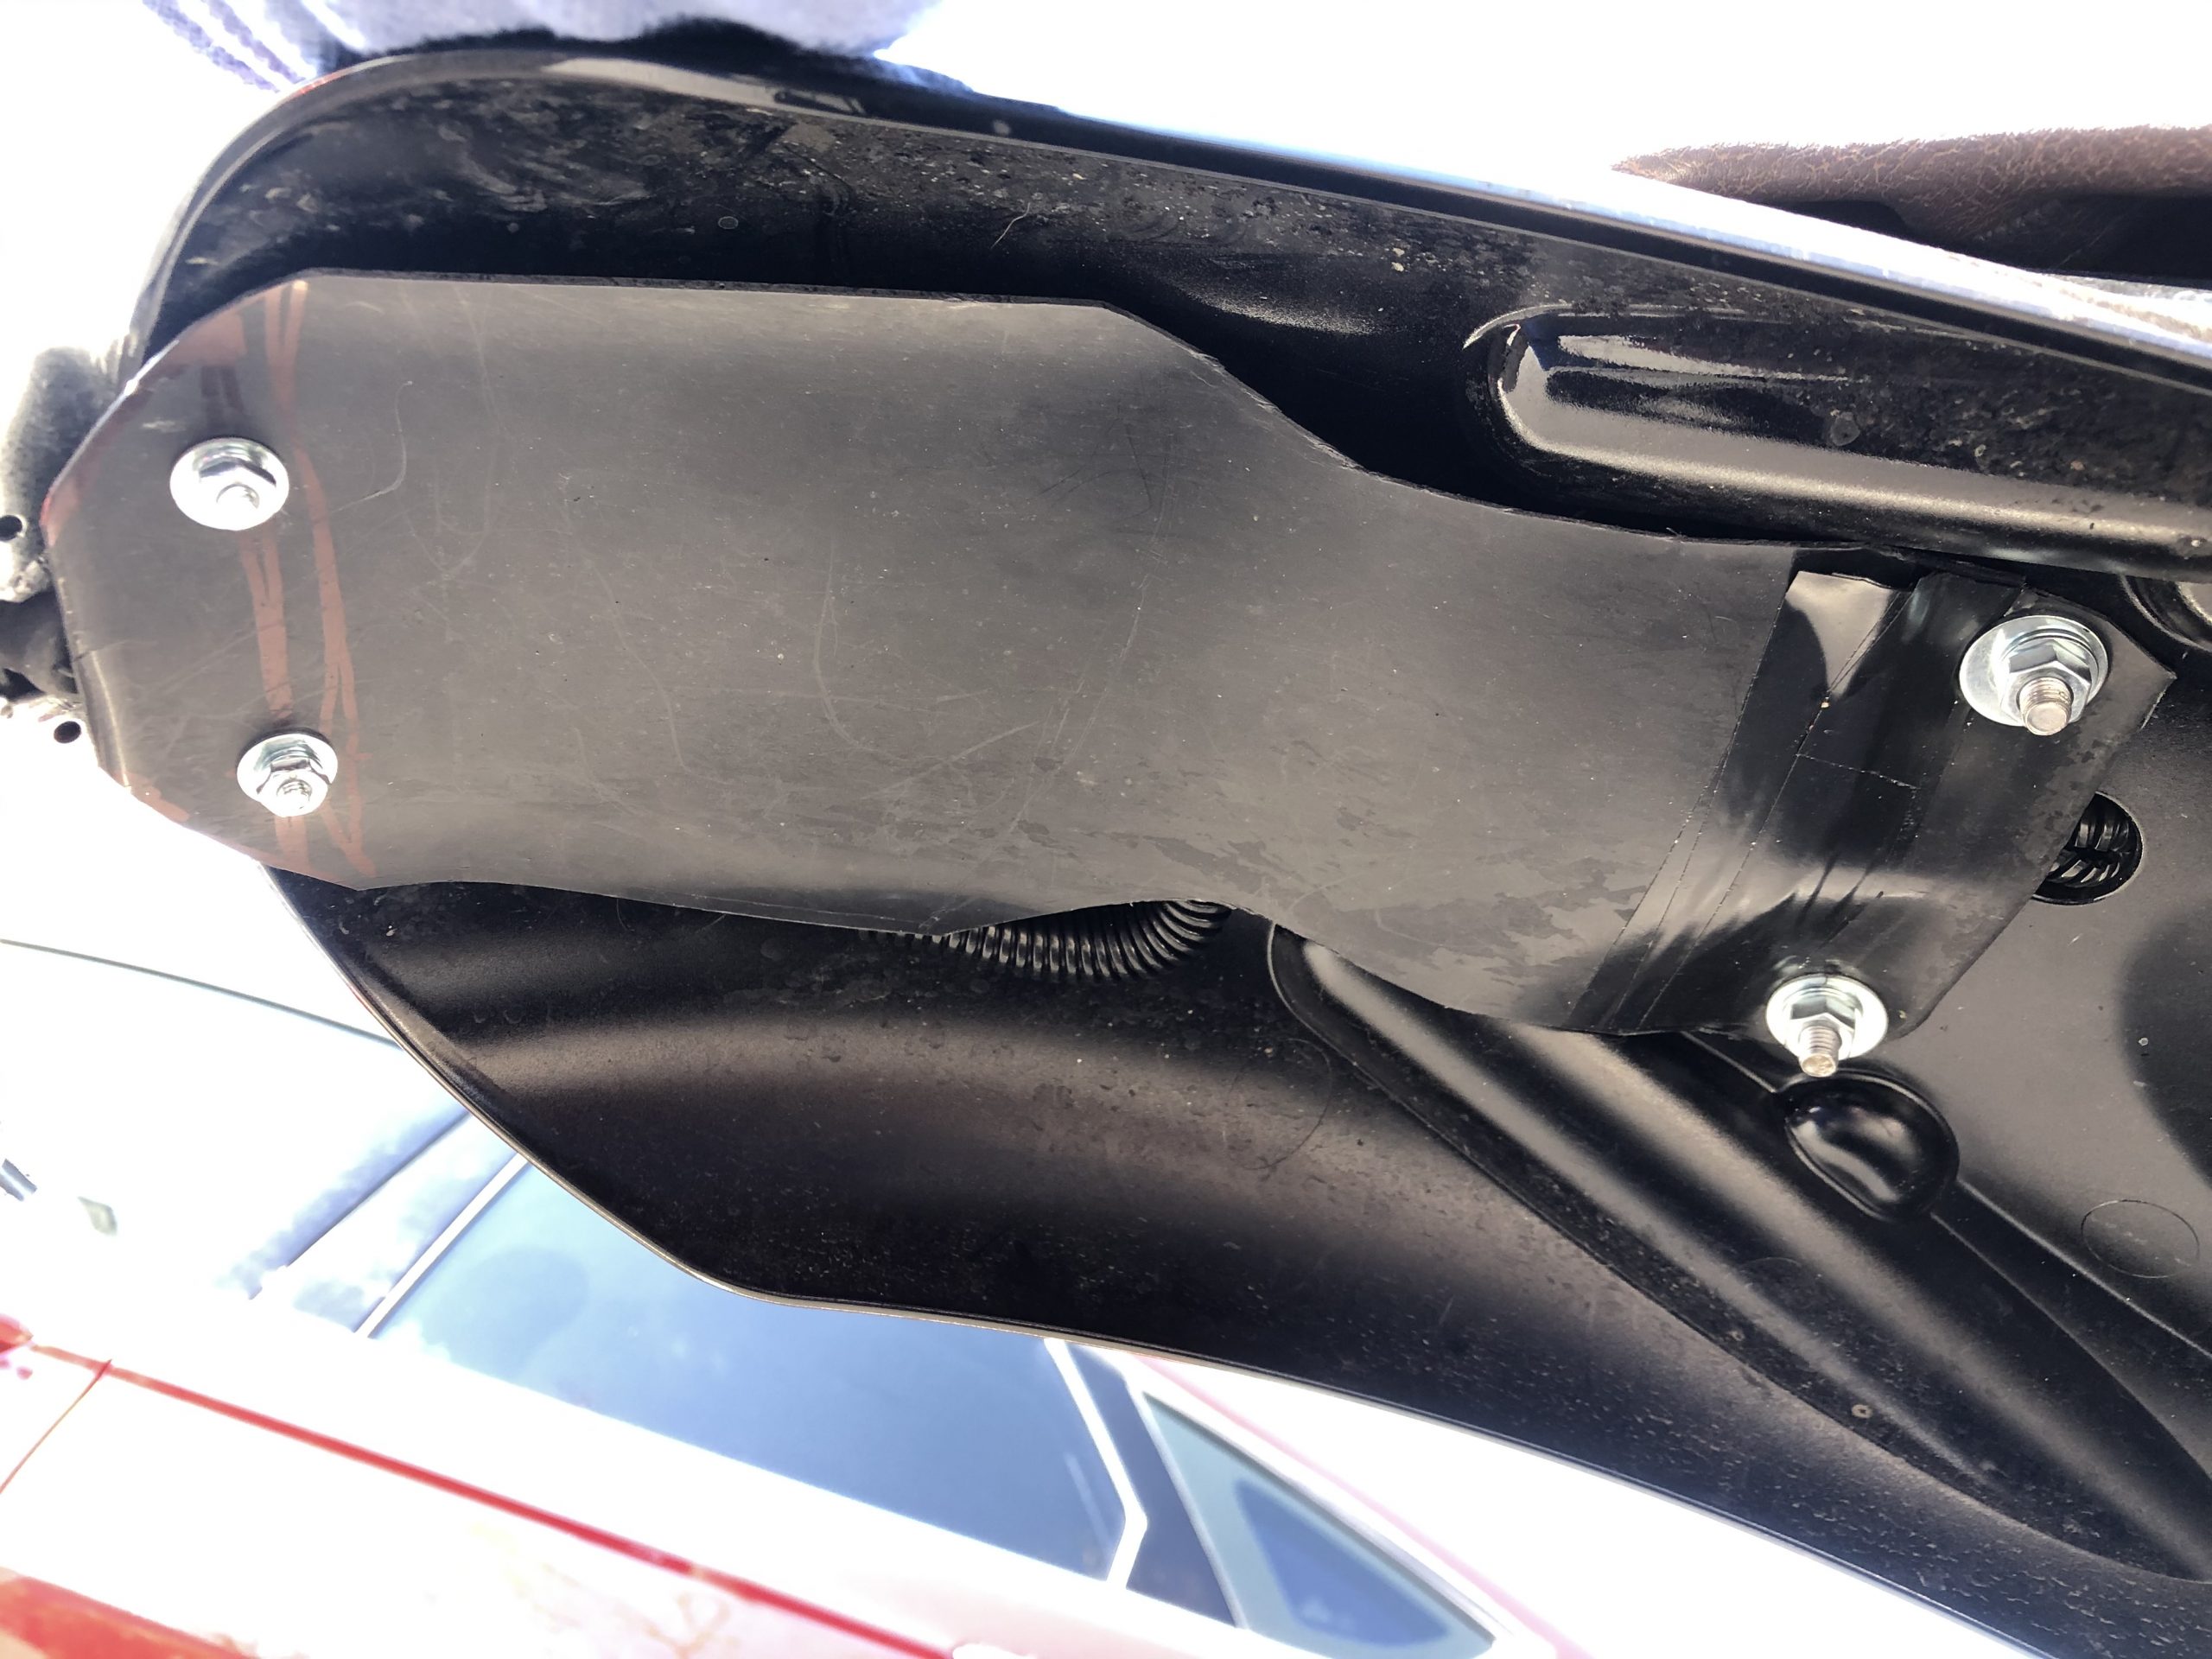
- I also needed a way to cover the exposed wiring from the removal of the stock license plate bracket. To do this, I purchased a $3.00 small plastic trash can and cut out a shape that I used under the fender to provide some protection for the wiring. (See Photo 9).
- Finally, I purchased reflectors designed as license plate holders and attached them in the standard license plate holes to satisfy the Arizona requirement of having a reflector on the rear of the motorycle (Photo 10).