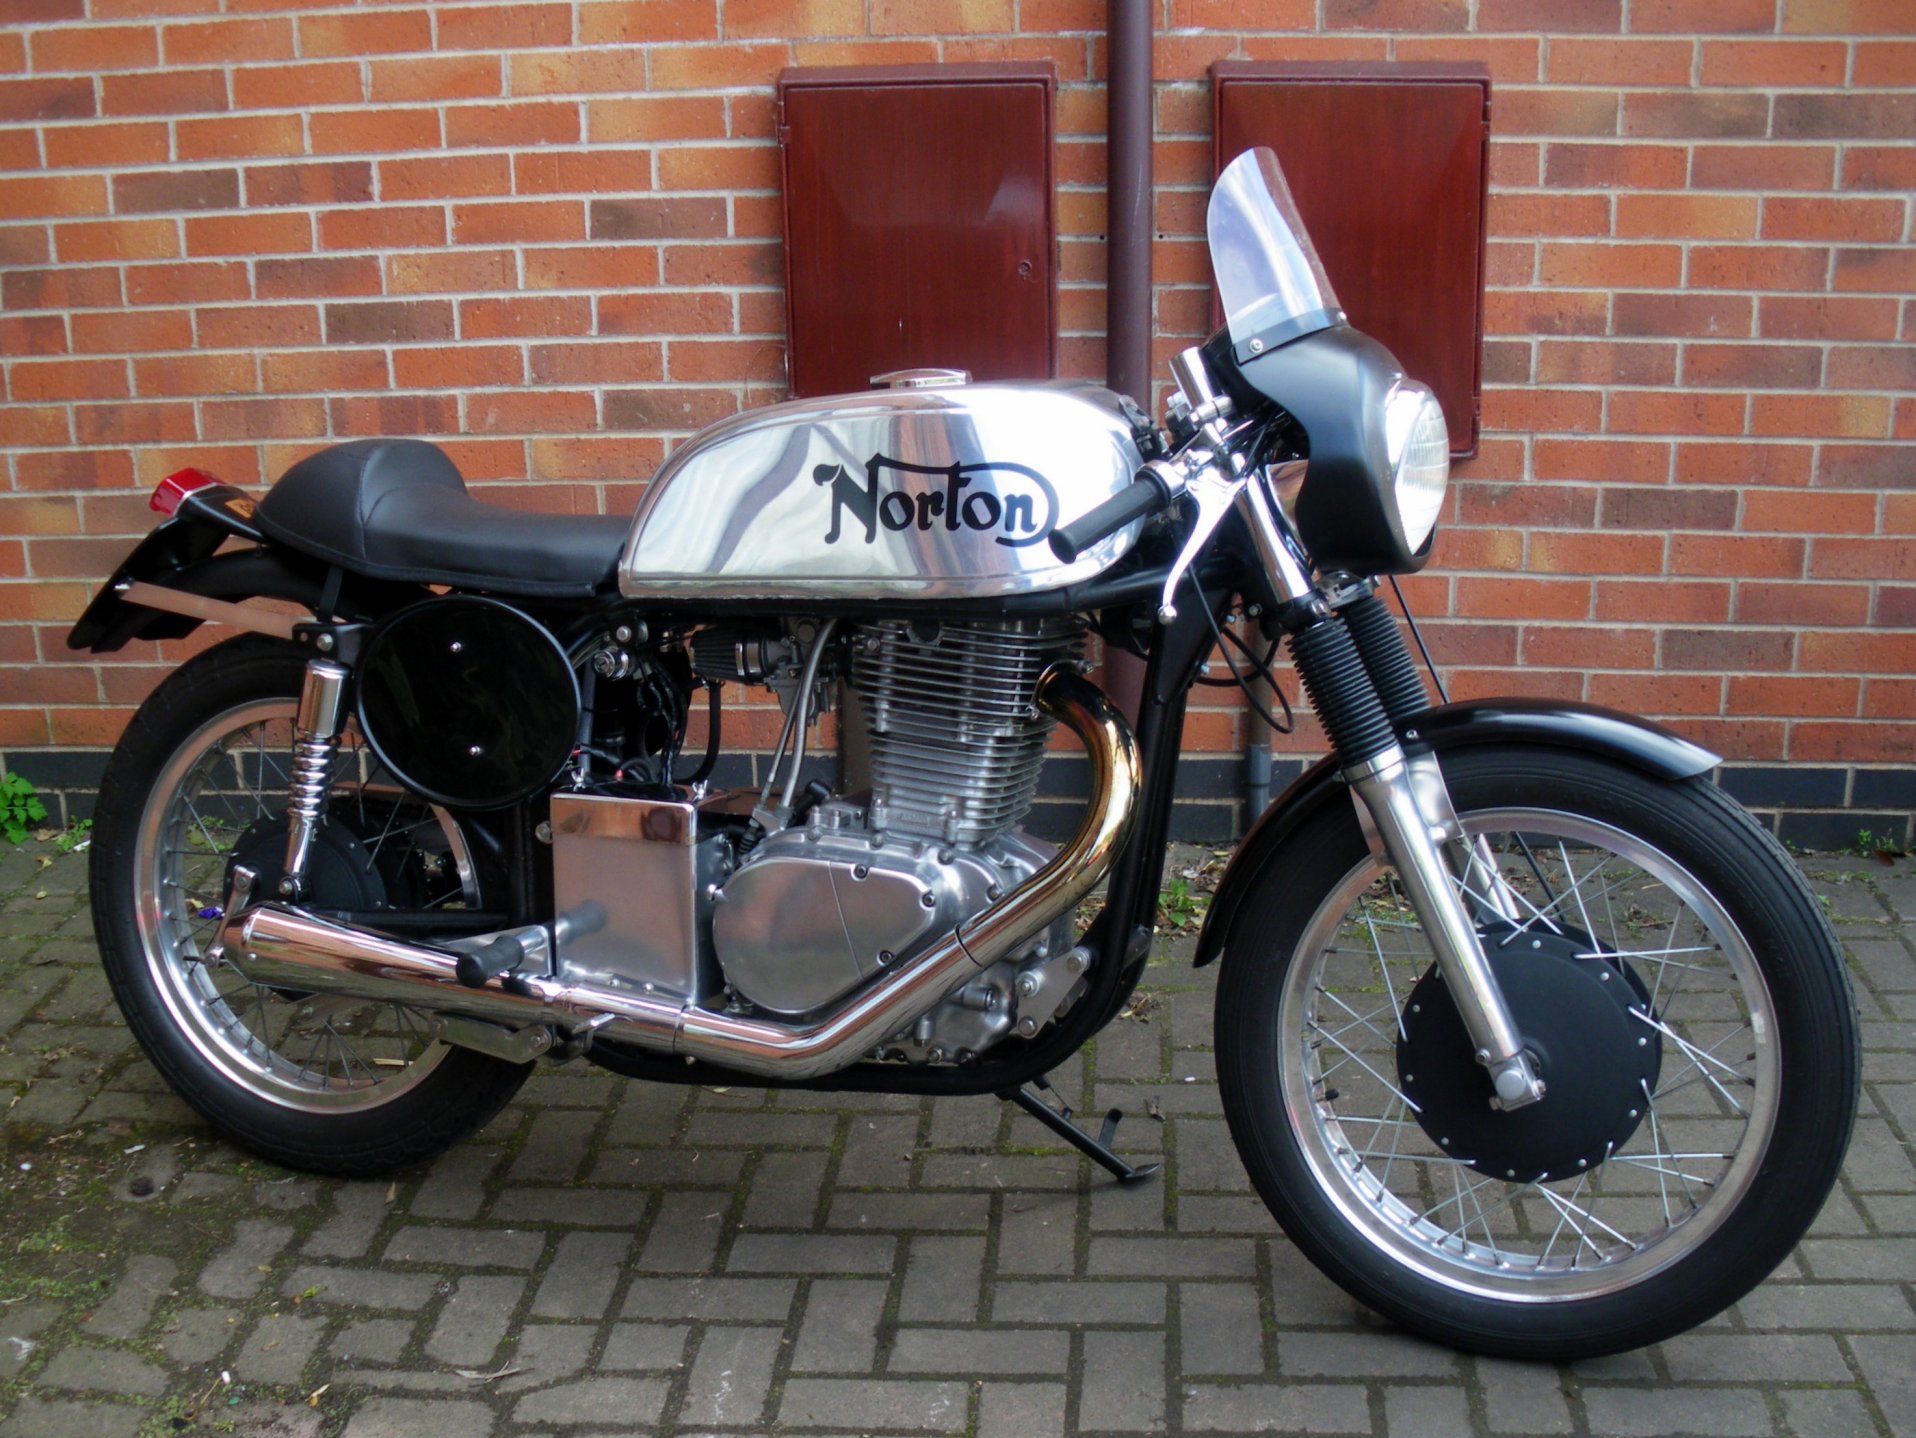
The vision started, not on the floor of the garage where one might expect, but on a PowerPoint slide. That is where Martyn Roberts fleshed out the design for his “Manki” a marriage of a Manx Norton and a Suzuki Savage 650.

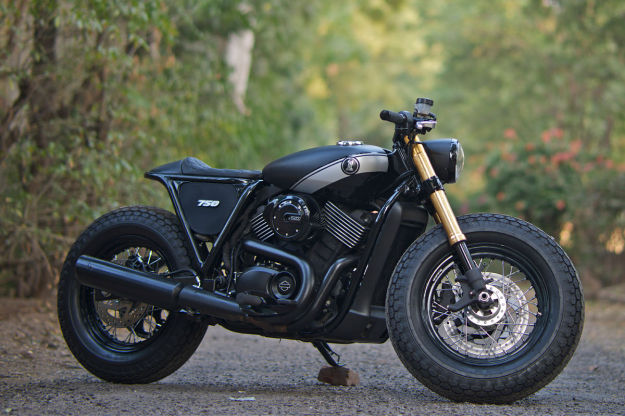
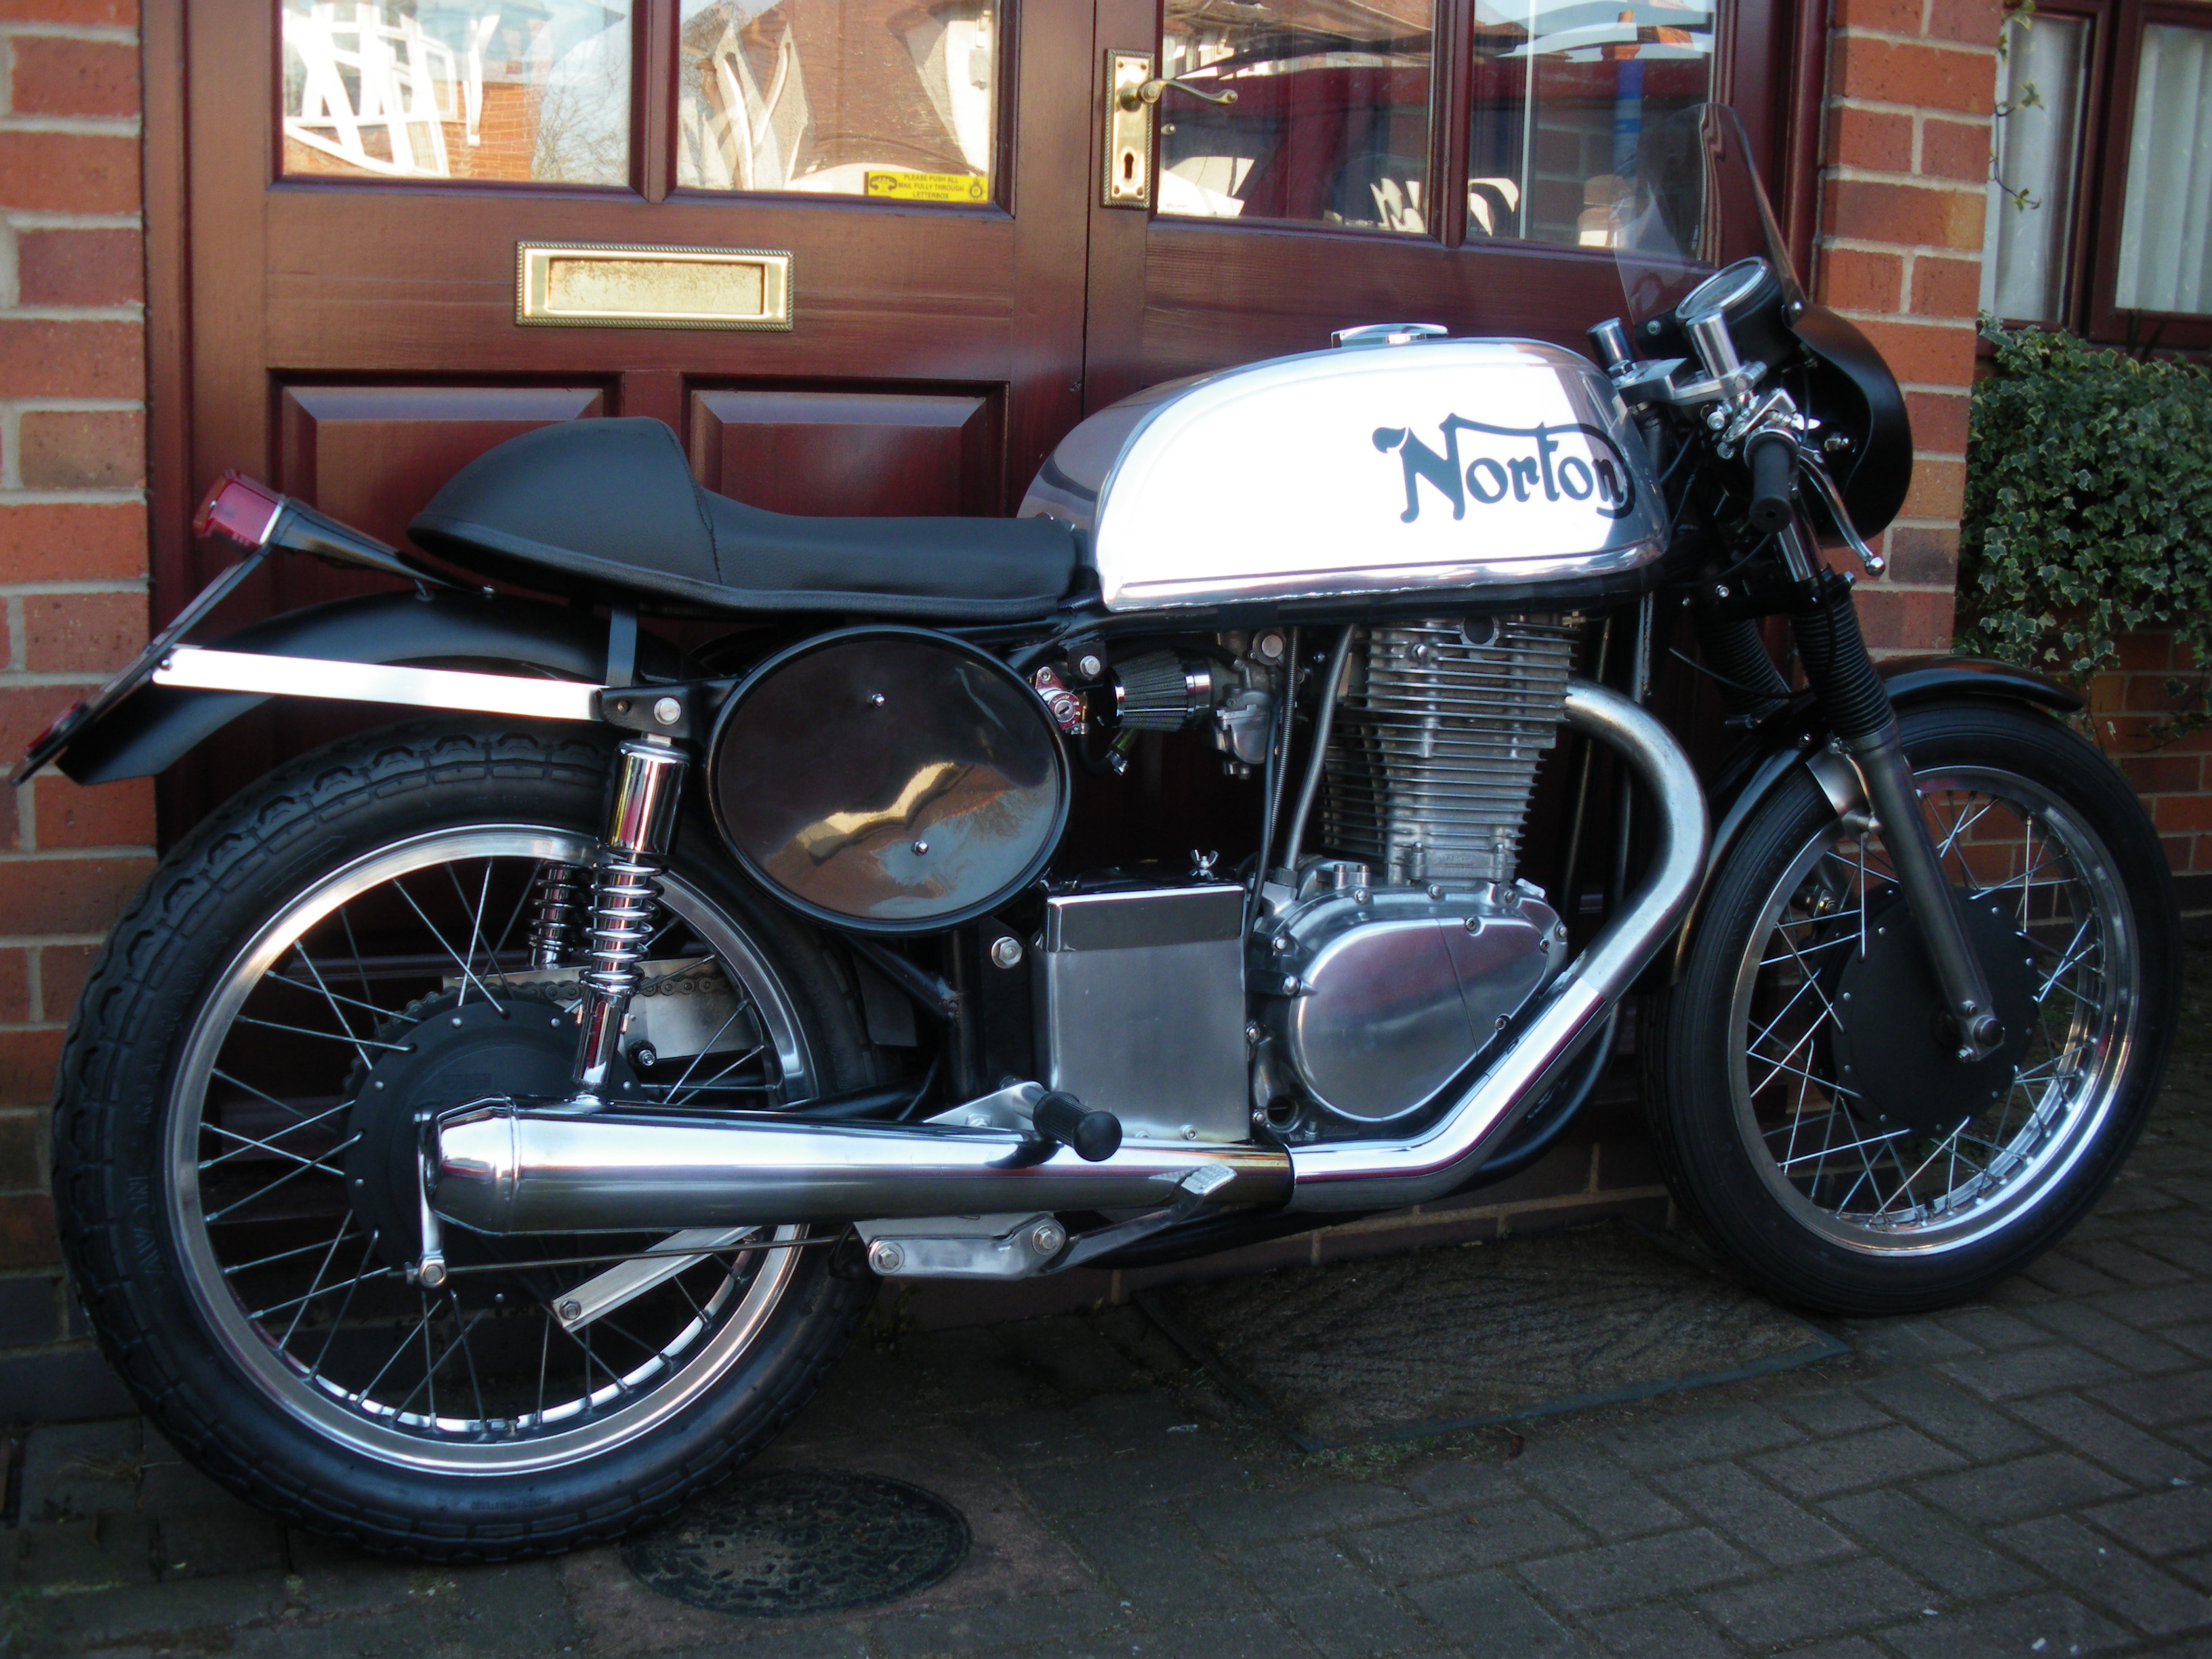
Here’s the finished product–I’m sure you’ll agree, Martyn has found the perfect marriage. Continue reading to see all that went into creating this beauty.

Martyn set his sights on this truly unique combination and put into play his plan of attack. First on the list was a frame and swing arm. Martyn got his hands on a slimline featherbed frame and swinging arm he bought with a 1959 log book for £900! This, Martyn tell us, remained completely stock except for cutting off the centre stand mountings.

Next was the power plant – a Suzuki Savage 650. Martyn amicably refers to this donor Savage as “what a dog.” He bought a complete, running bike so he could check the motor. He found that it ran OK, but only used the motor, electrics, exhaust, rear hub and a few small bits. We like to think of it not so much as a ‘dog’ but an engine looking for a new home.

Once he got the engine out, early trials were done on the garage floor. This gave Martyn some encouragement. The biggest problem with the donor Savage was getting the belt drive sprocket nut off the gearbox output shaft – he had to grind it off — fortunately Martyn had a spare off a GSXR750 that was identical!

It took lots and lots of dummy builds before he could get the engine in a sensible position. He used simple temporary brackets made from aluminum strips while doing this. Most of the problems were down to the chain line, which is much more inboard on a Norton than the original belt line on the Savage.
The chain run was eventually sorted by machining about 25mm off the rear hub and using shorter sprocket bolts to match. He had exposed the bearing in the sprocket carrier, so changed it for a shielded type. The hub was still offset 8mm across the bike which later on meant lacing the spokes up offset to get the rim central.
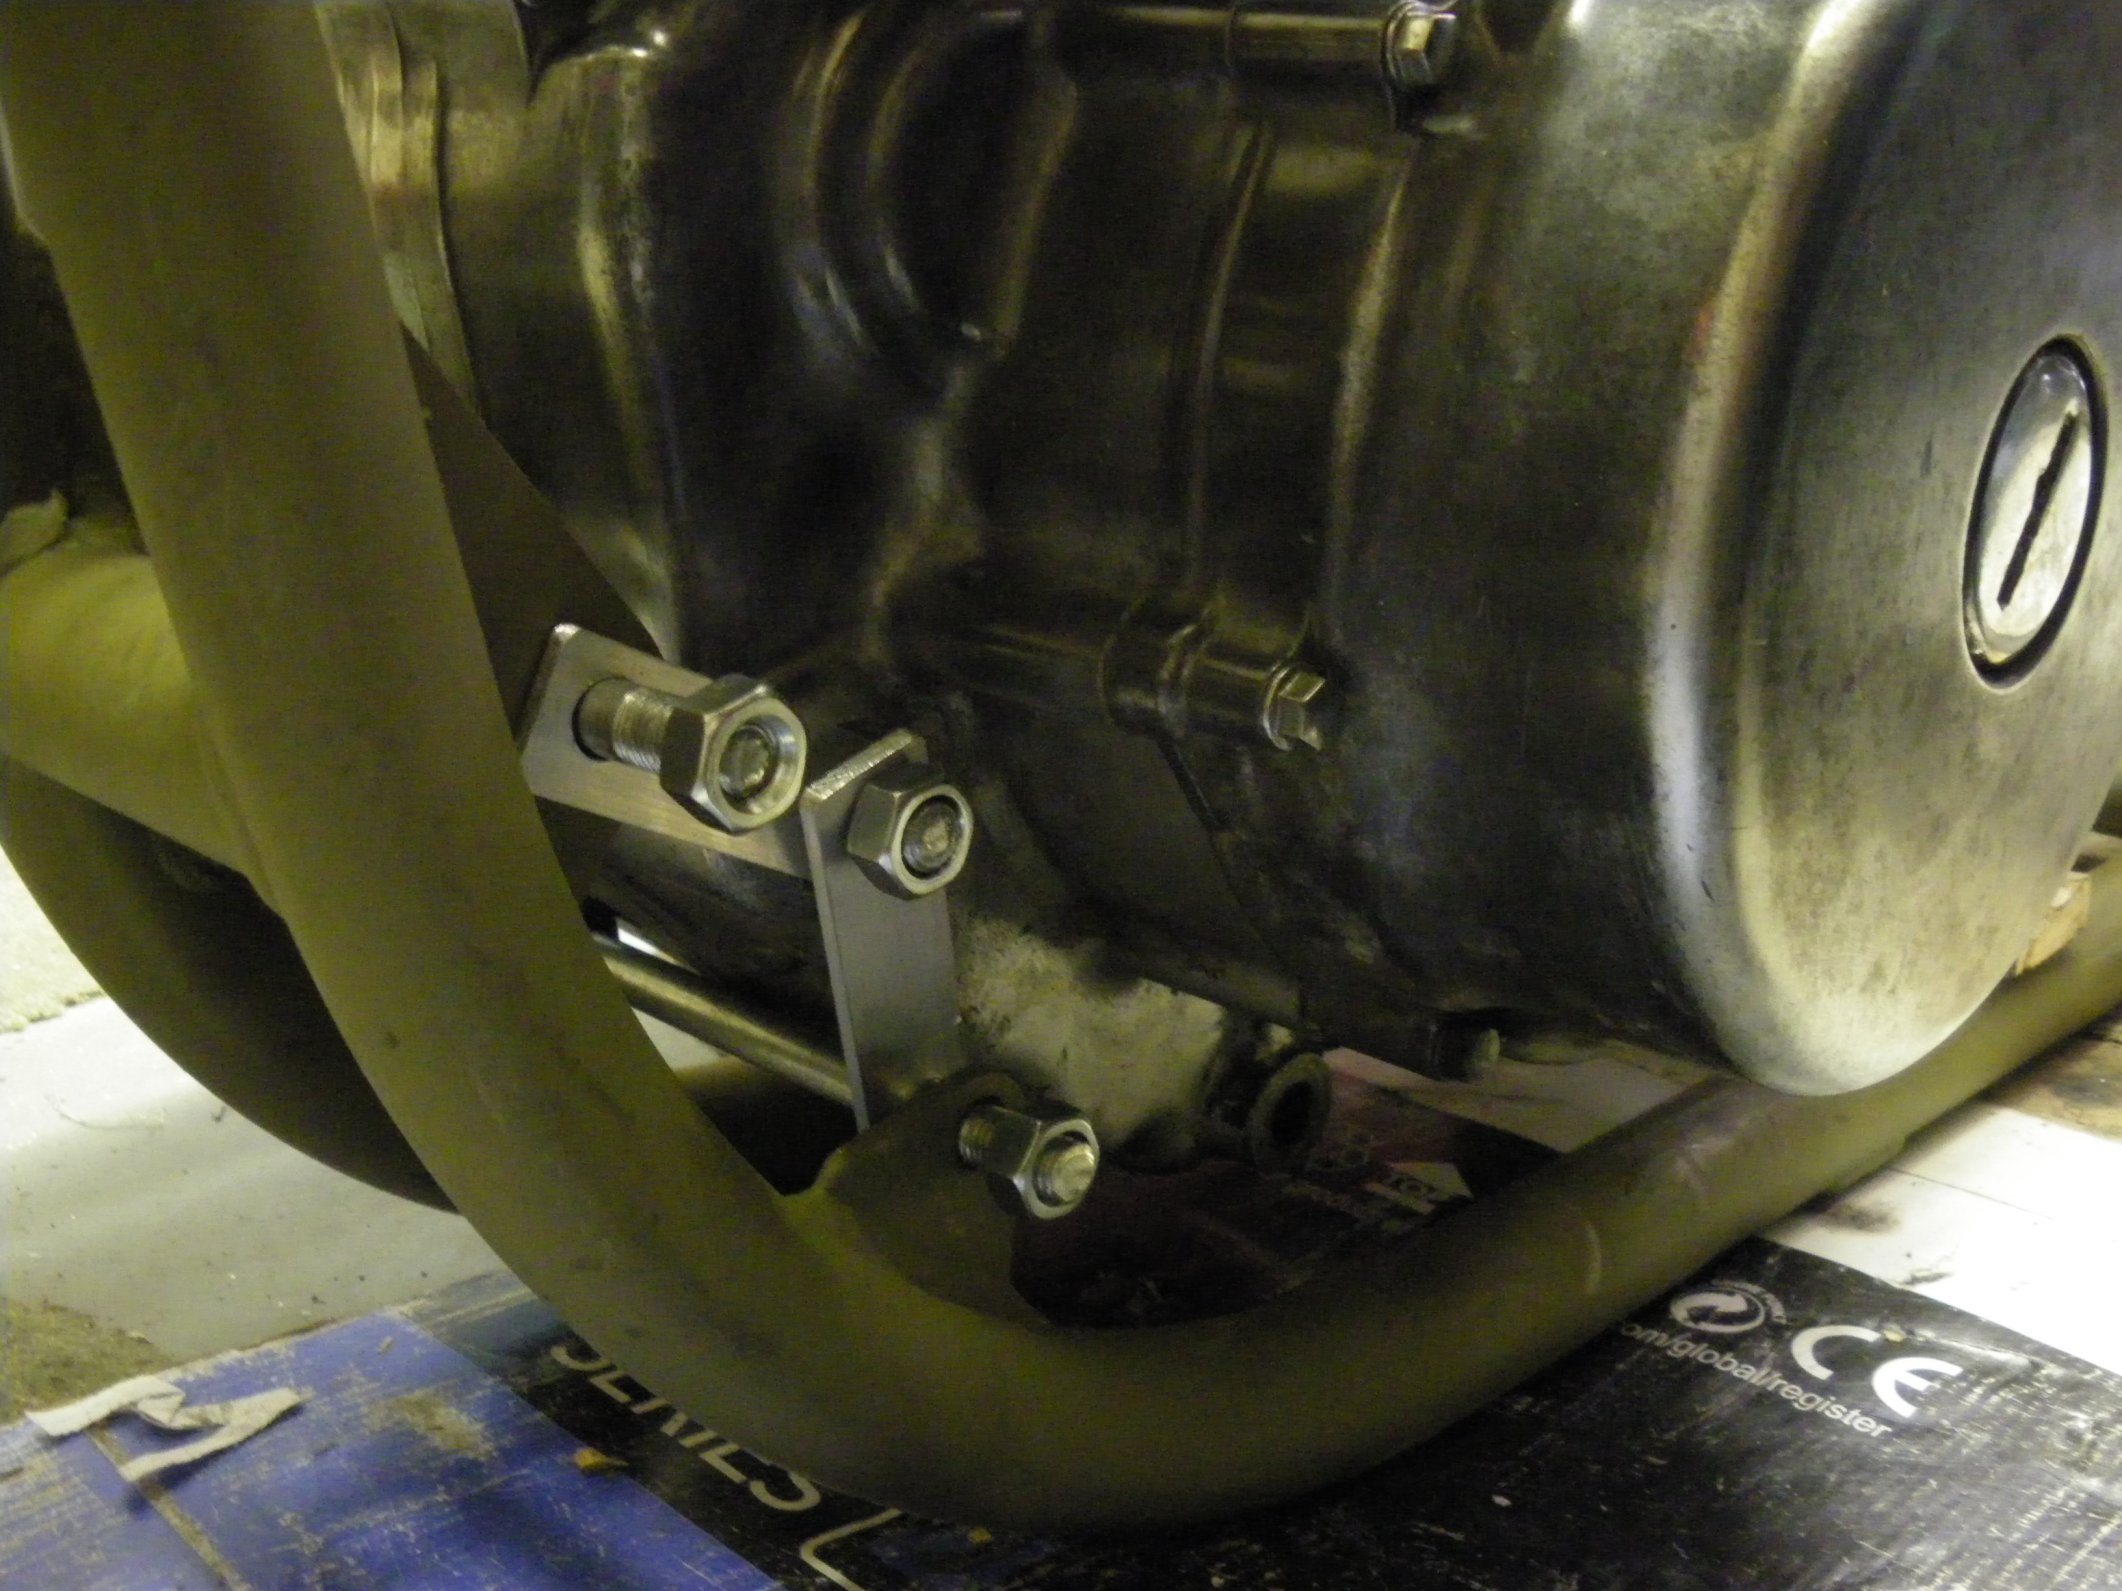
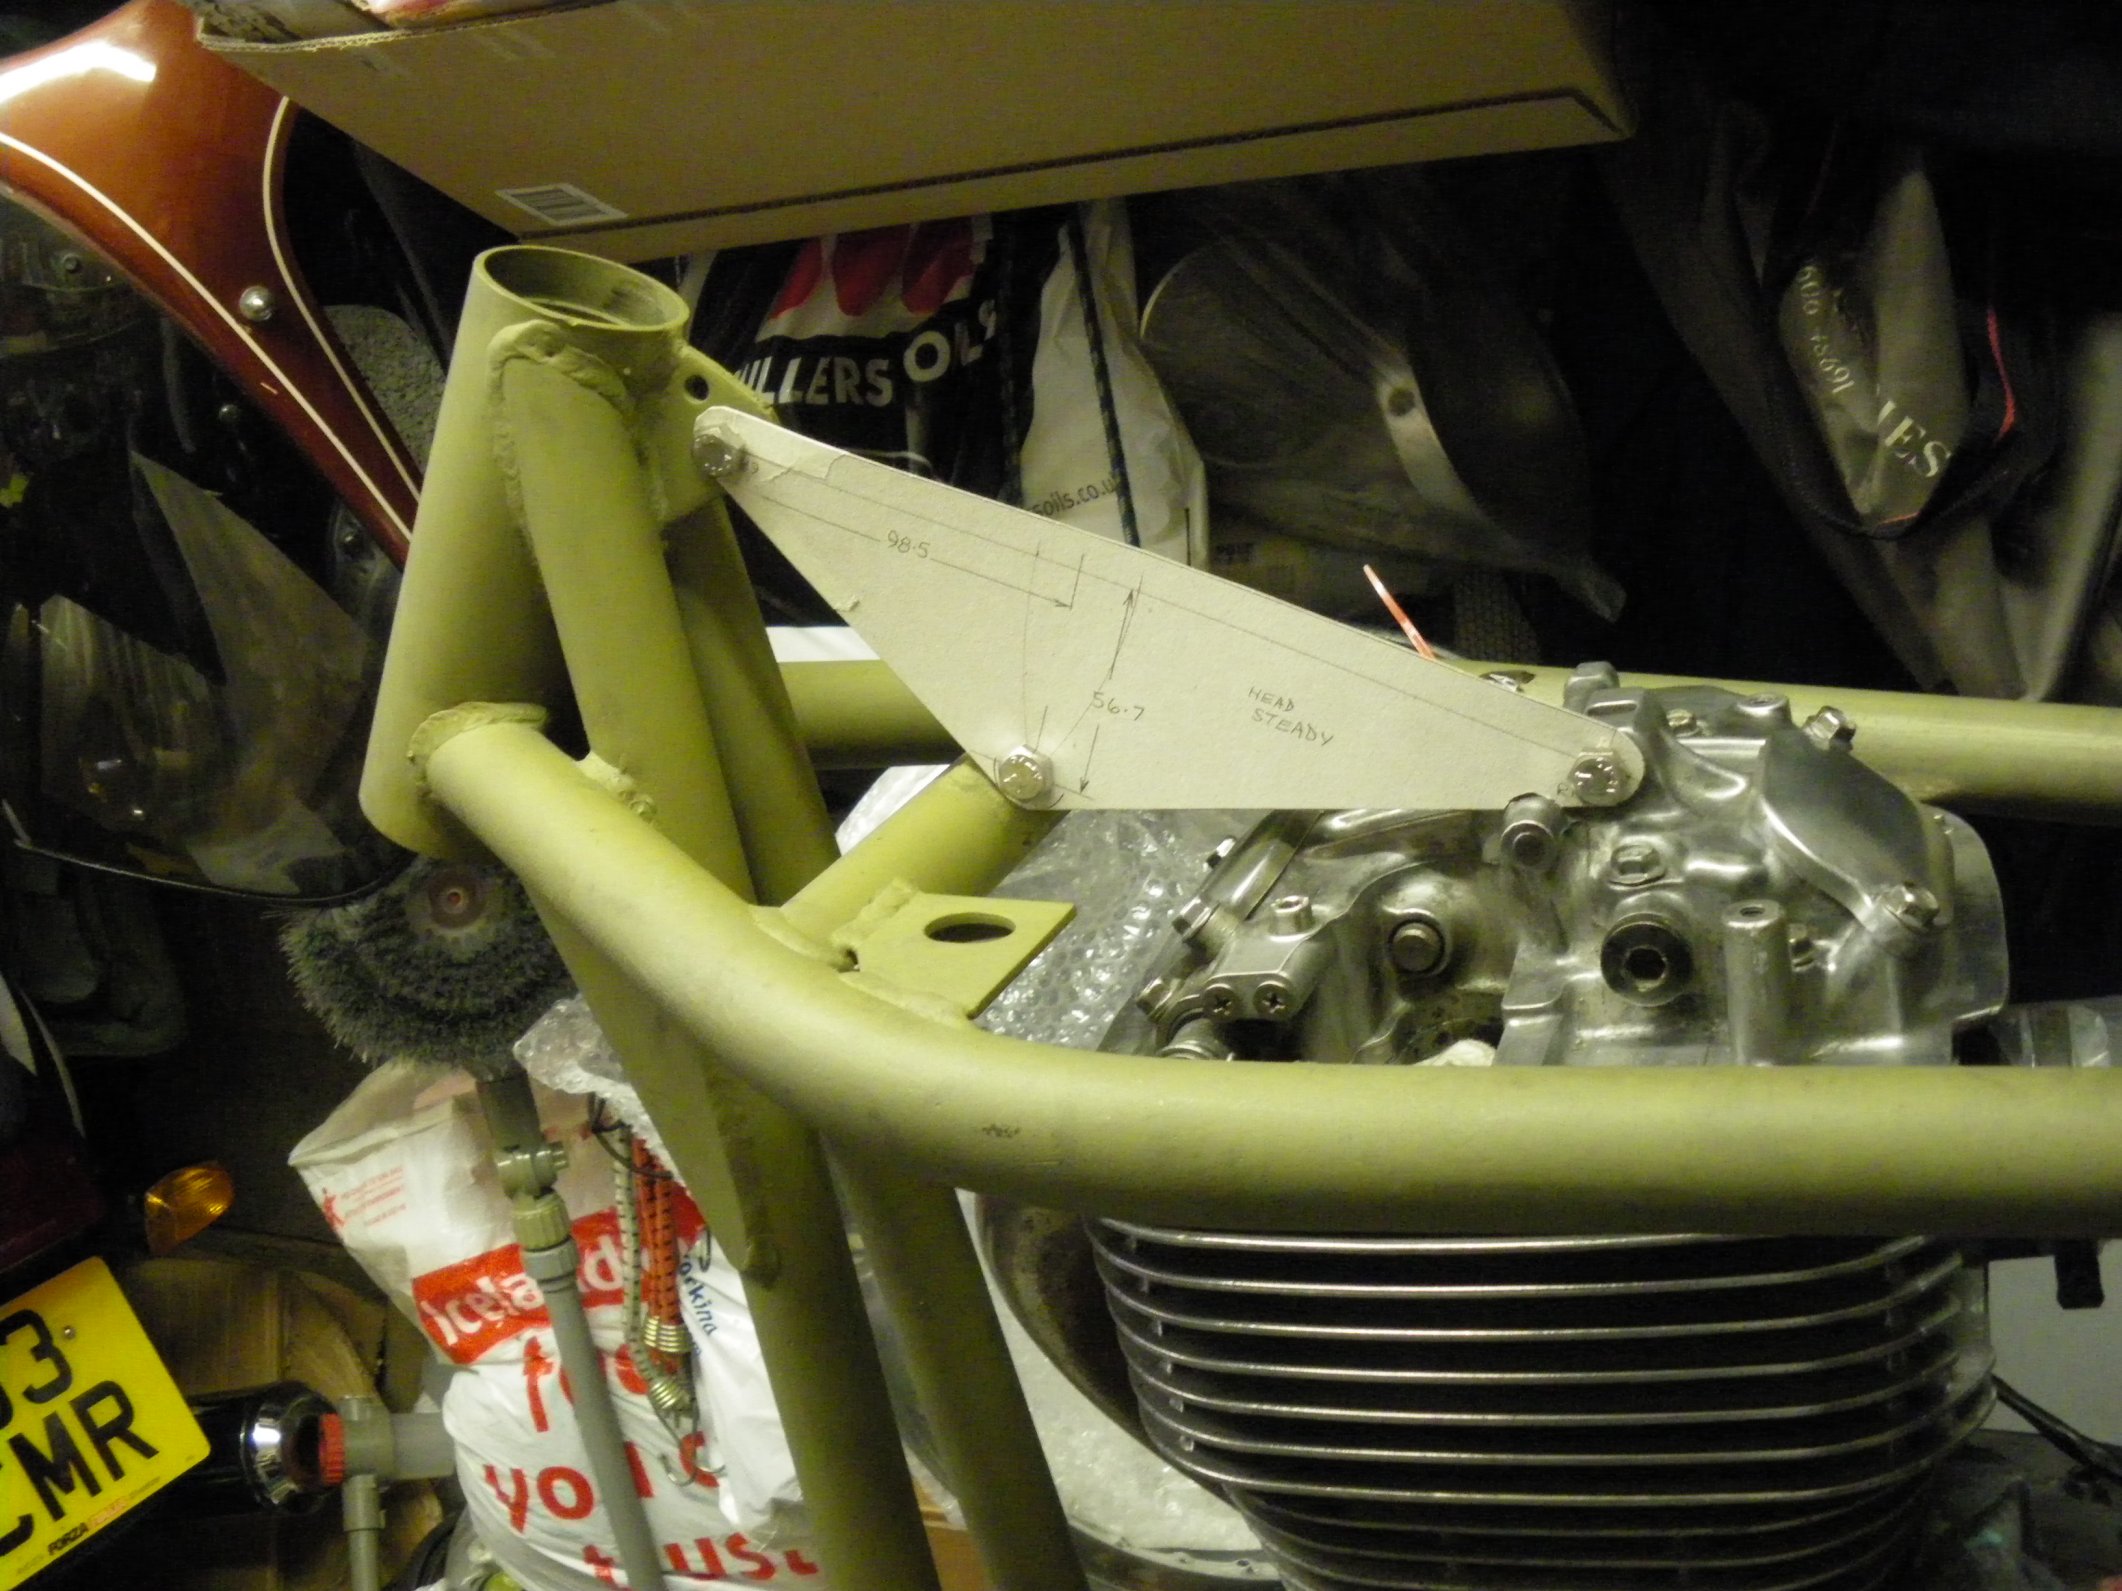
Cardboard templates were used to develop the engine mounting plates: this is the head steady.
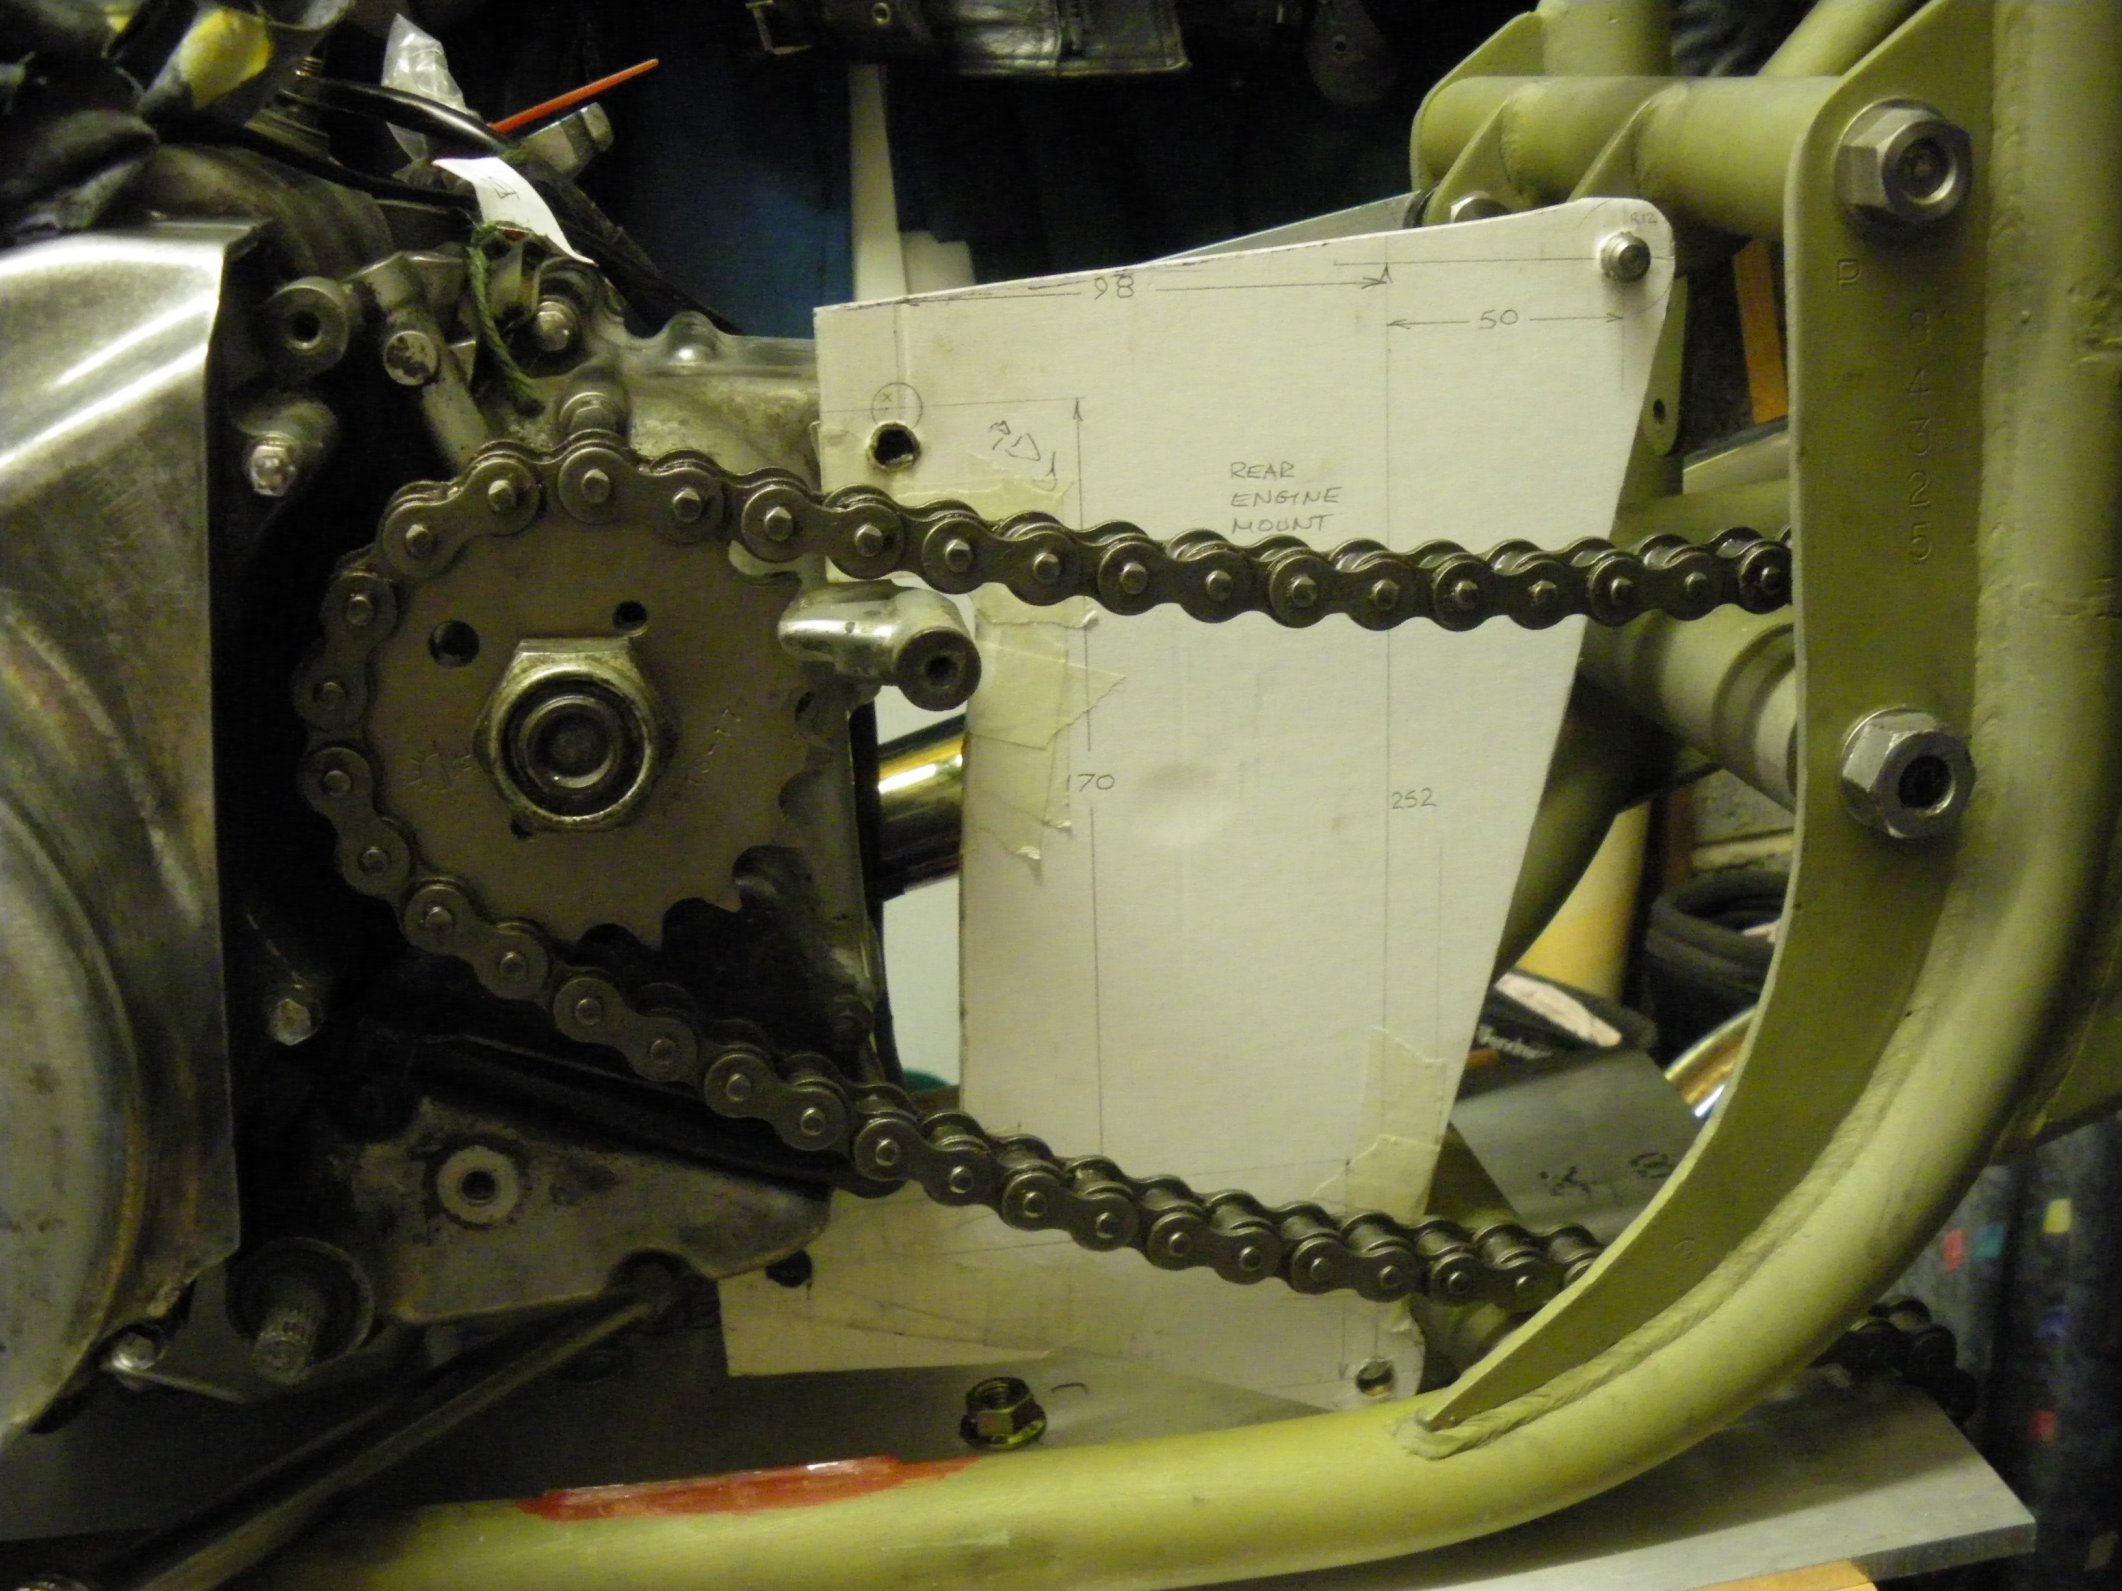
These are the mockups used to develop the main engine plates. All engine plates were made from high strength 6mm aluminum alloy using an angle grinder Martyn bought especially for the job. He then filed and polished them.
The carb originally fouled the floor of the shiny alloy tank. There was no other answer but to design an inlet manifold to angle the carb lower. He passed the drawings to a pal who machined it from a small billet of aluminum–ending up with 2.5mm clearance!
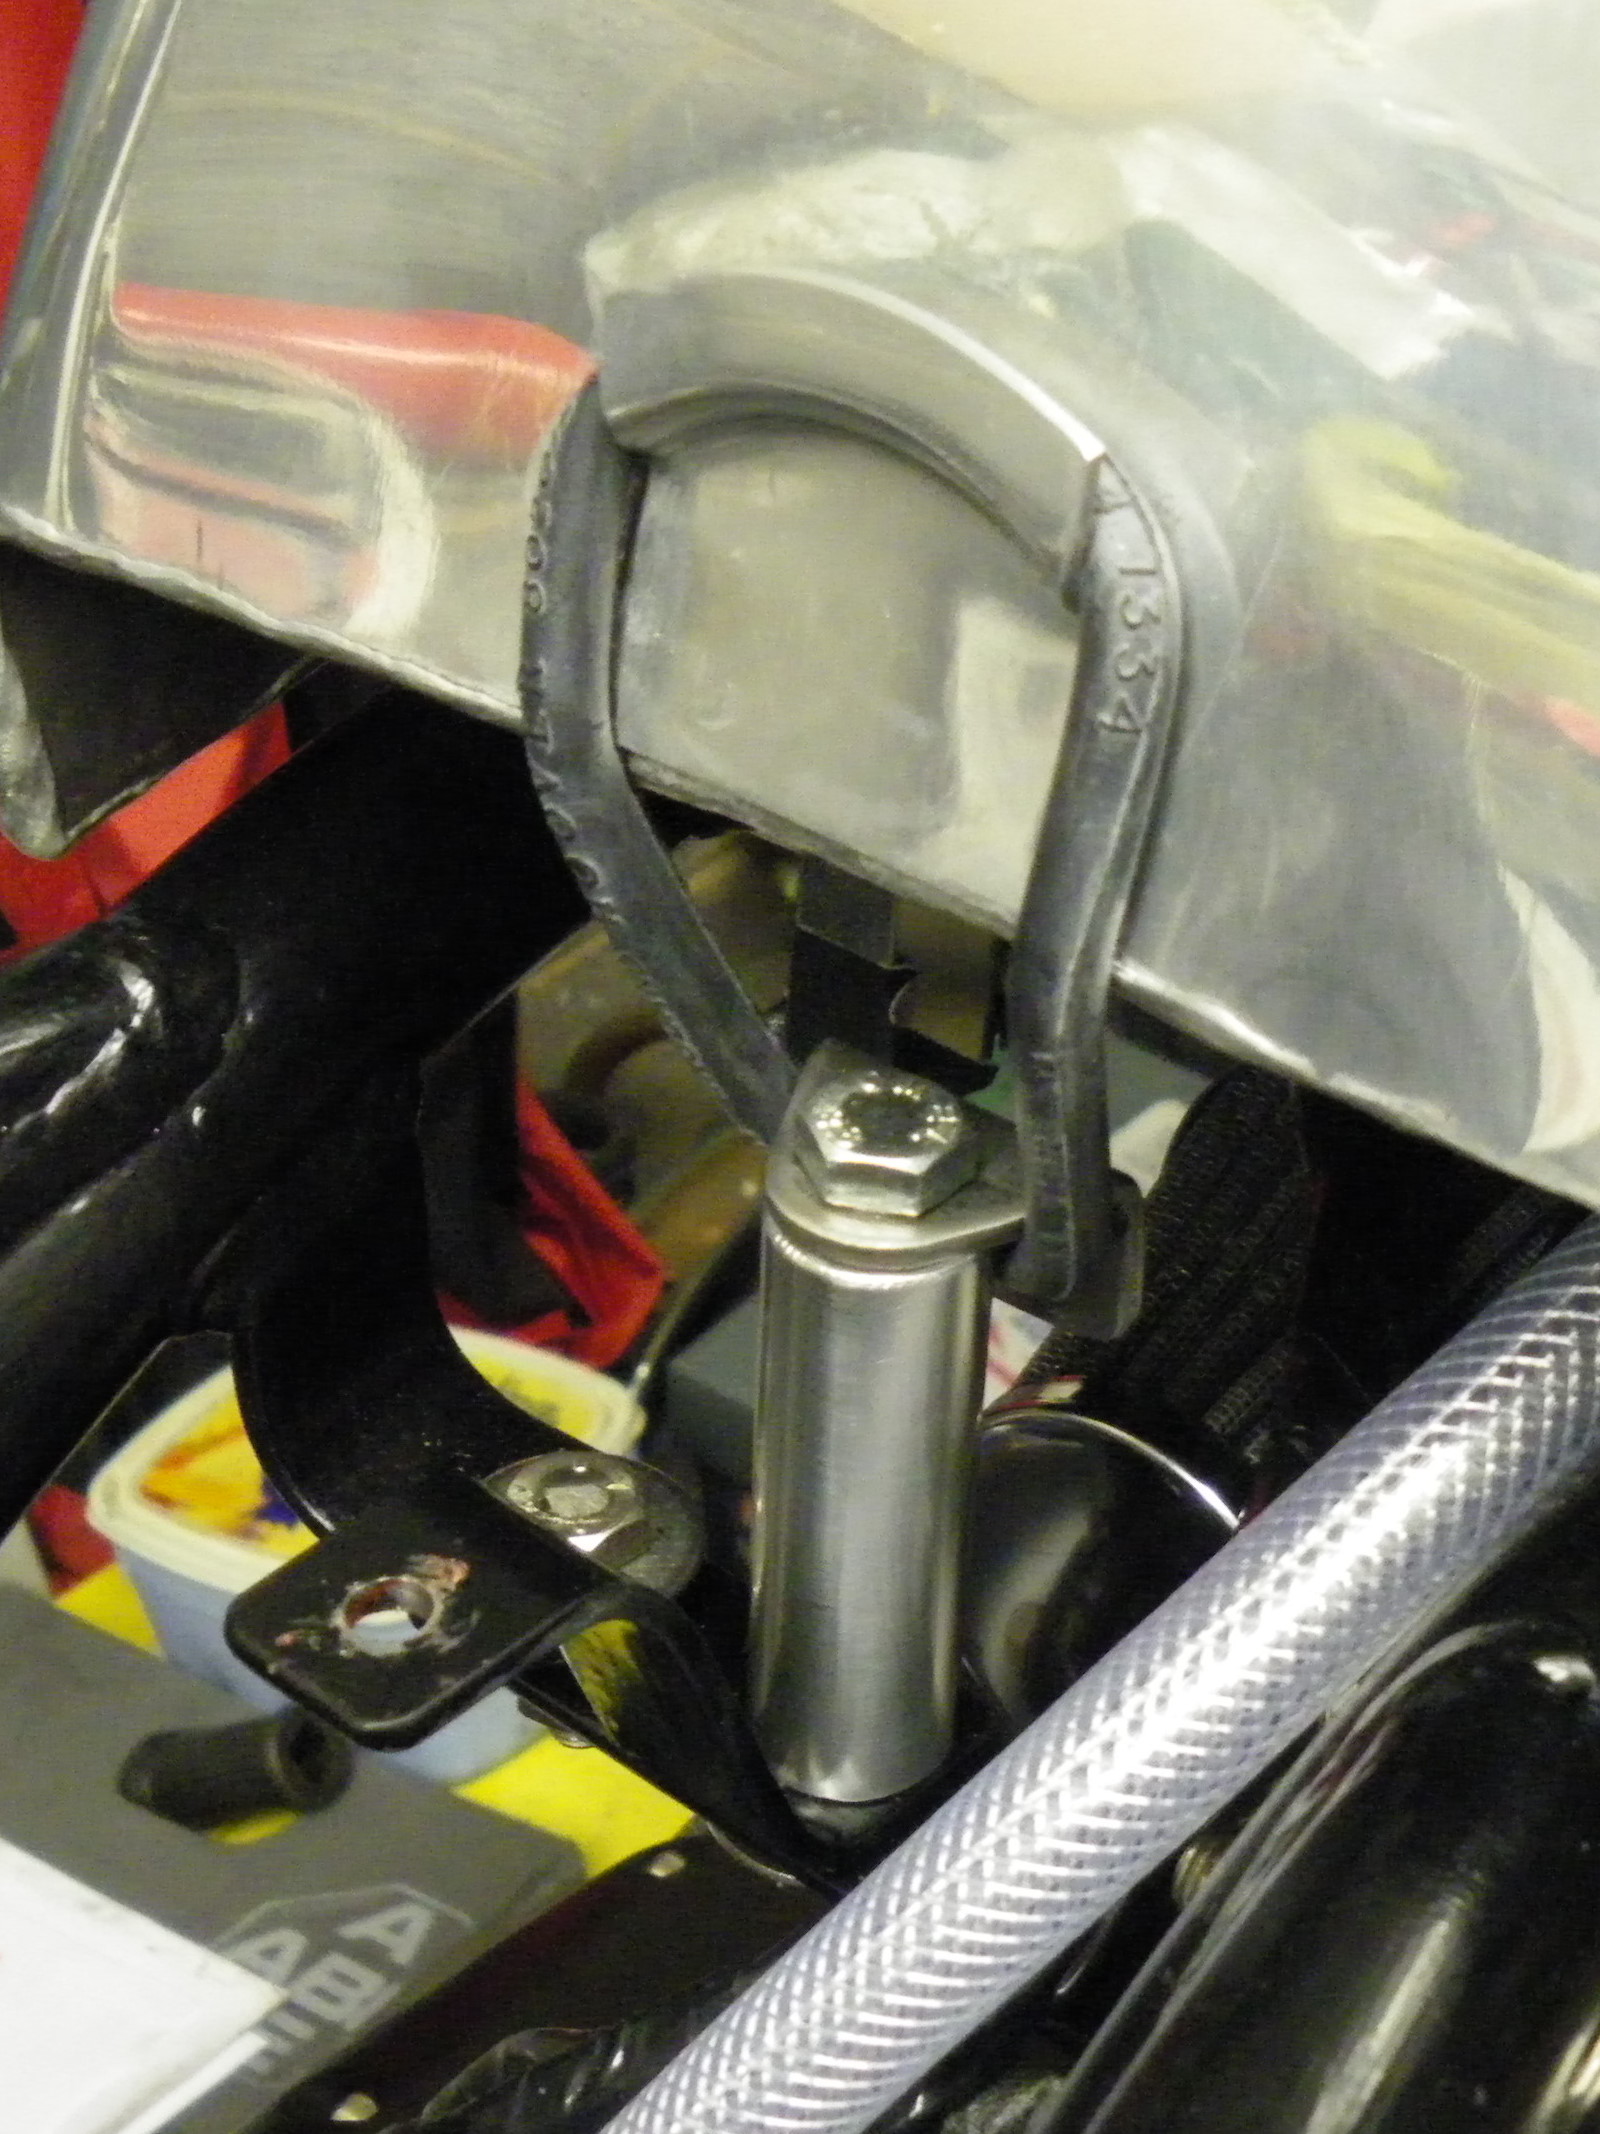
Clearing the fuel tap was also a challenge: by using a long hexagon nut as a spacer he can reach the fuel tap from under the frame tube and nothing clashes.
The exhaust was less of a problem: it almost looks like it was designed for this frame.
The head was more of a problem: He had to grind the fins back a fair bit to clear the frame.
When one puts a modern engine into a featherbed they often end up with a big gap between the engine and frame (the frame was designed to take a primary transmission and separate gearbox).
On the exhaust side Martyn filled the gap by locating the battery behind the engine and he made the battery box to fit the donor Savage lid.

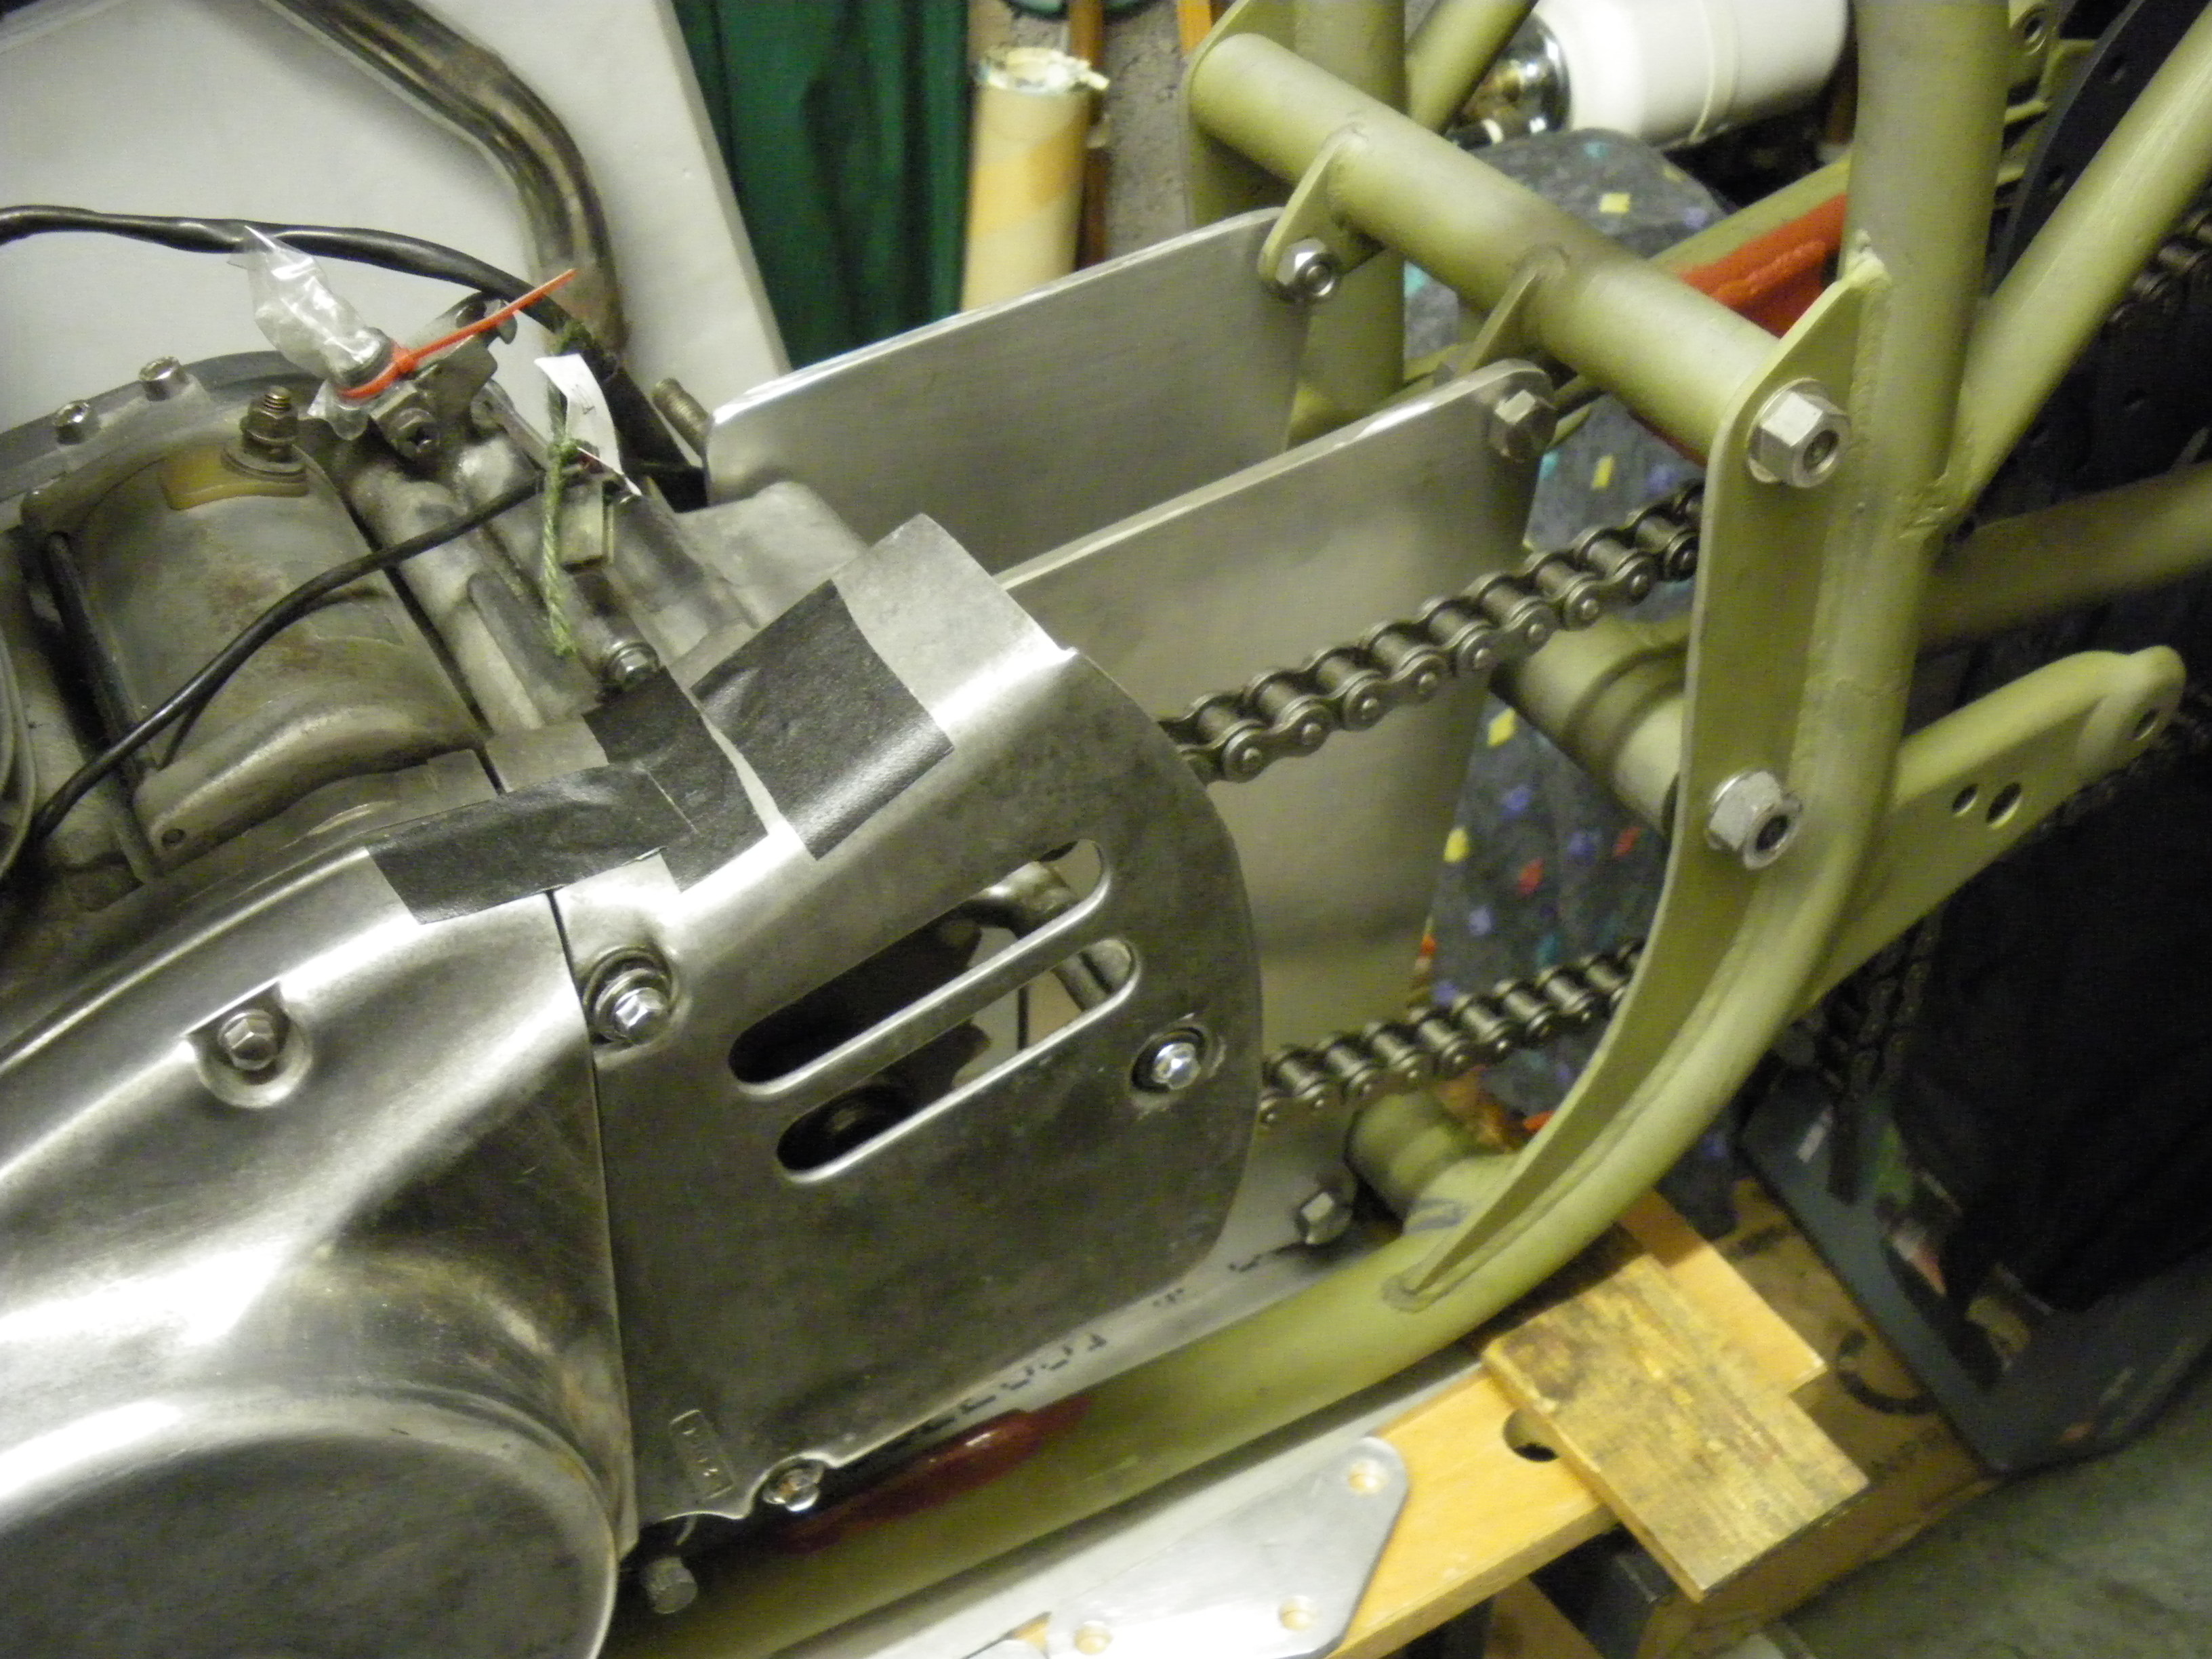
Believe it or not, the chain does clear the frame, but not by much!
That’s a 1200 Bandit gearbox sprocket. It looks a bit lonely stuck in the middle of nowhere but at least the chain goes slack as the back wheel rises, so chain tension isn’t really a problem.
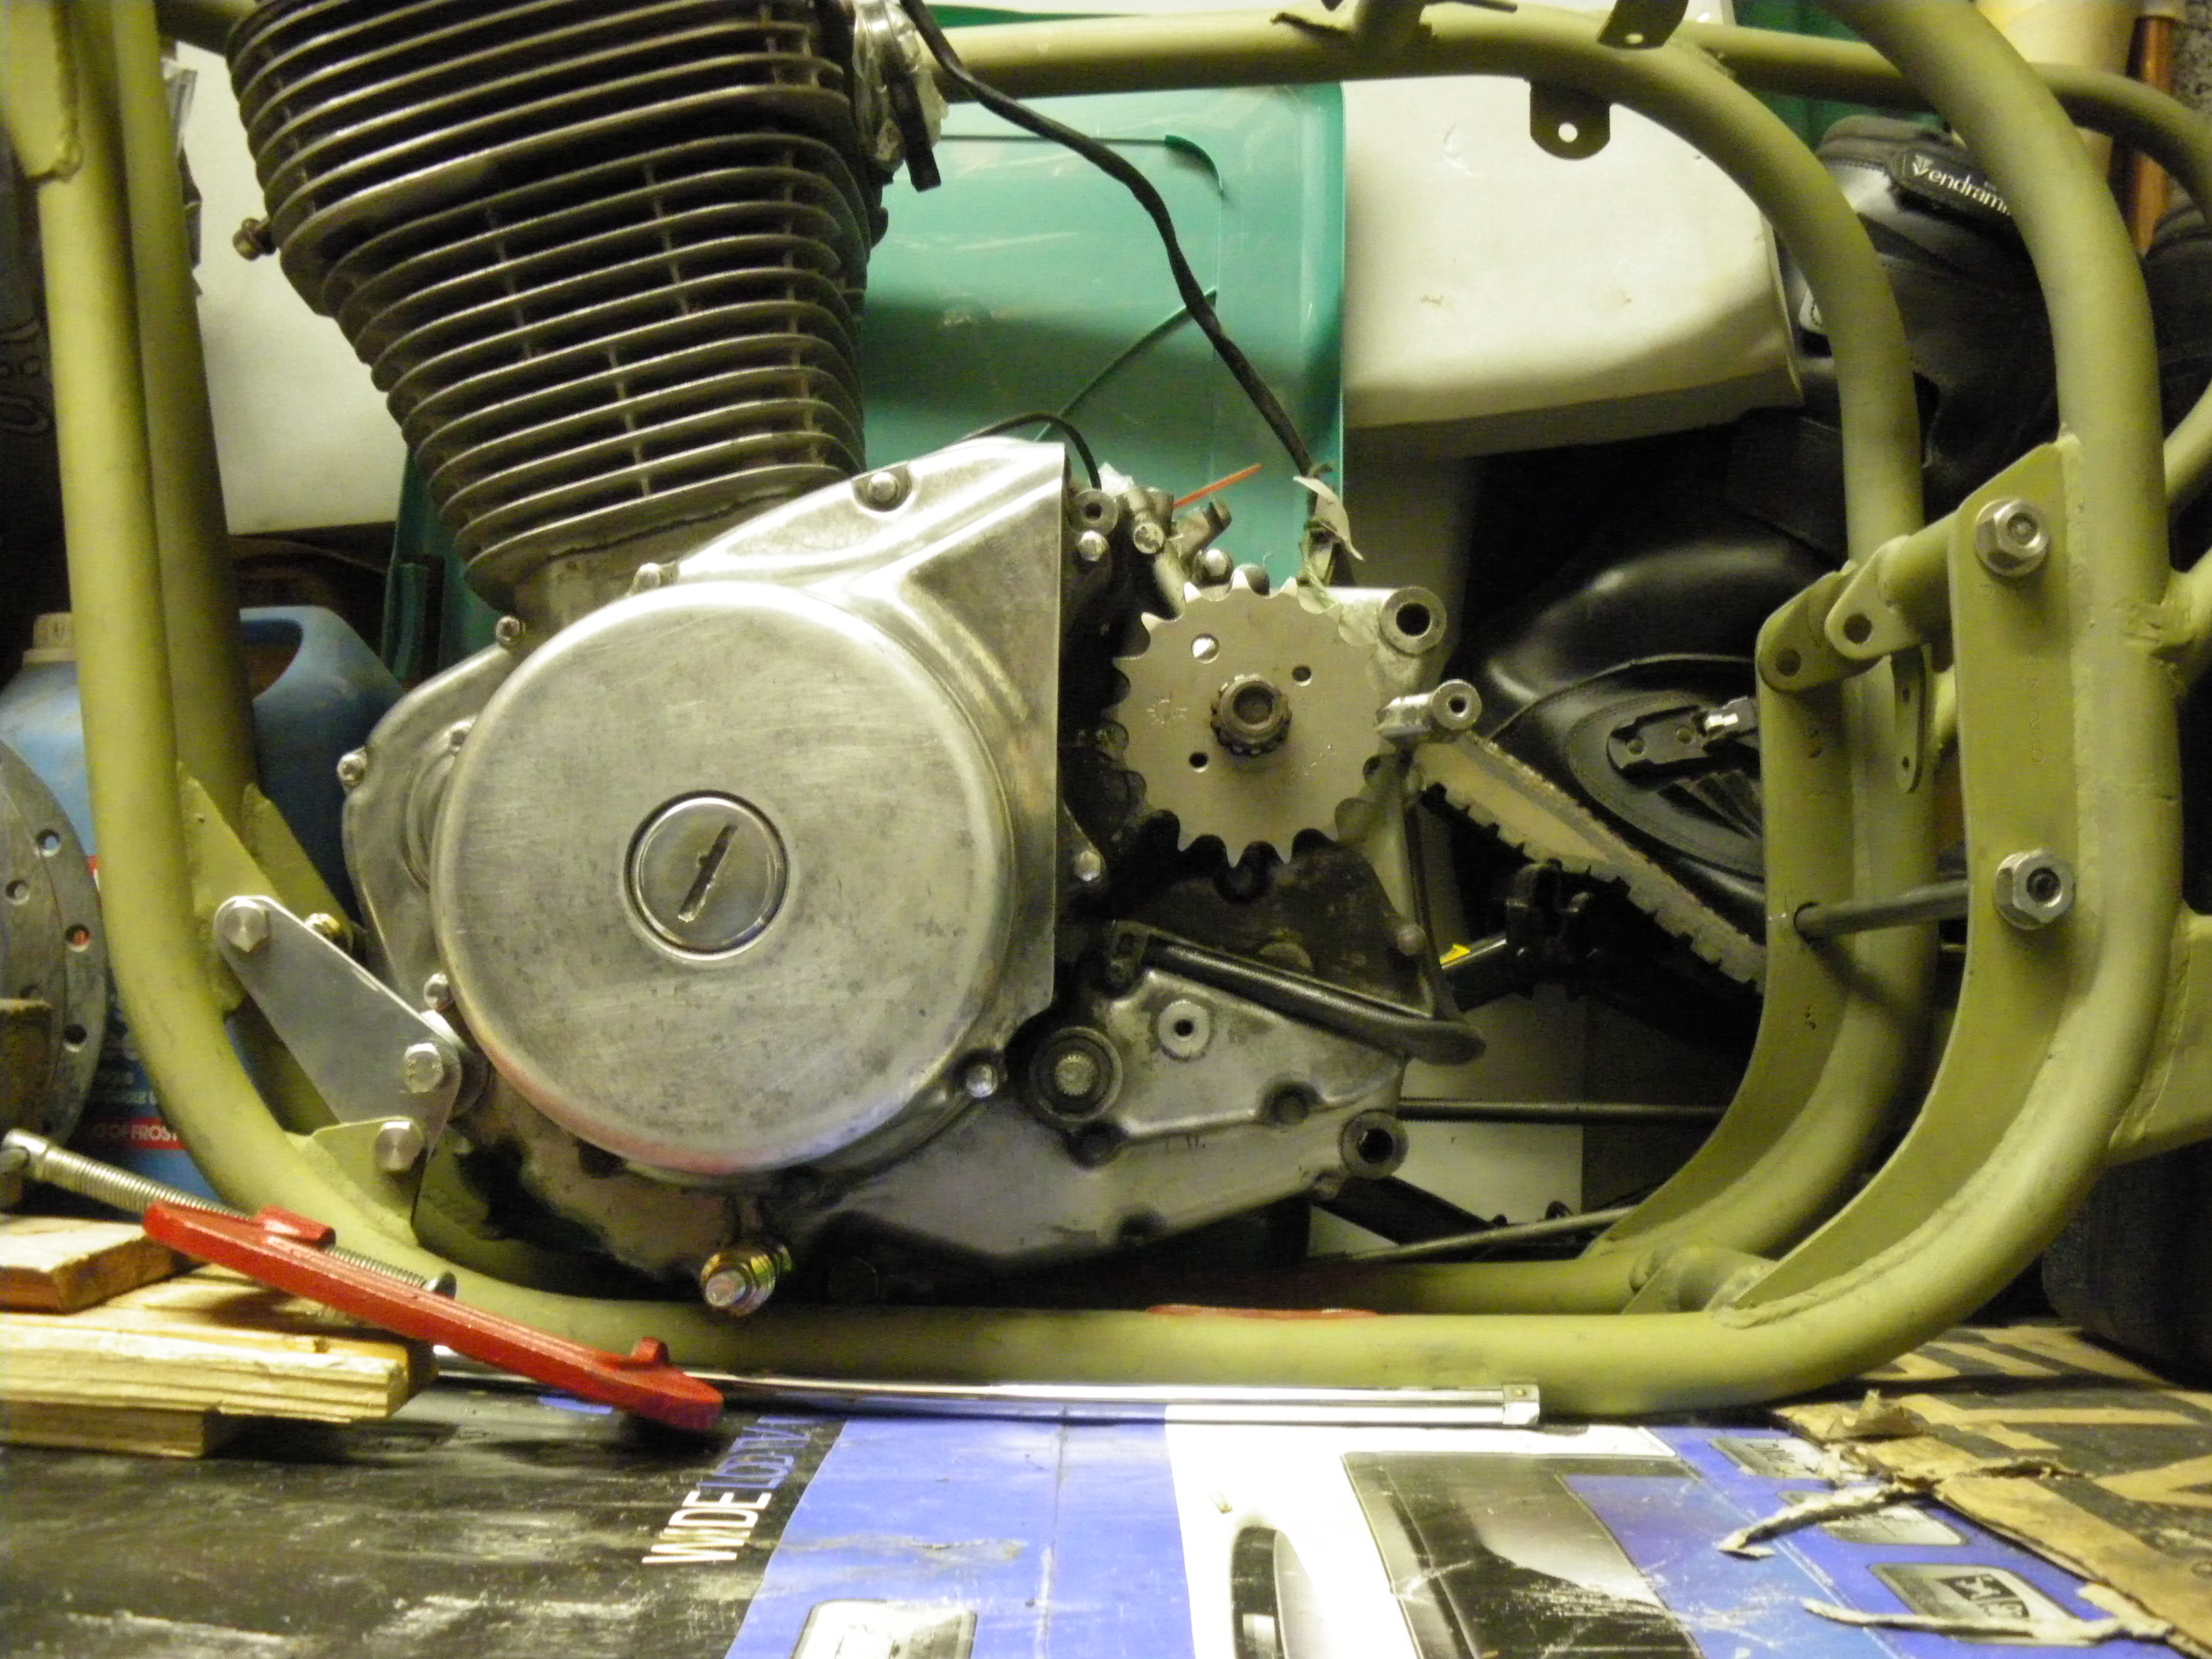
The drive sprocket position was disguised by an old BSA primary cover, cut off to match the line of the Savage engine.
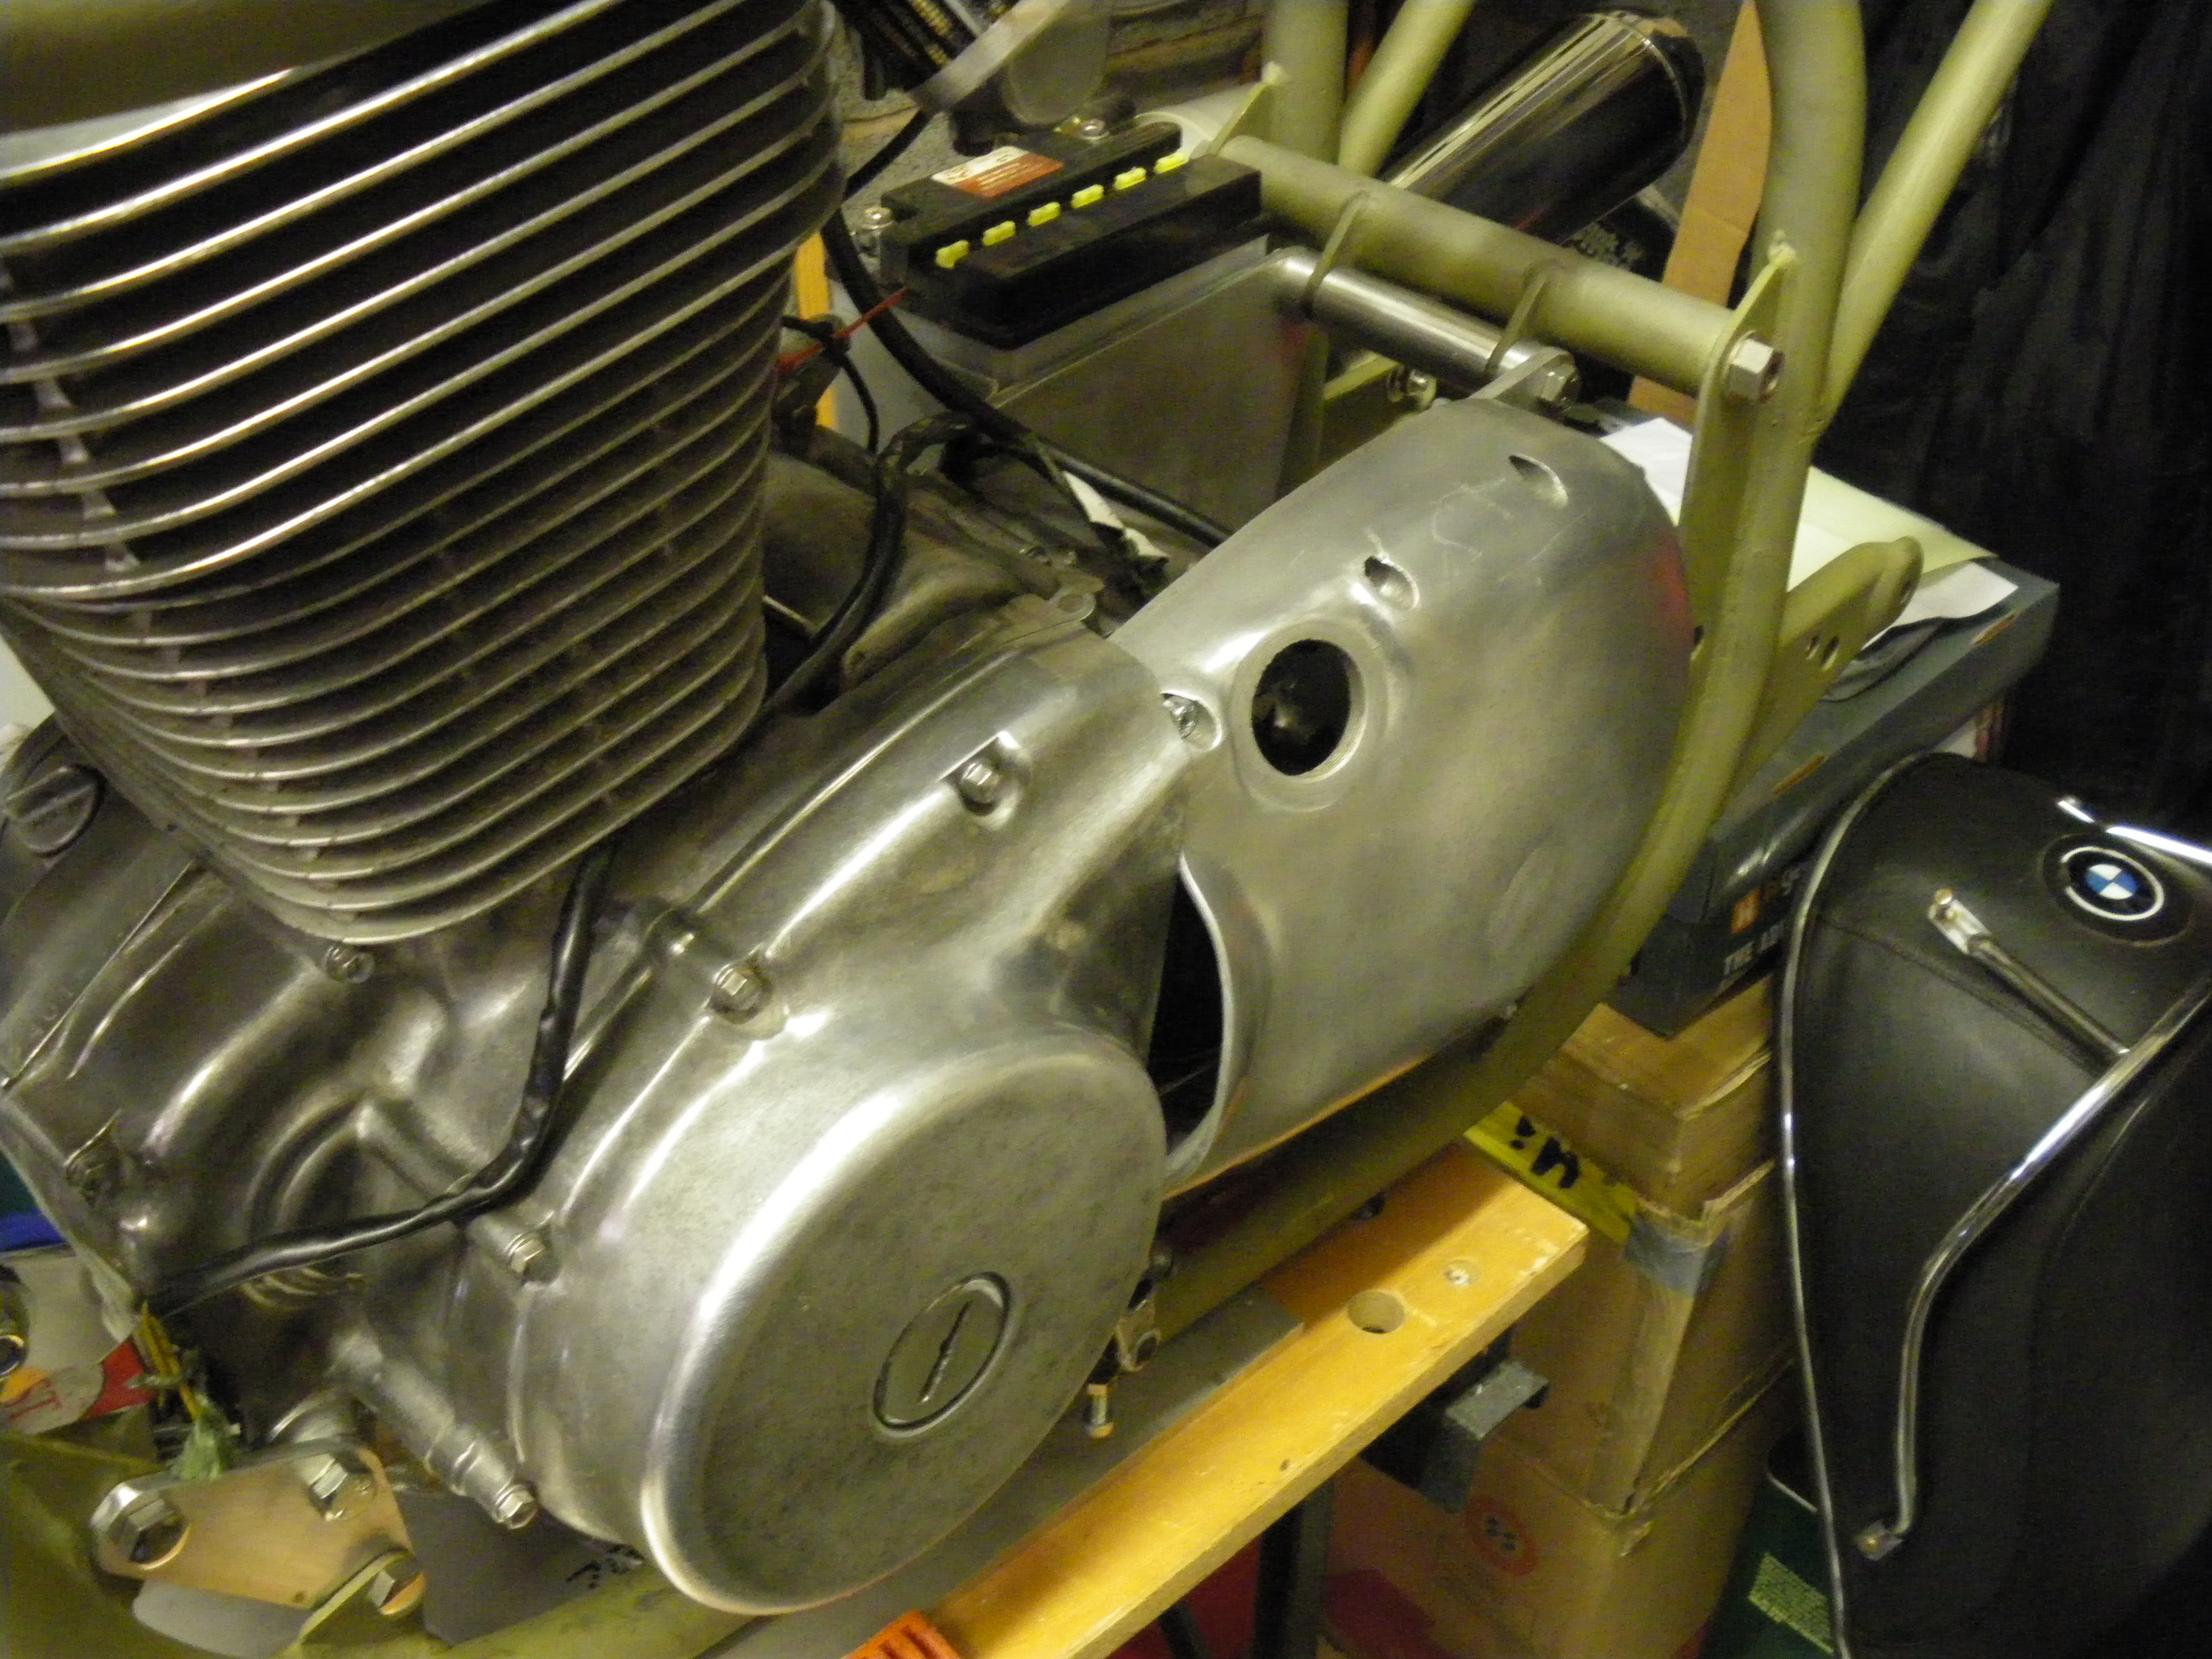
After several days of blending and shaping with body filler he had a match. Martyn also made some aluminum covers for behind the engine. It was now time to stop the dry builds and pull everything down for painting.

There were a lot of brackets to be primed and painted, as well as the frame itself. It was quite nearly a production line going at one point.

Both hubs were primed then painted in matte black to give the style of the proper Manx brakes.

Much of the build took place on a Black and Decker Workmate. It creaked and groaned a bit, but survived. He labeled all the wiring as they were removed from the Savage—some leads needed to be lengthened and others shortened.

Martyn made a real effort to route everything nicely around the head so nothing would buzz against the tank. The speedo cable had to be extended but extensions are easily available to suit trike builders. Martyn was dead keen to get the proper 50s look for the handlebars: the silver plate with the button on the right hand bar is the electric start.

All the major electrics are hidden behind the engine, set into sponge rubber and protected by the engine plates.

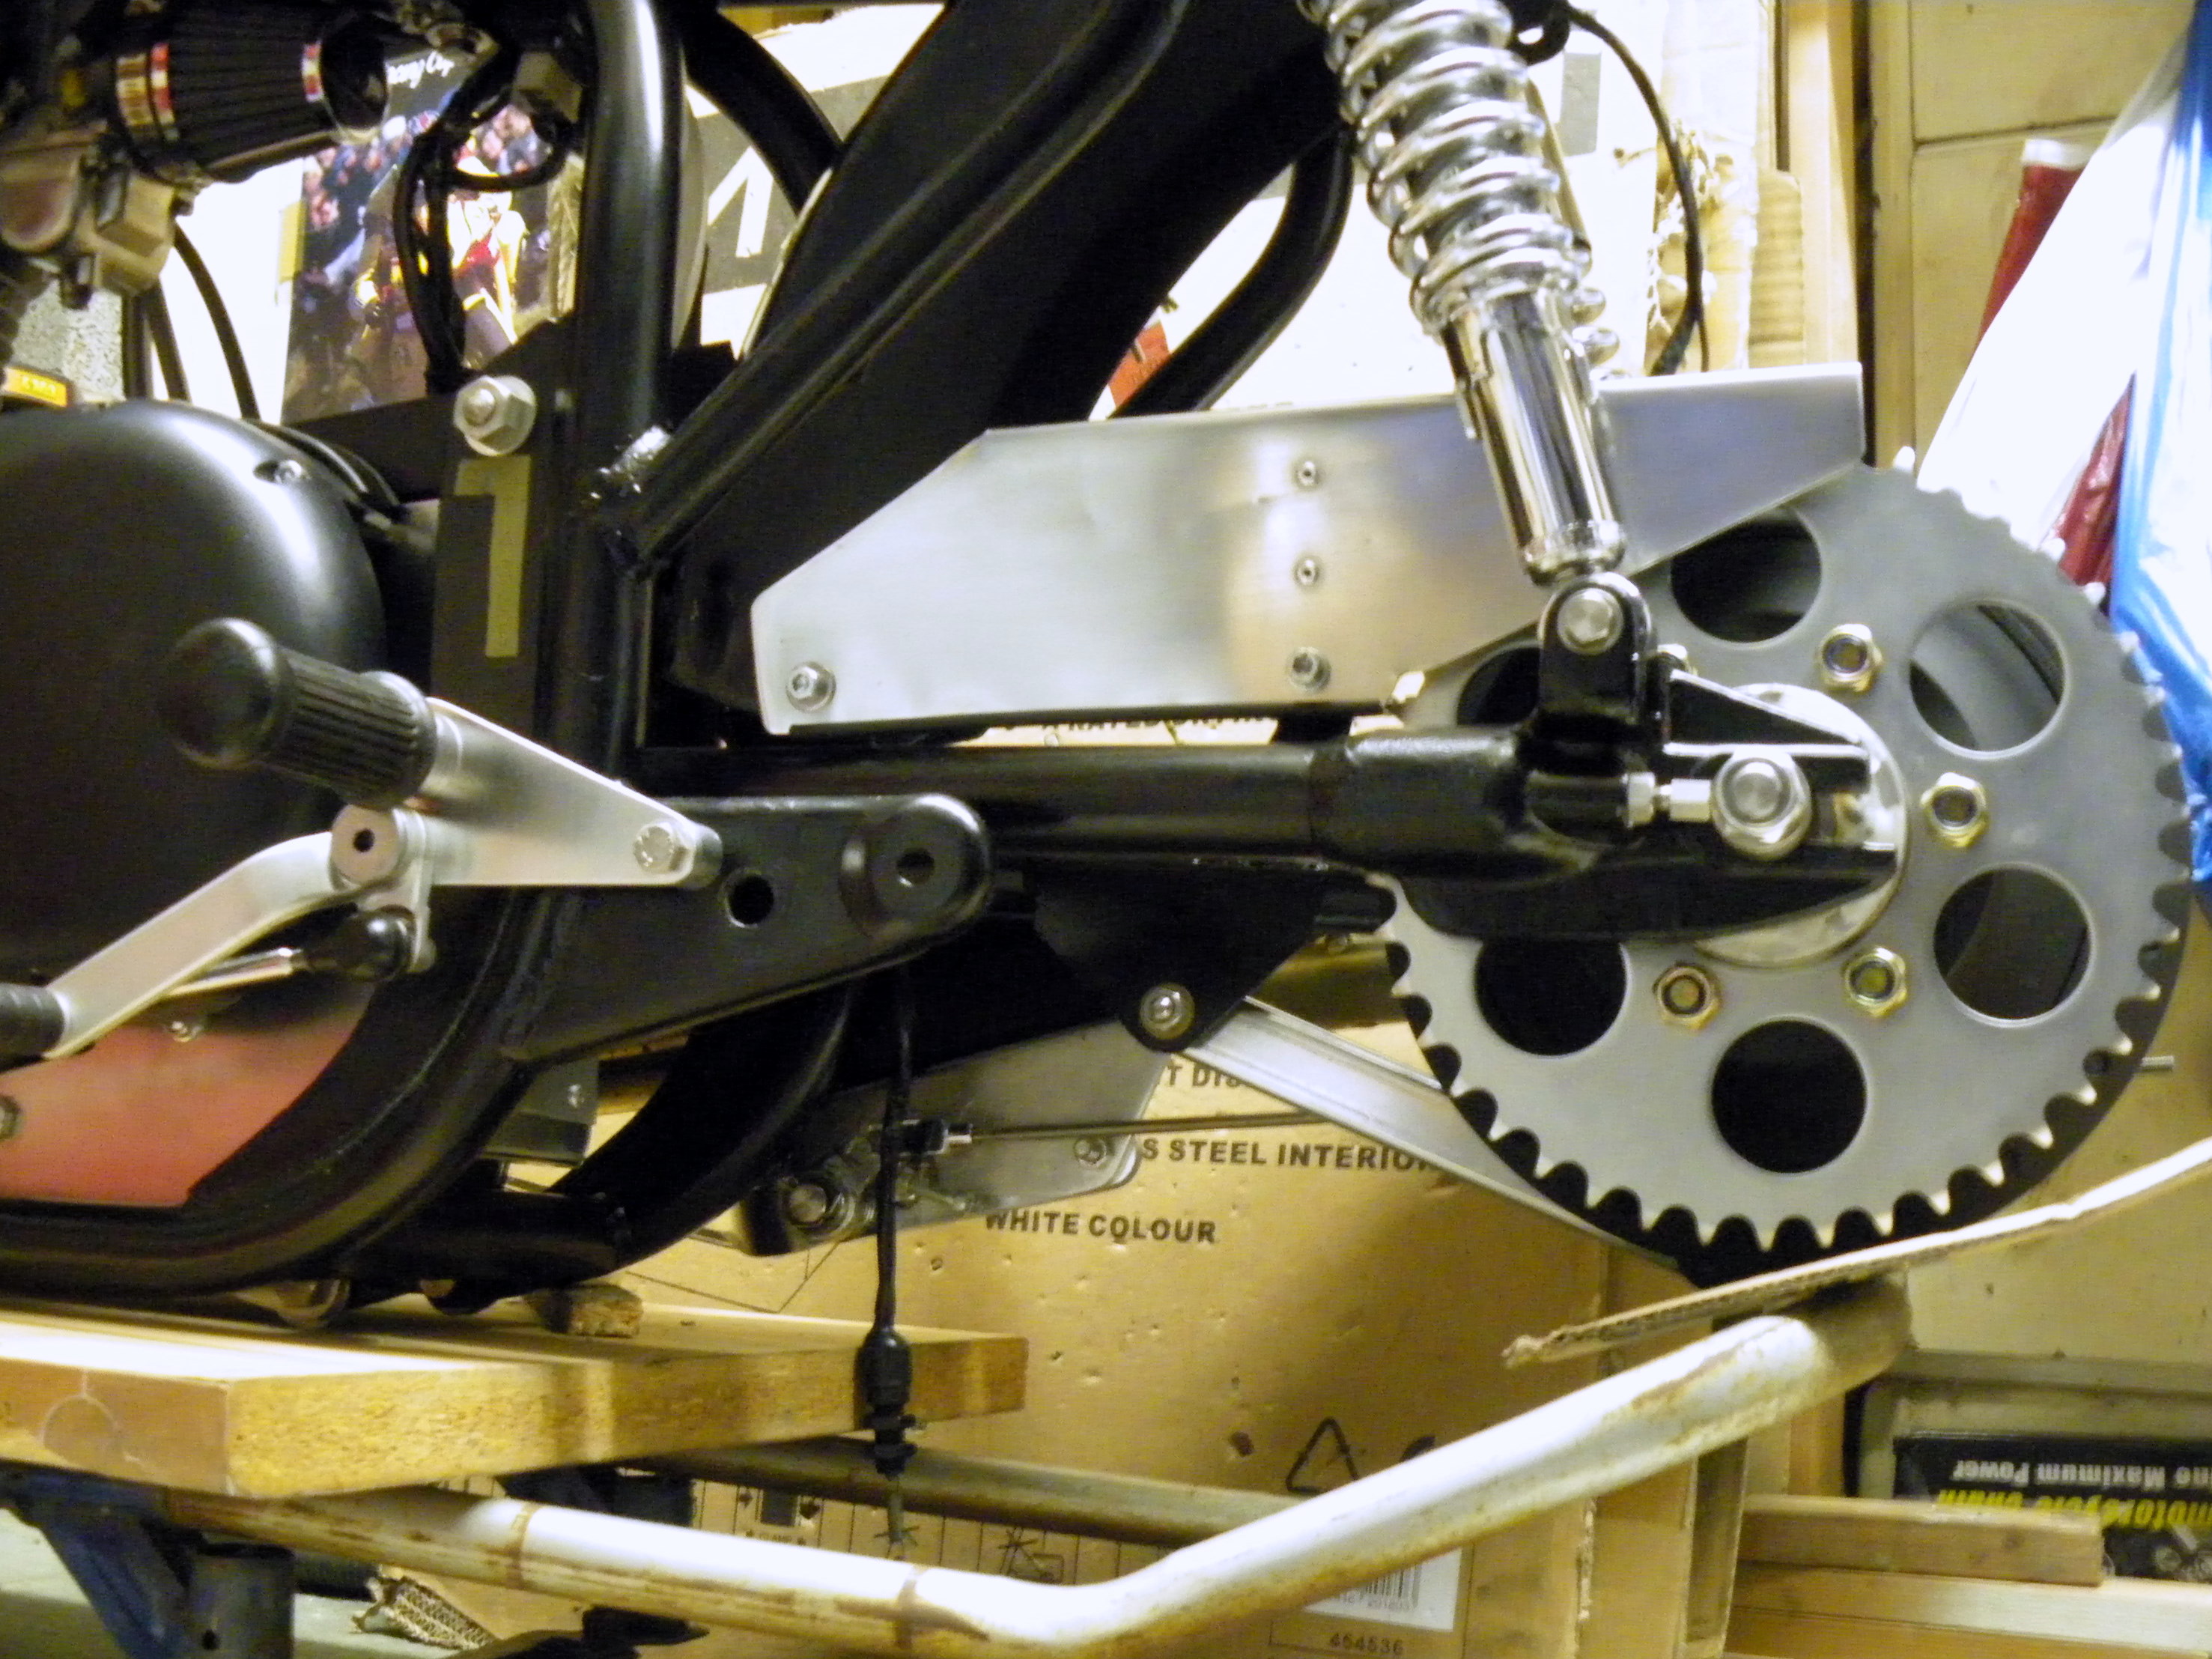
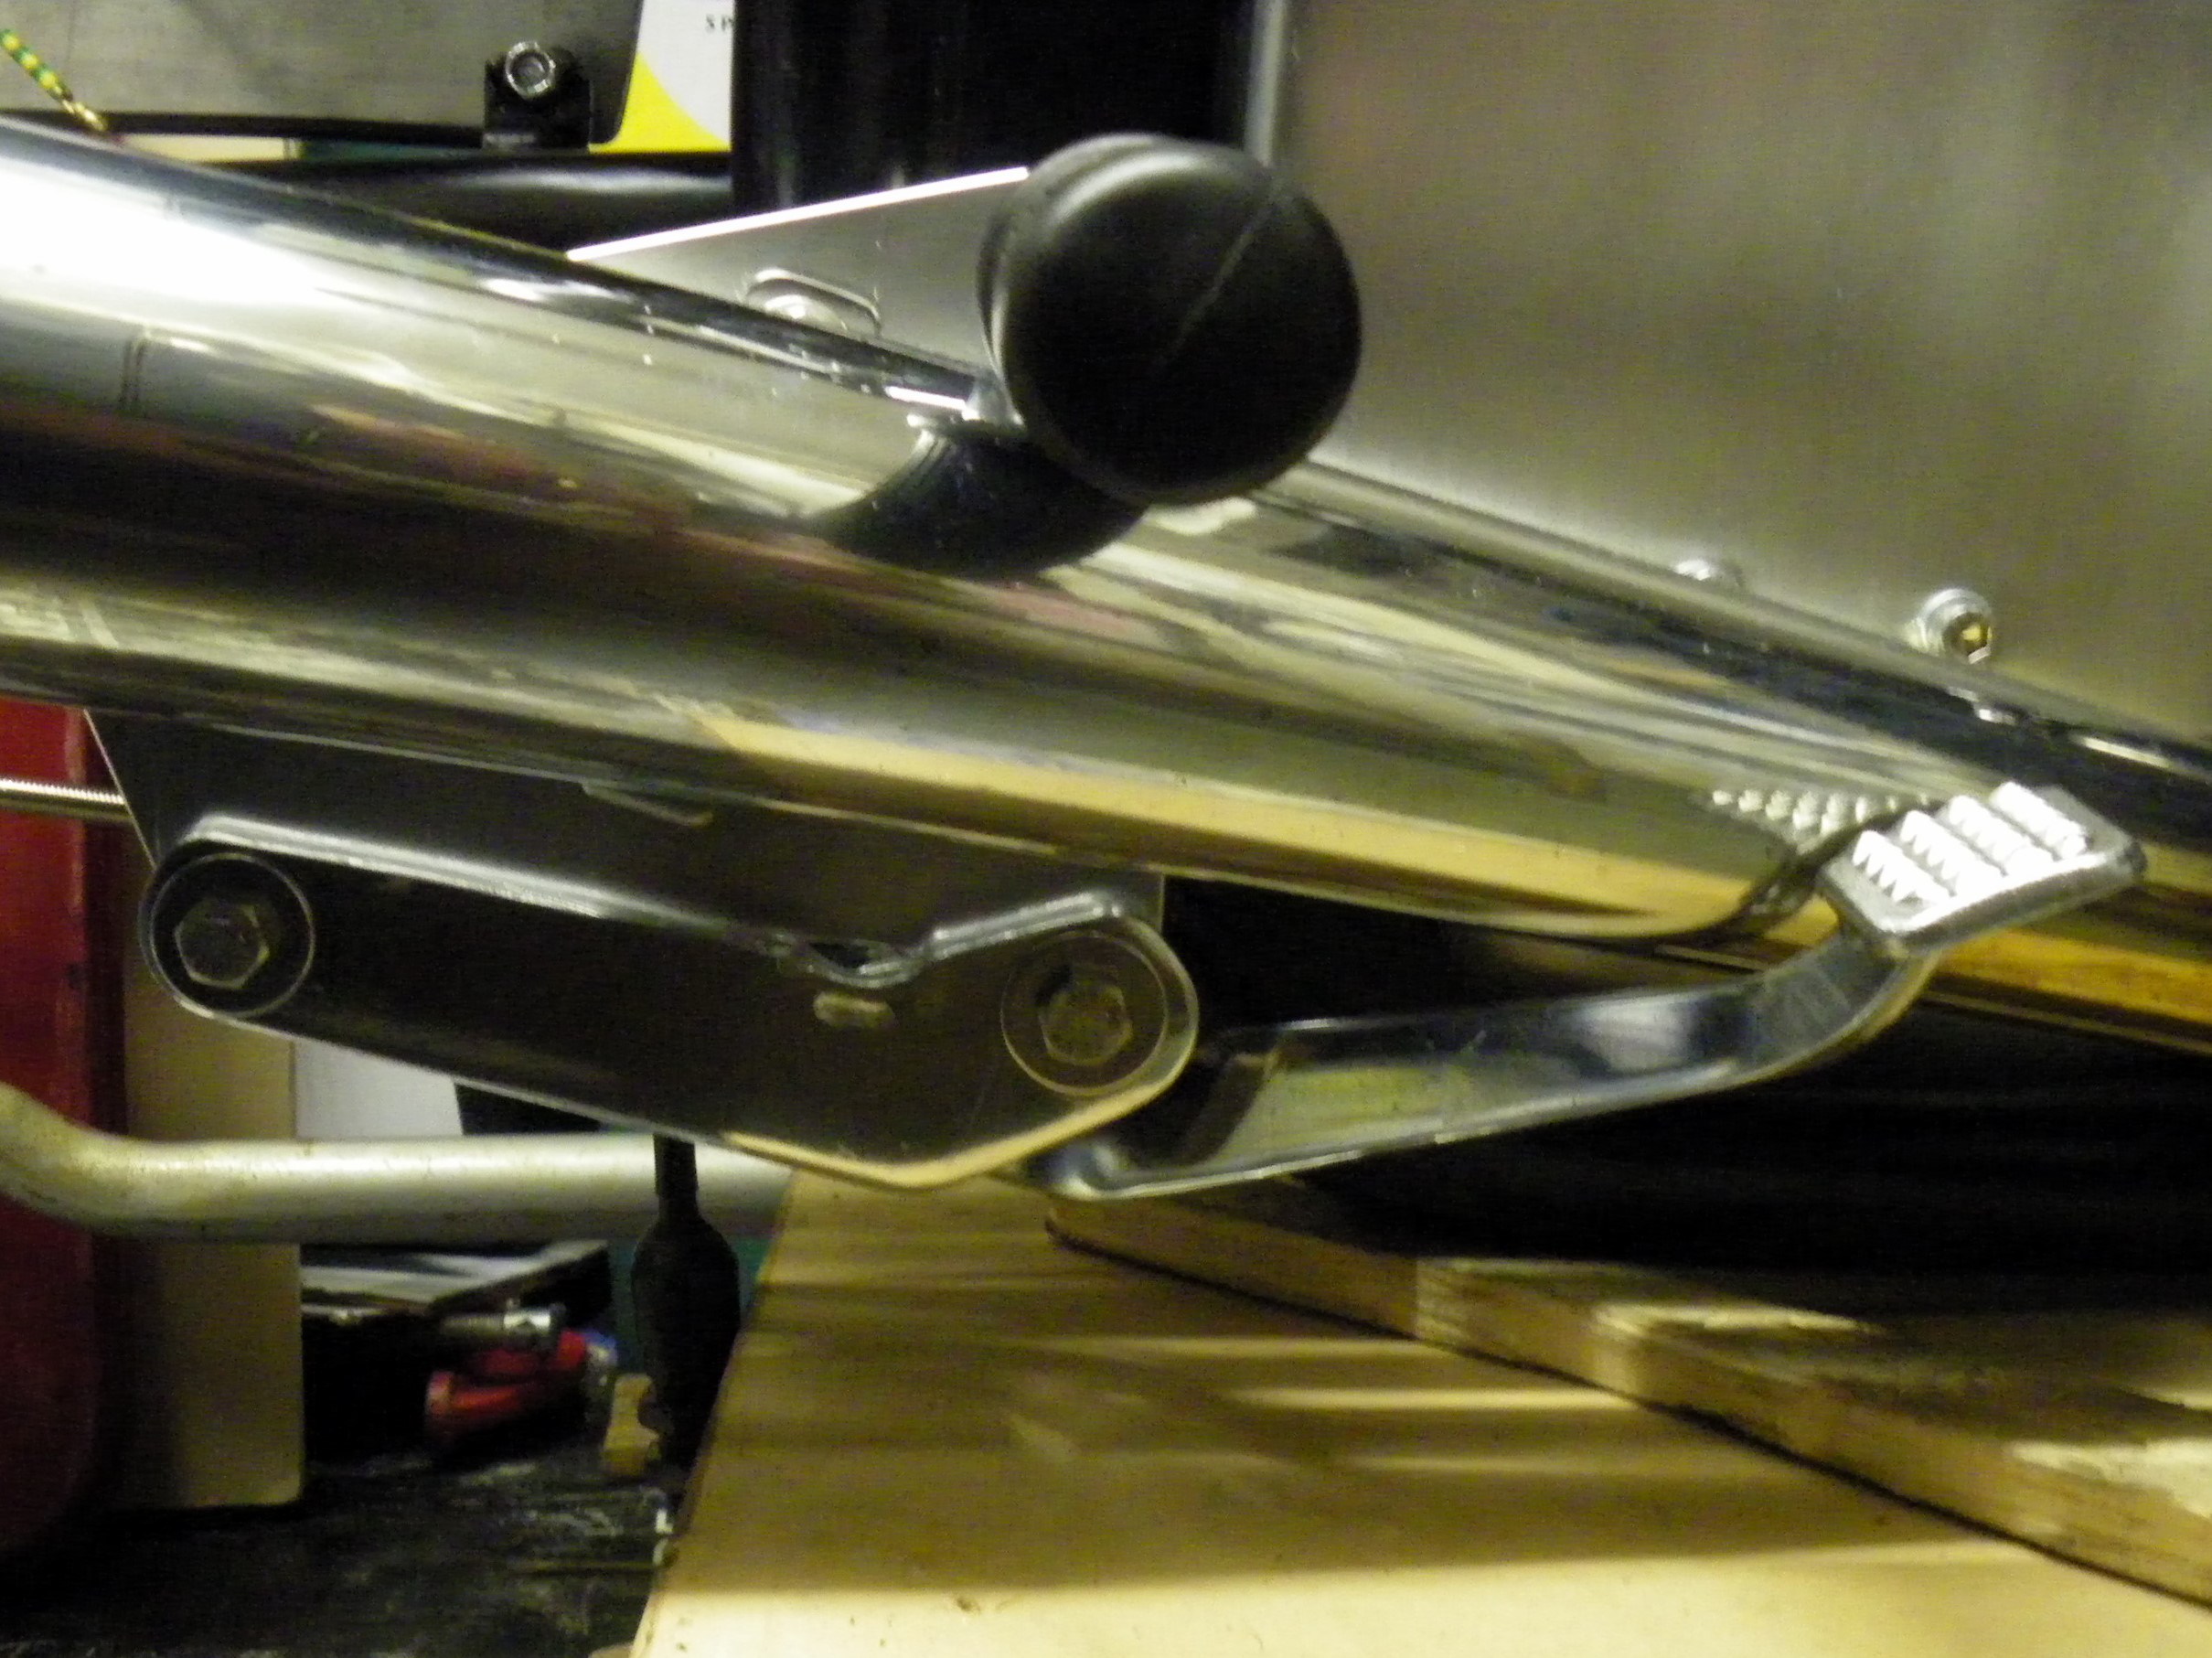
A Kettle rear sprocket, home-built chain guard and Hinckley Triumph gear pedal. Both front and rear wheel spindles were made by shortening a pair of Suzuki GS850 rear spindles bought for £1 each (you shouldn’t take chances with unknown material for something like spindles). The footrests are mounted directly on the ends of the Norton swinging arm spindle by using extra-long hexagon nuts that leave enough thread for them to screw into. He made the rear torque arm from a length of stainless channel section.
The Triumph gear pedal is connected to the Savage linkage by a length of M6 stainless hexagon. He used a lot of stainless fasteners, probably about 150 quid’s worth!
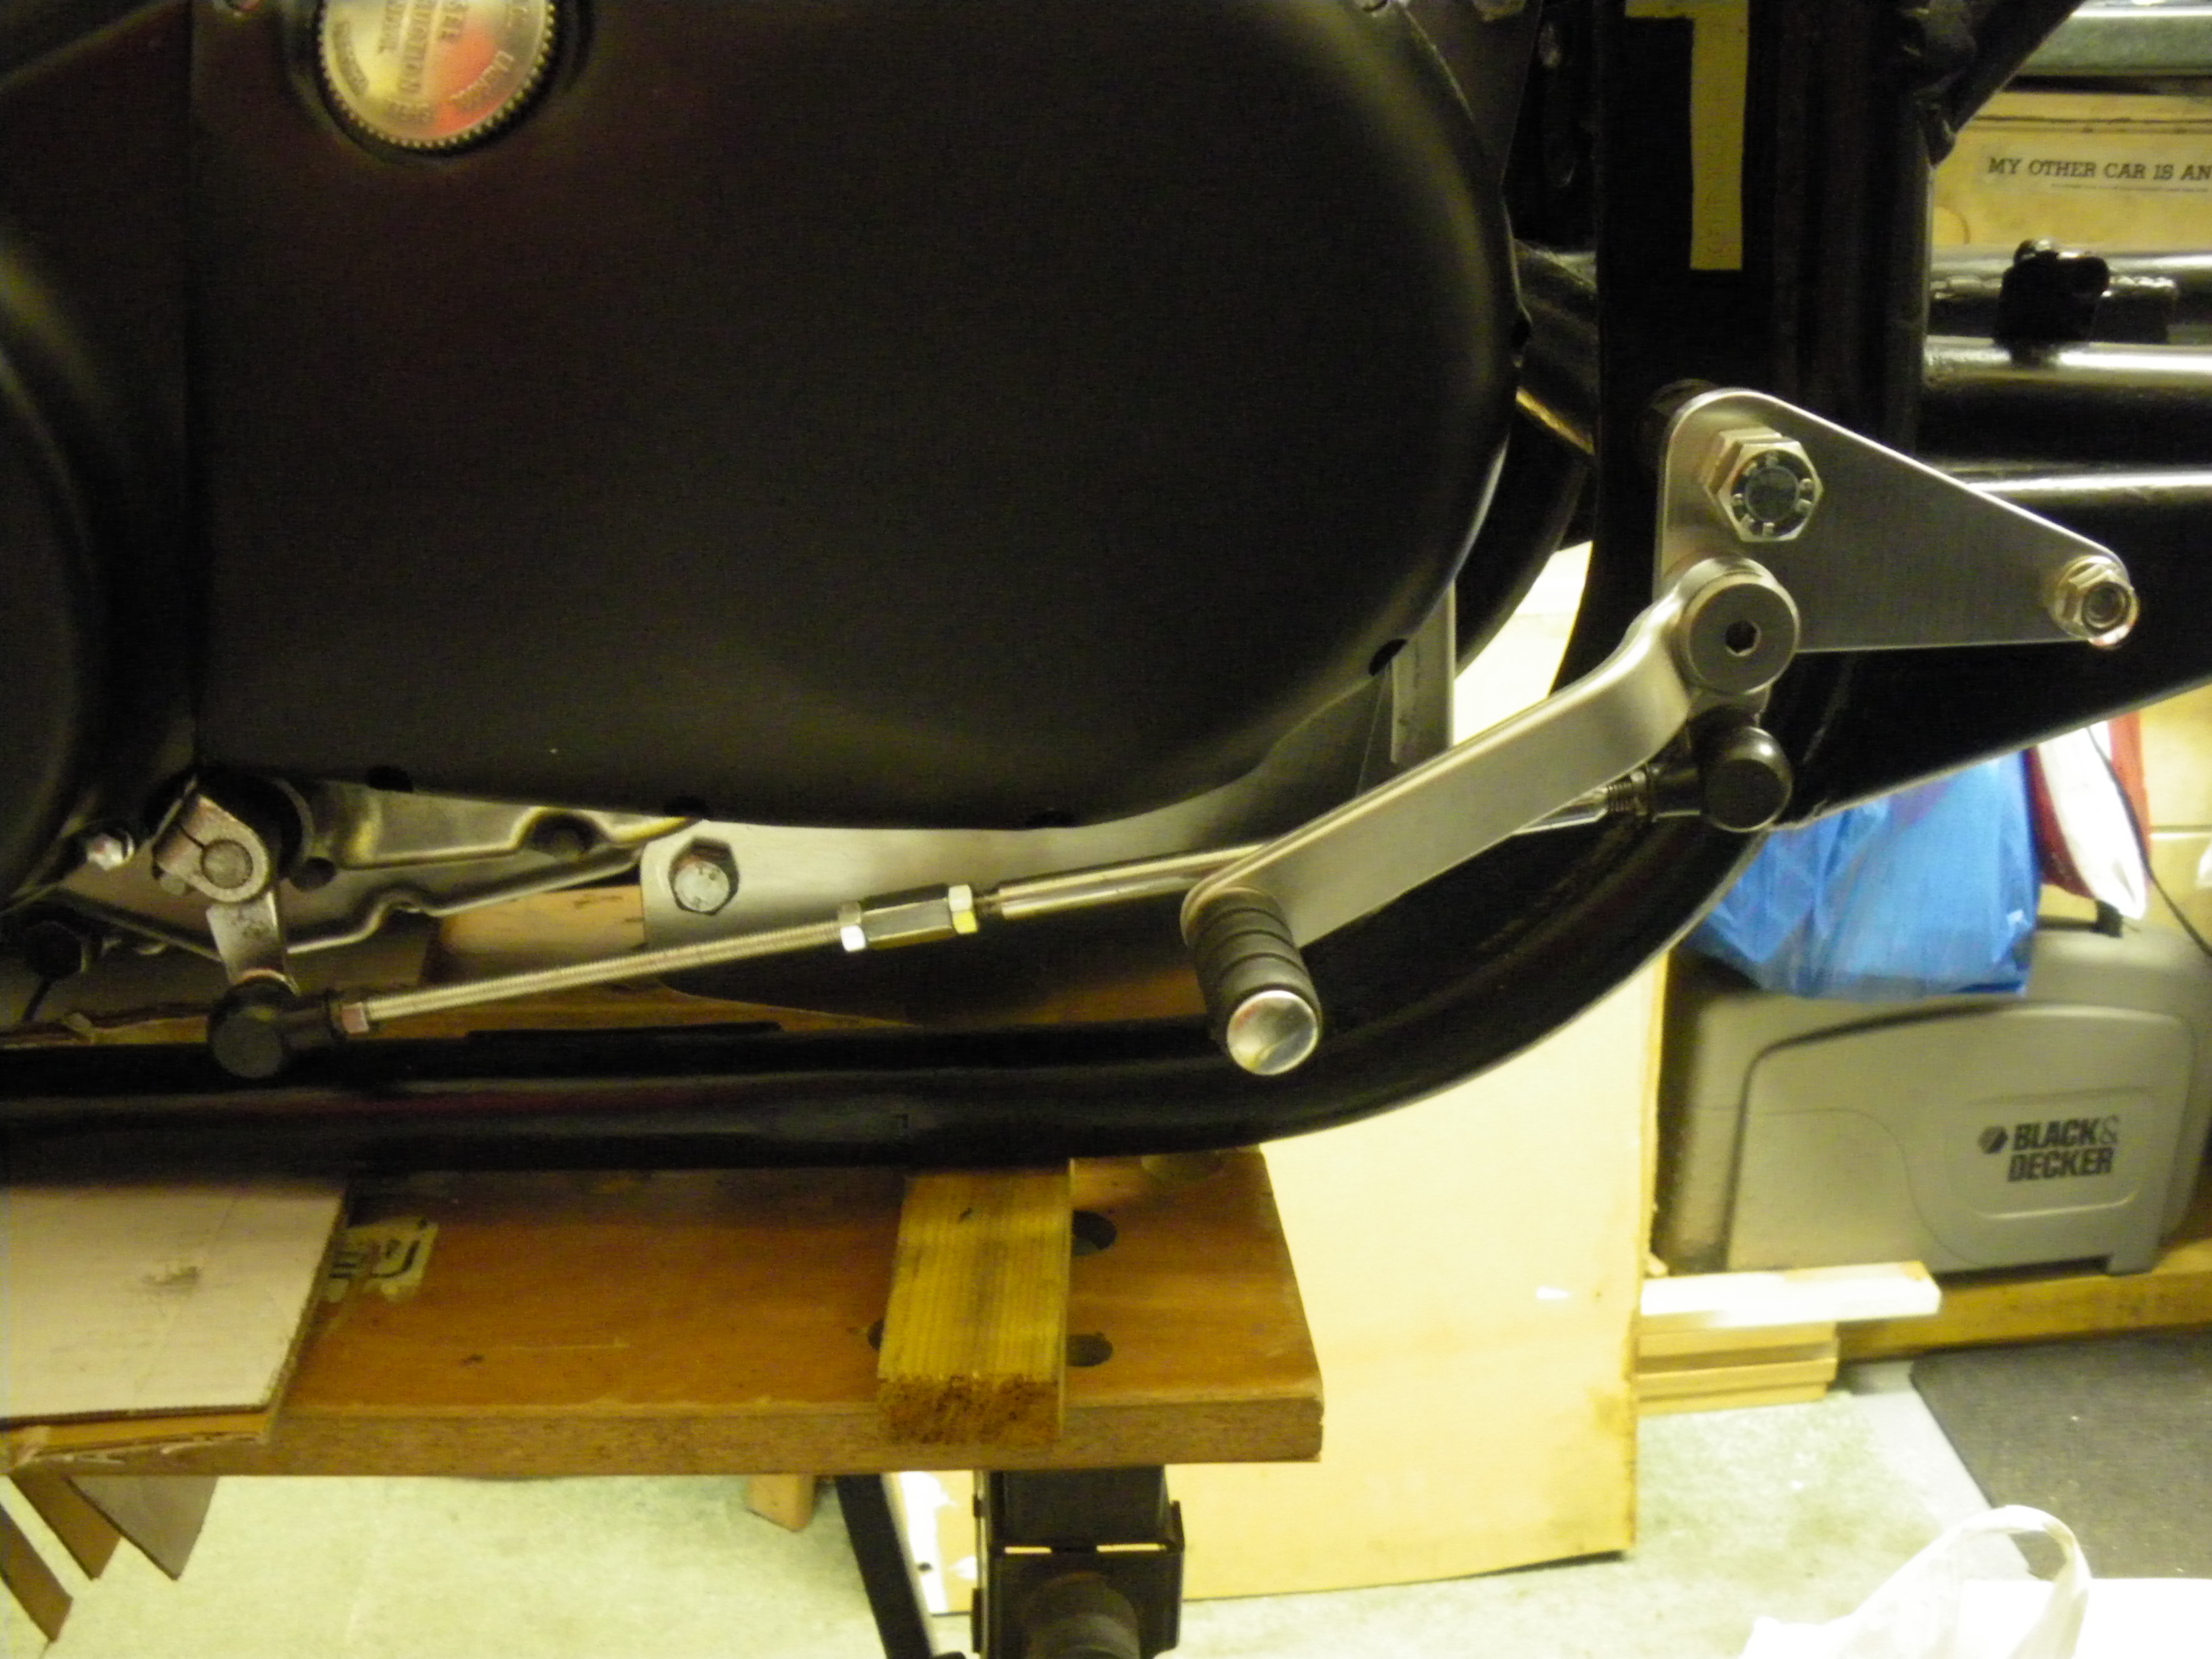
The rear brake pedal was a challenge: the sweep of the exhaust that he initially thought was so attractive meant the footrest had to go above and the brake pedal below. By now Manki was too heavy for the workmate, so with the help of two strong sons Martyn moved it onto a trolley.

After several unsuccessful trials he used part of the donor Savage brake assembly, mounted from an extended alloy plate that also carried the exhaust mount. The rear brake rod is 6mm stainless threaded rod.
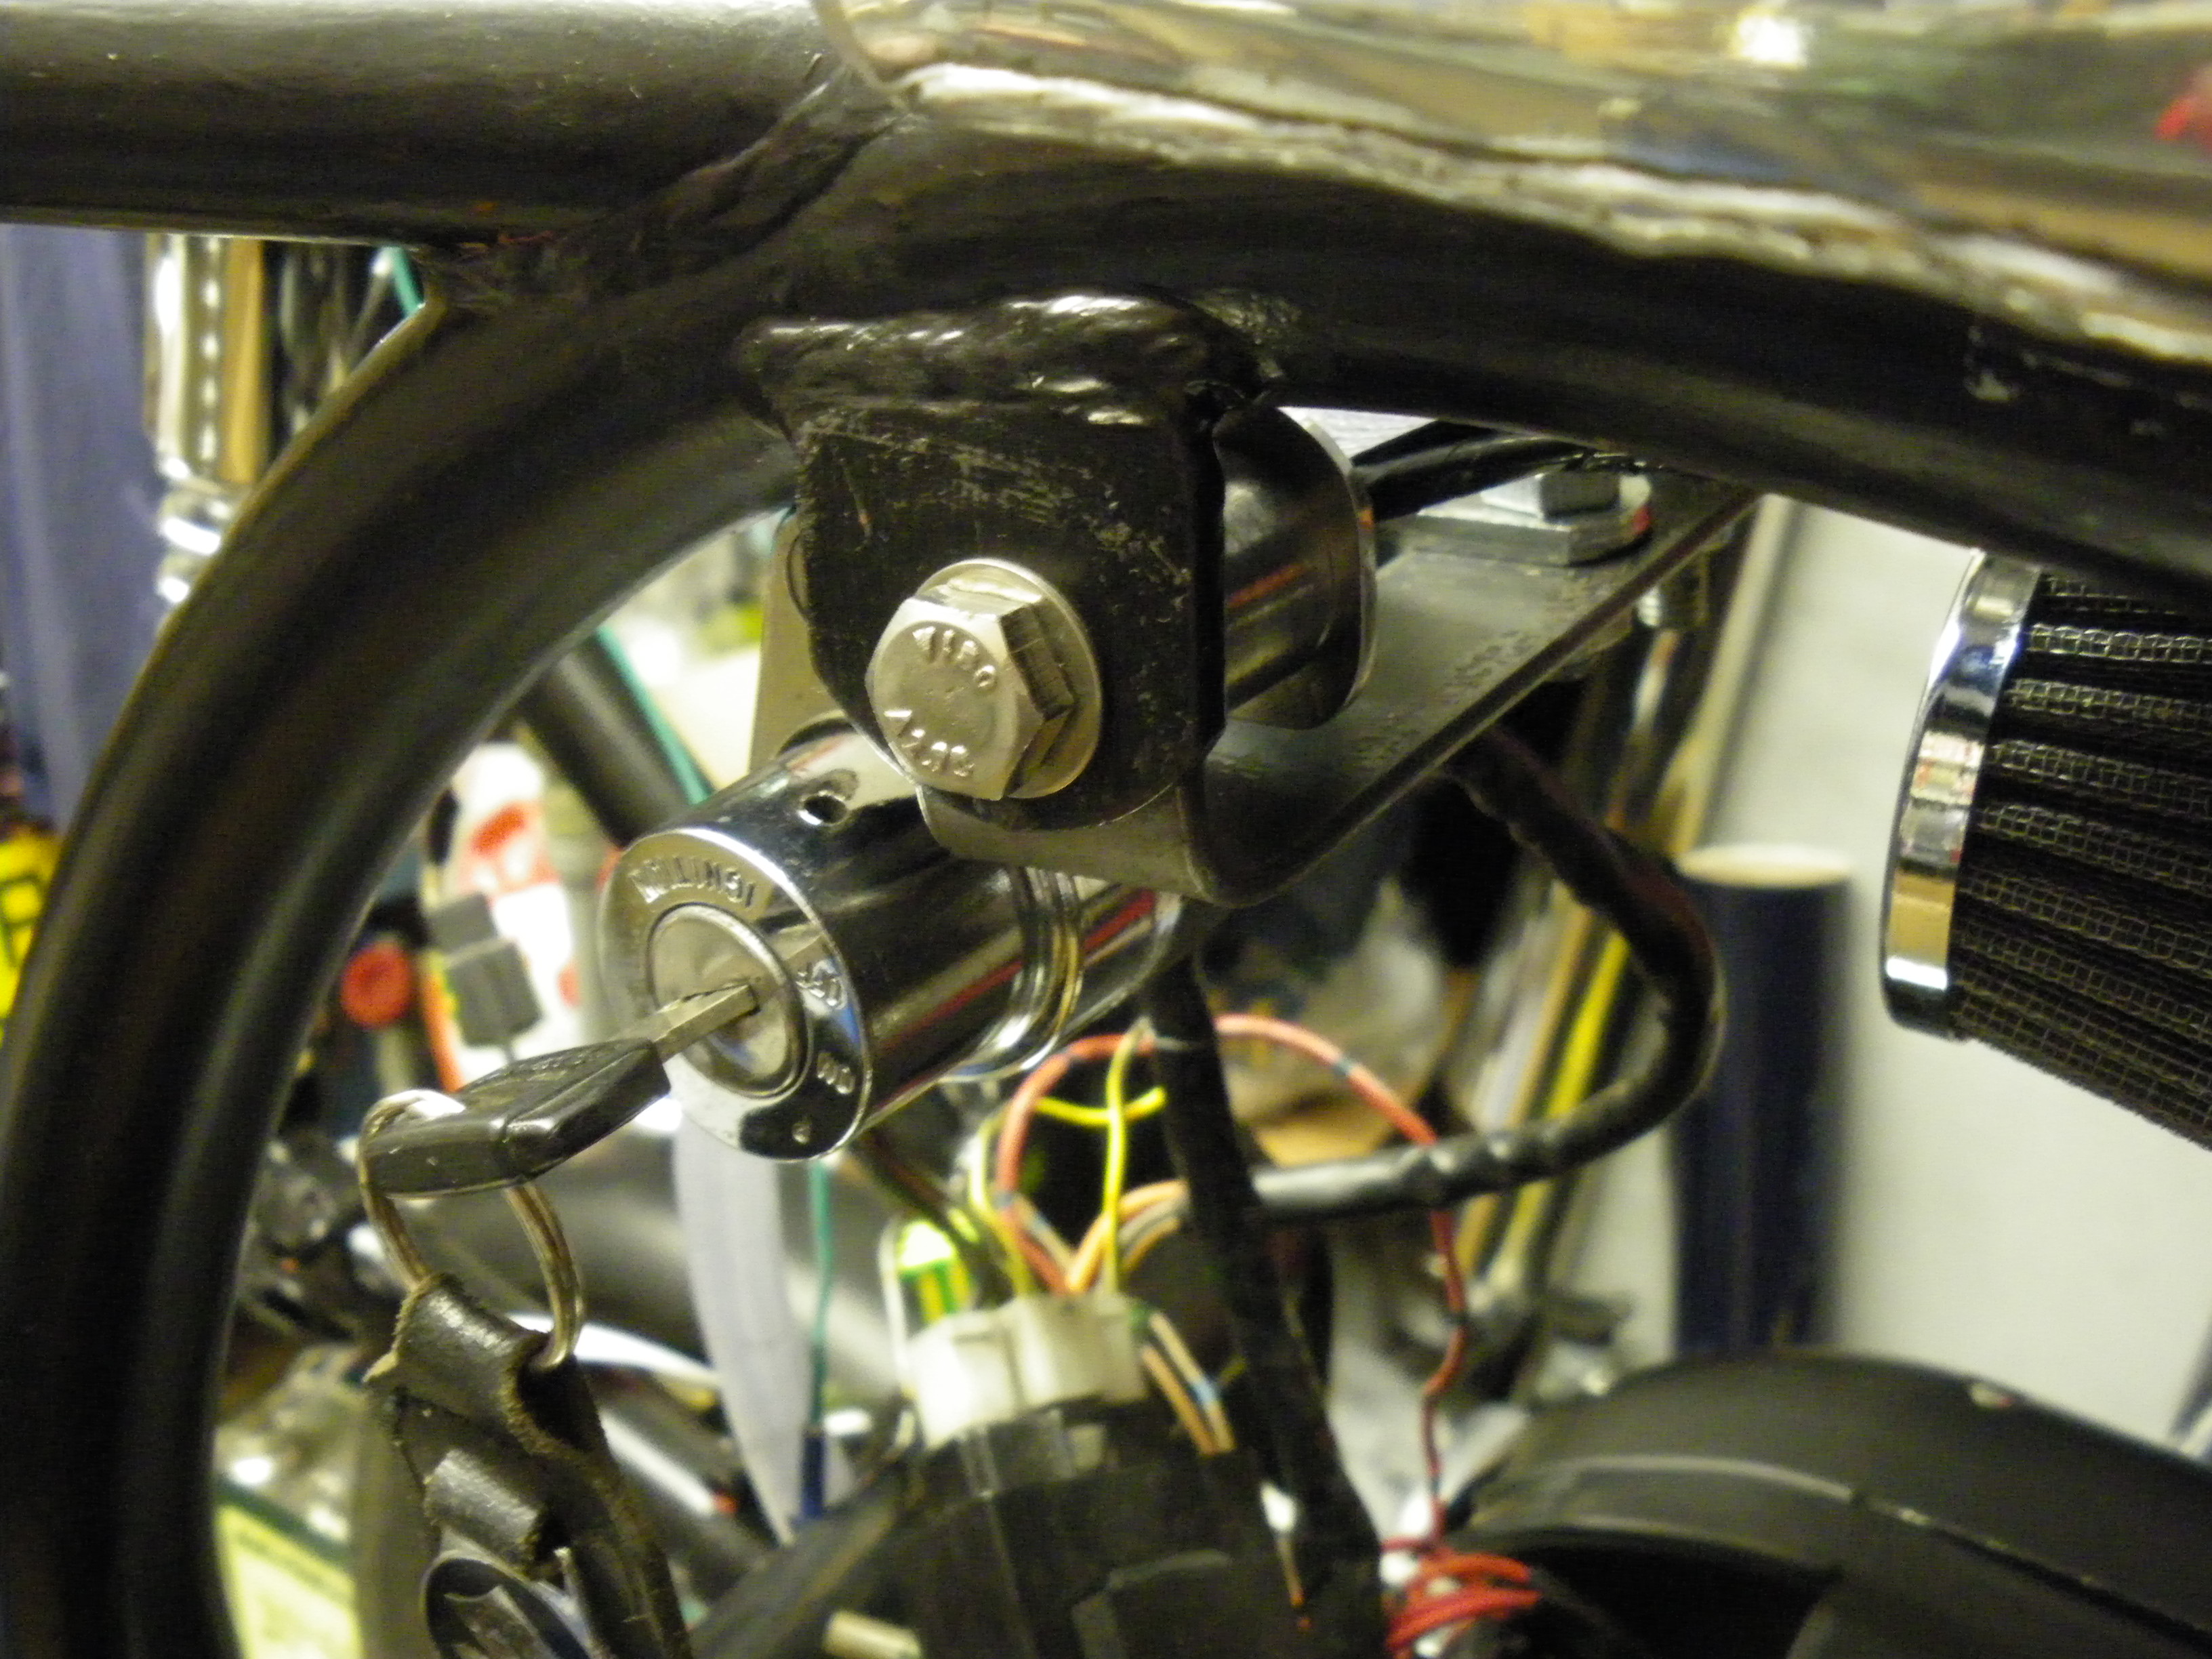
The ignition switch was tucked away under the frame so Martyn bash his leg on the key.
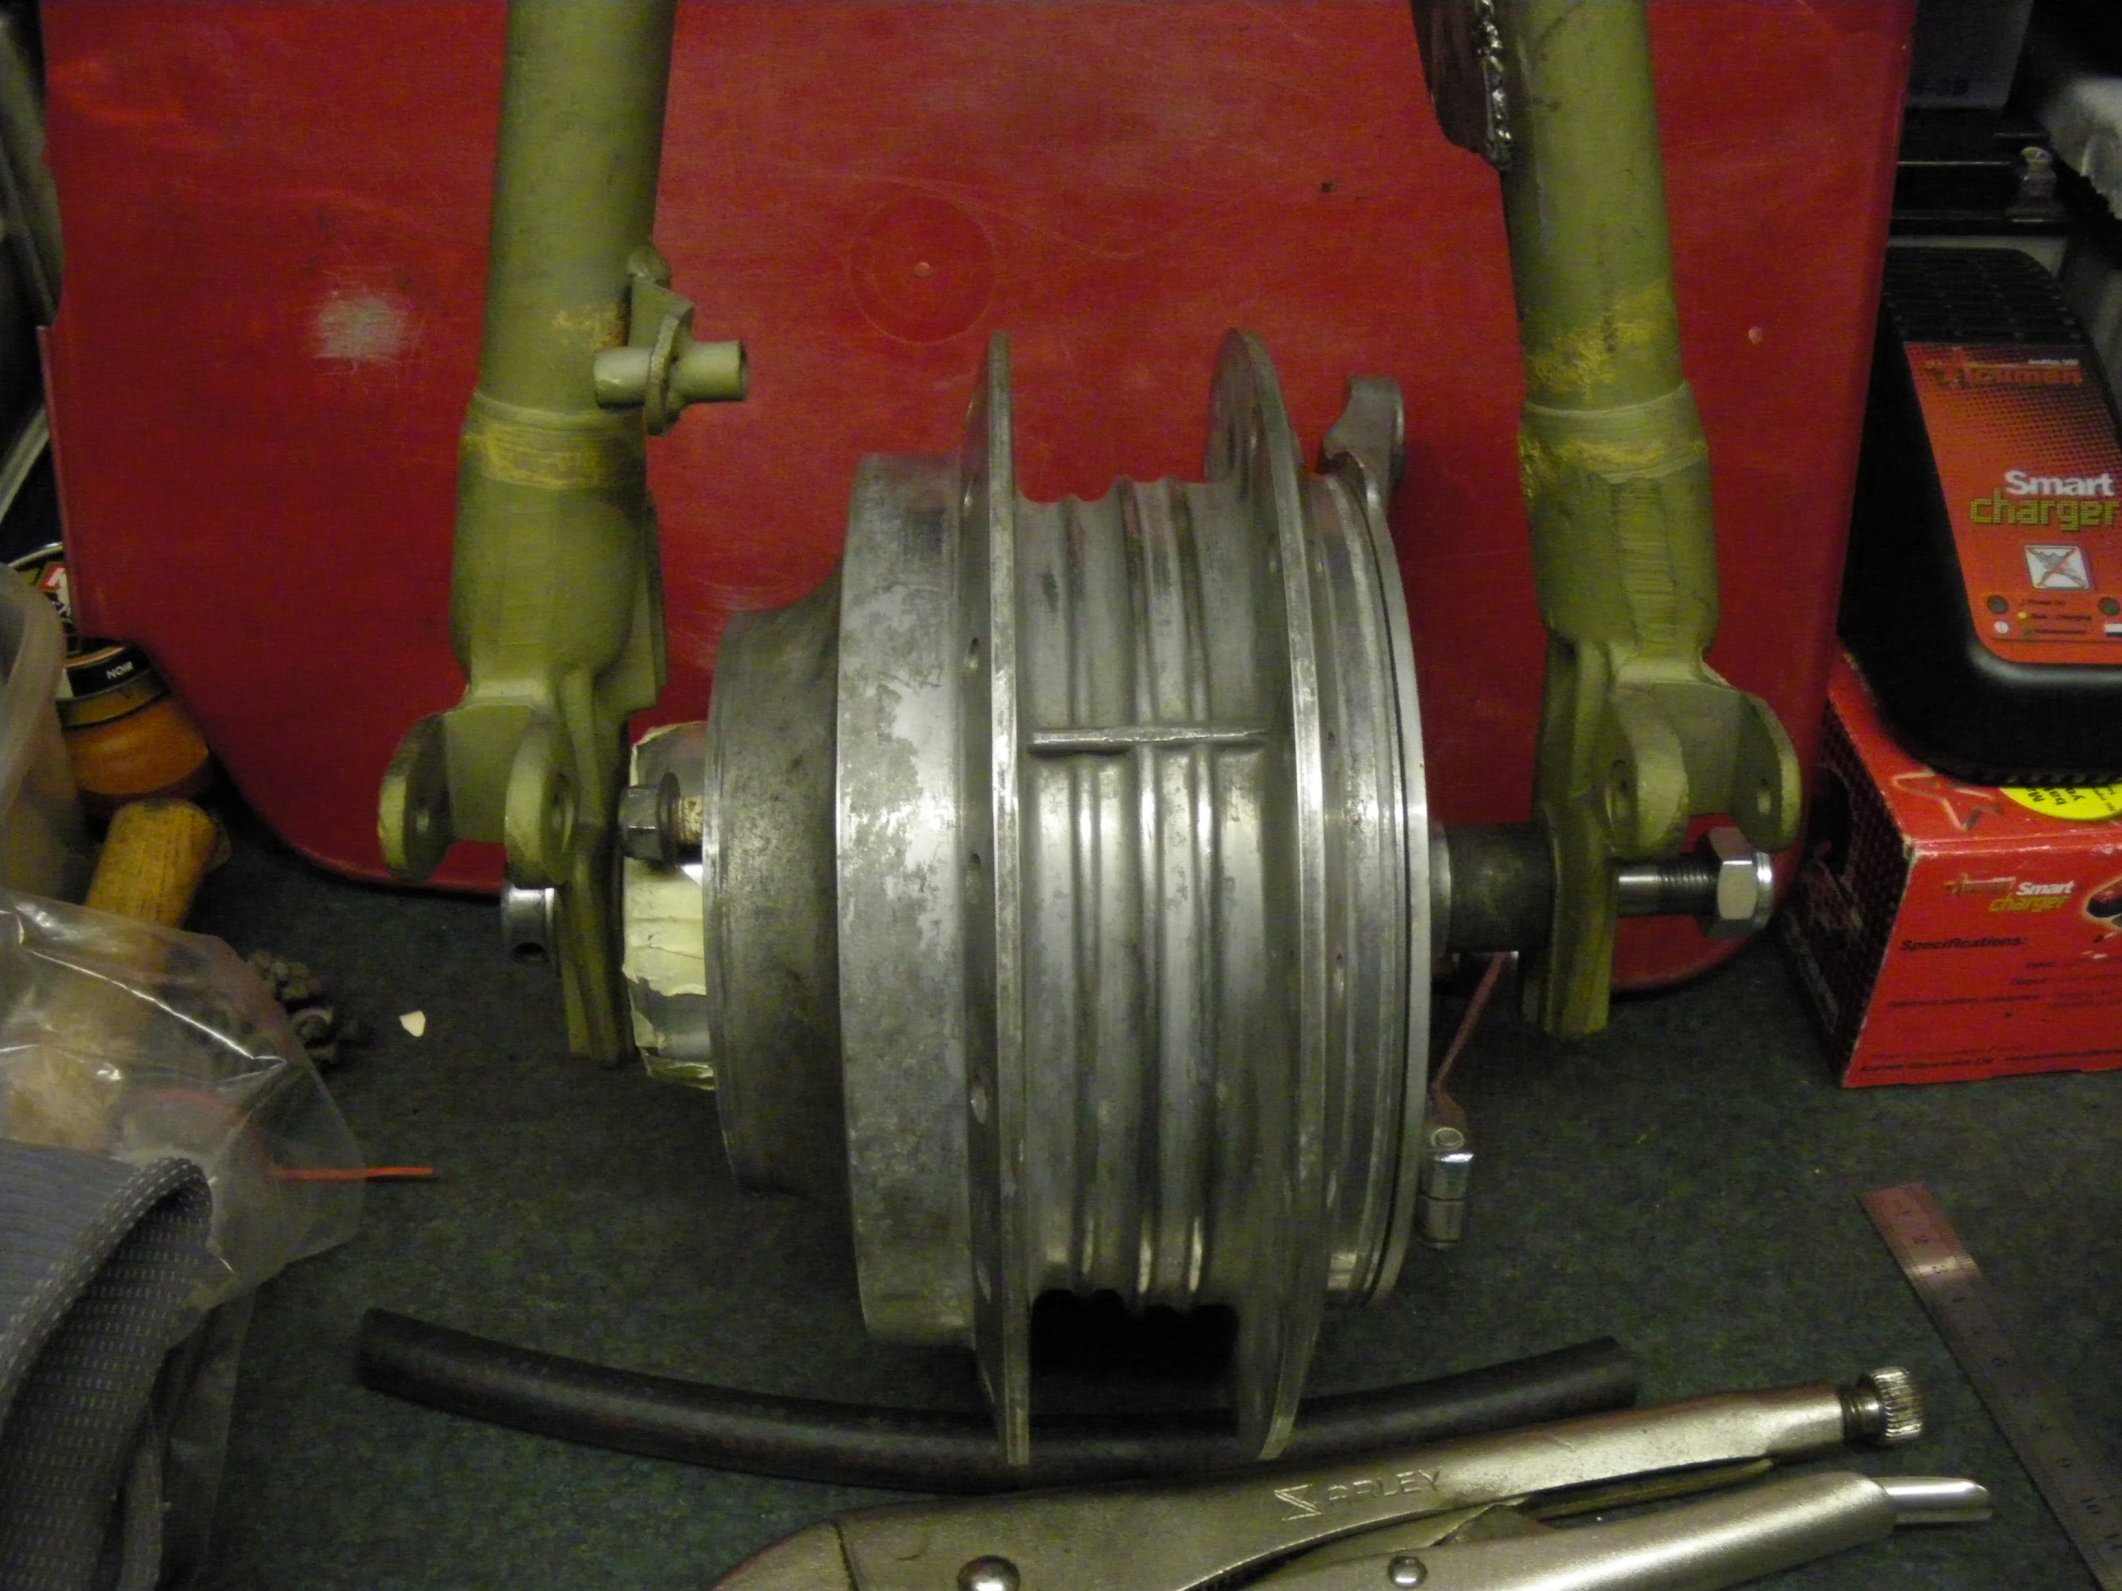
Time to start on the wheels. Martyn had never laced a wheel before but he found it easier than expected. This is the Norton front hub and rim, waiting for a nice shiny set of new spokes.

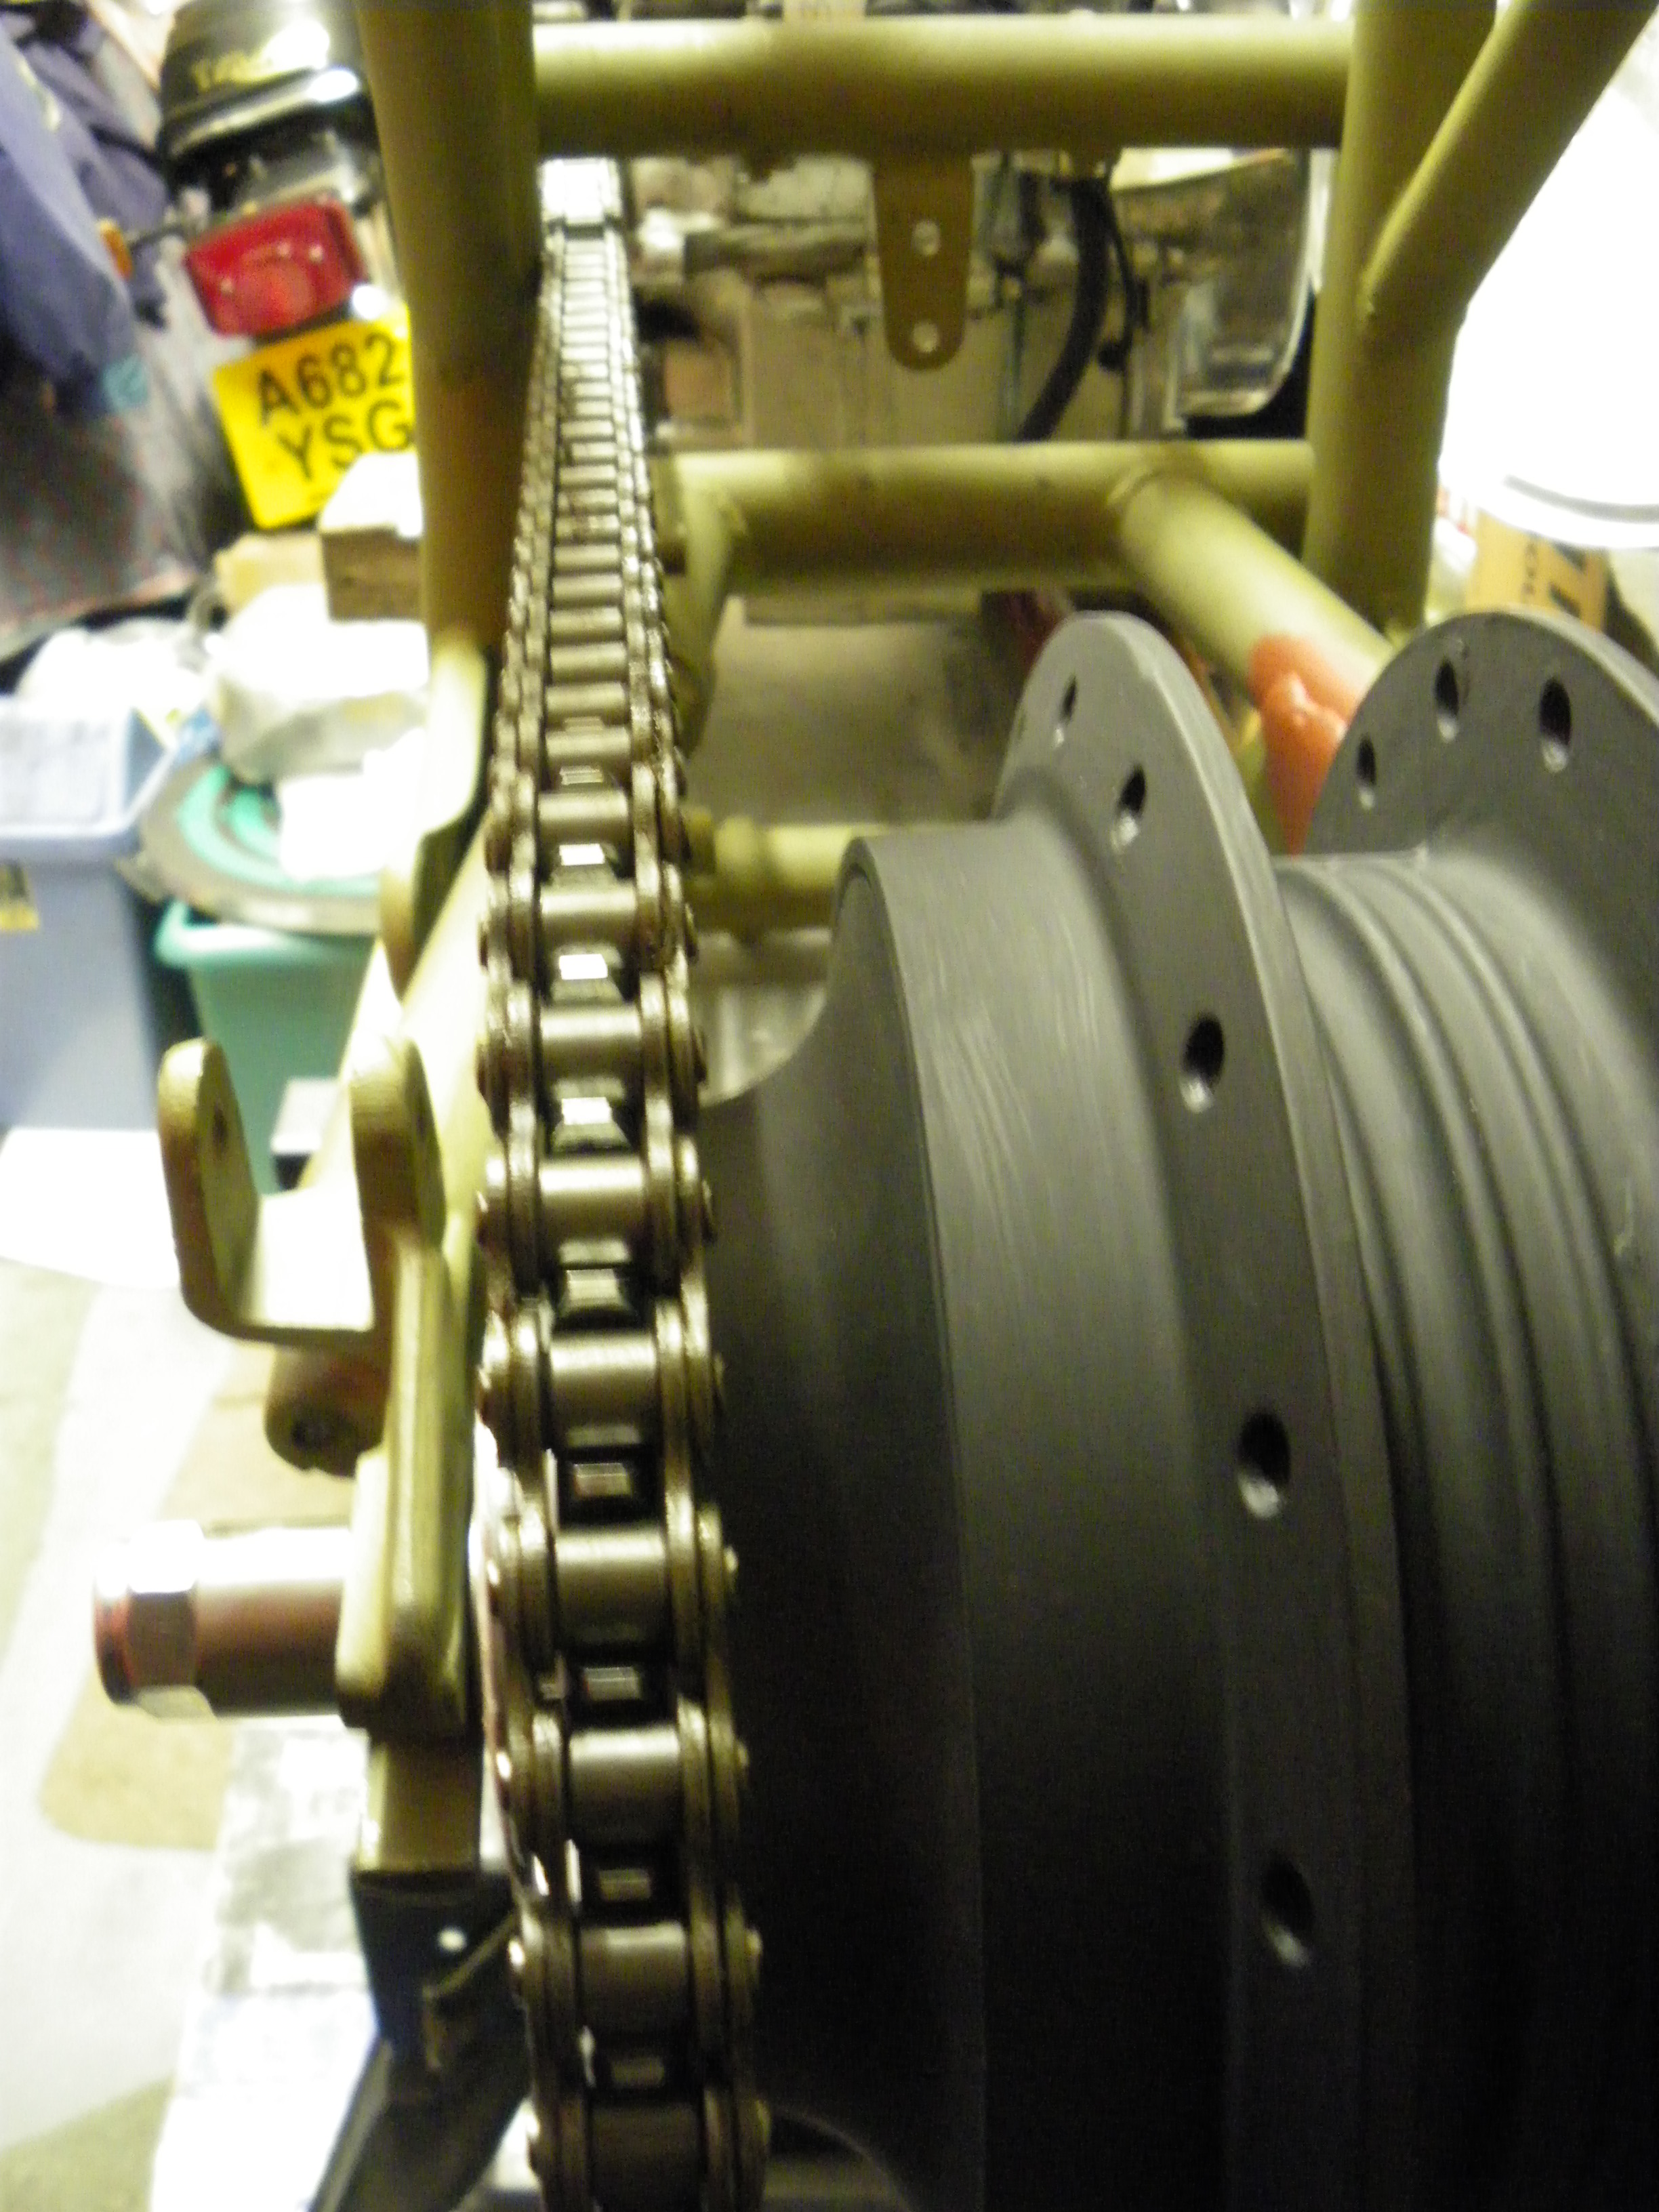
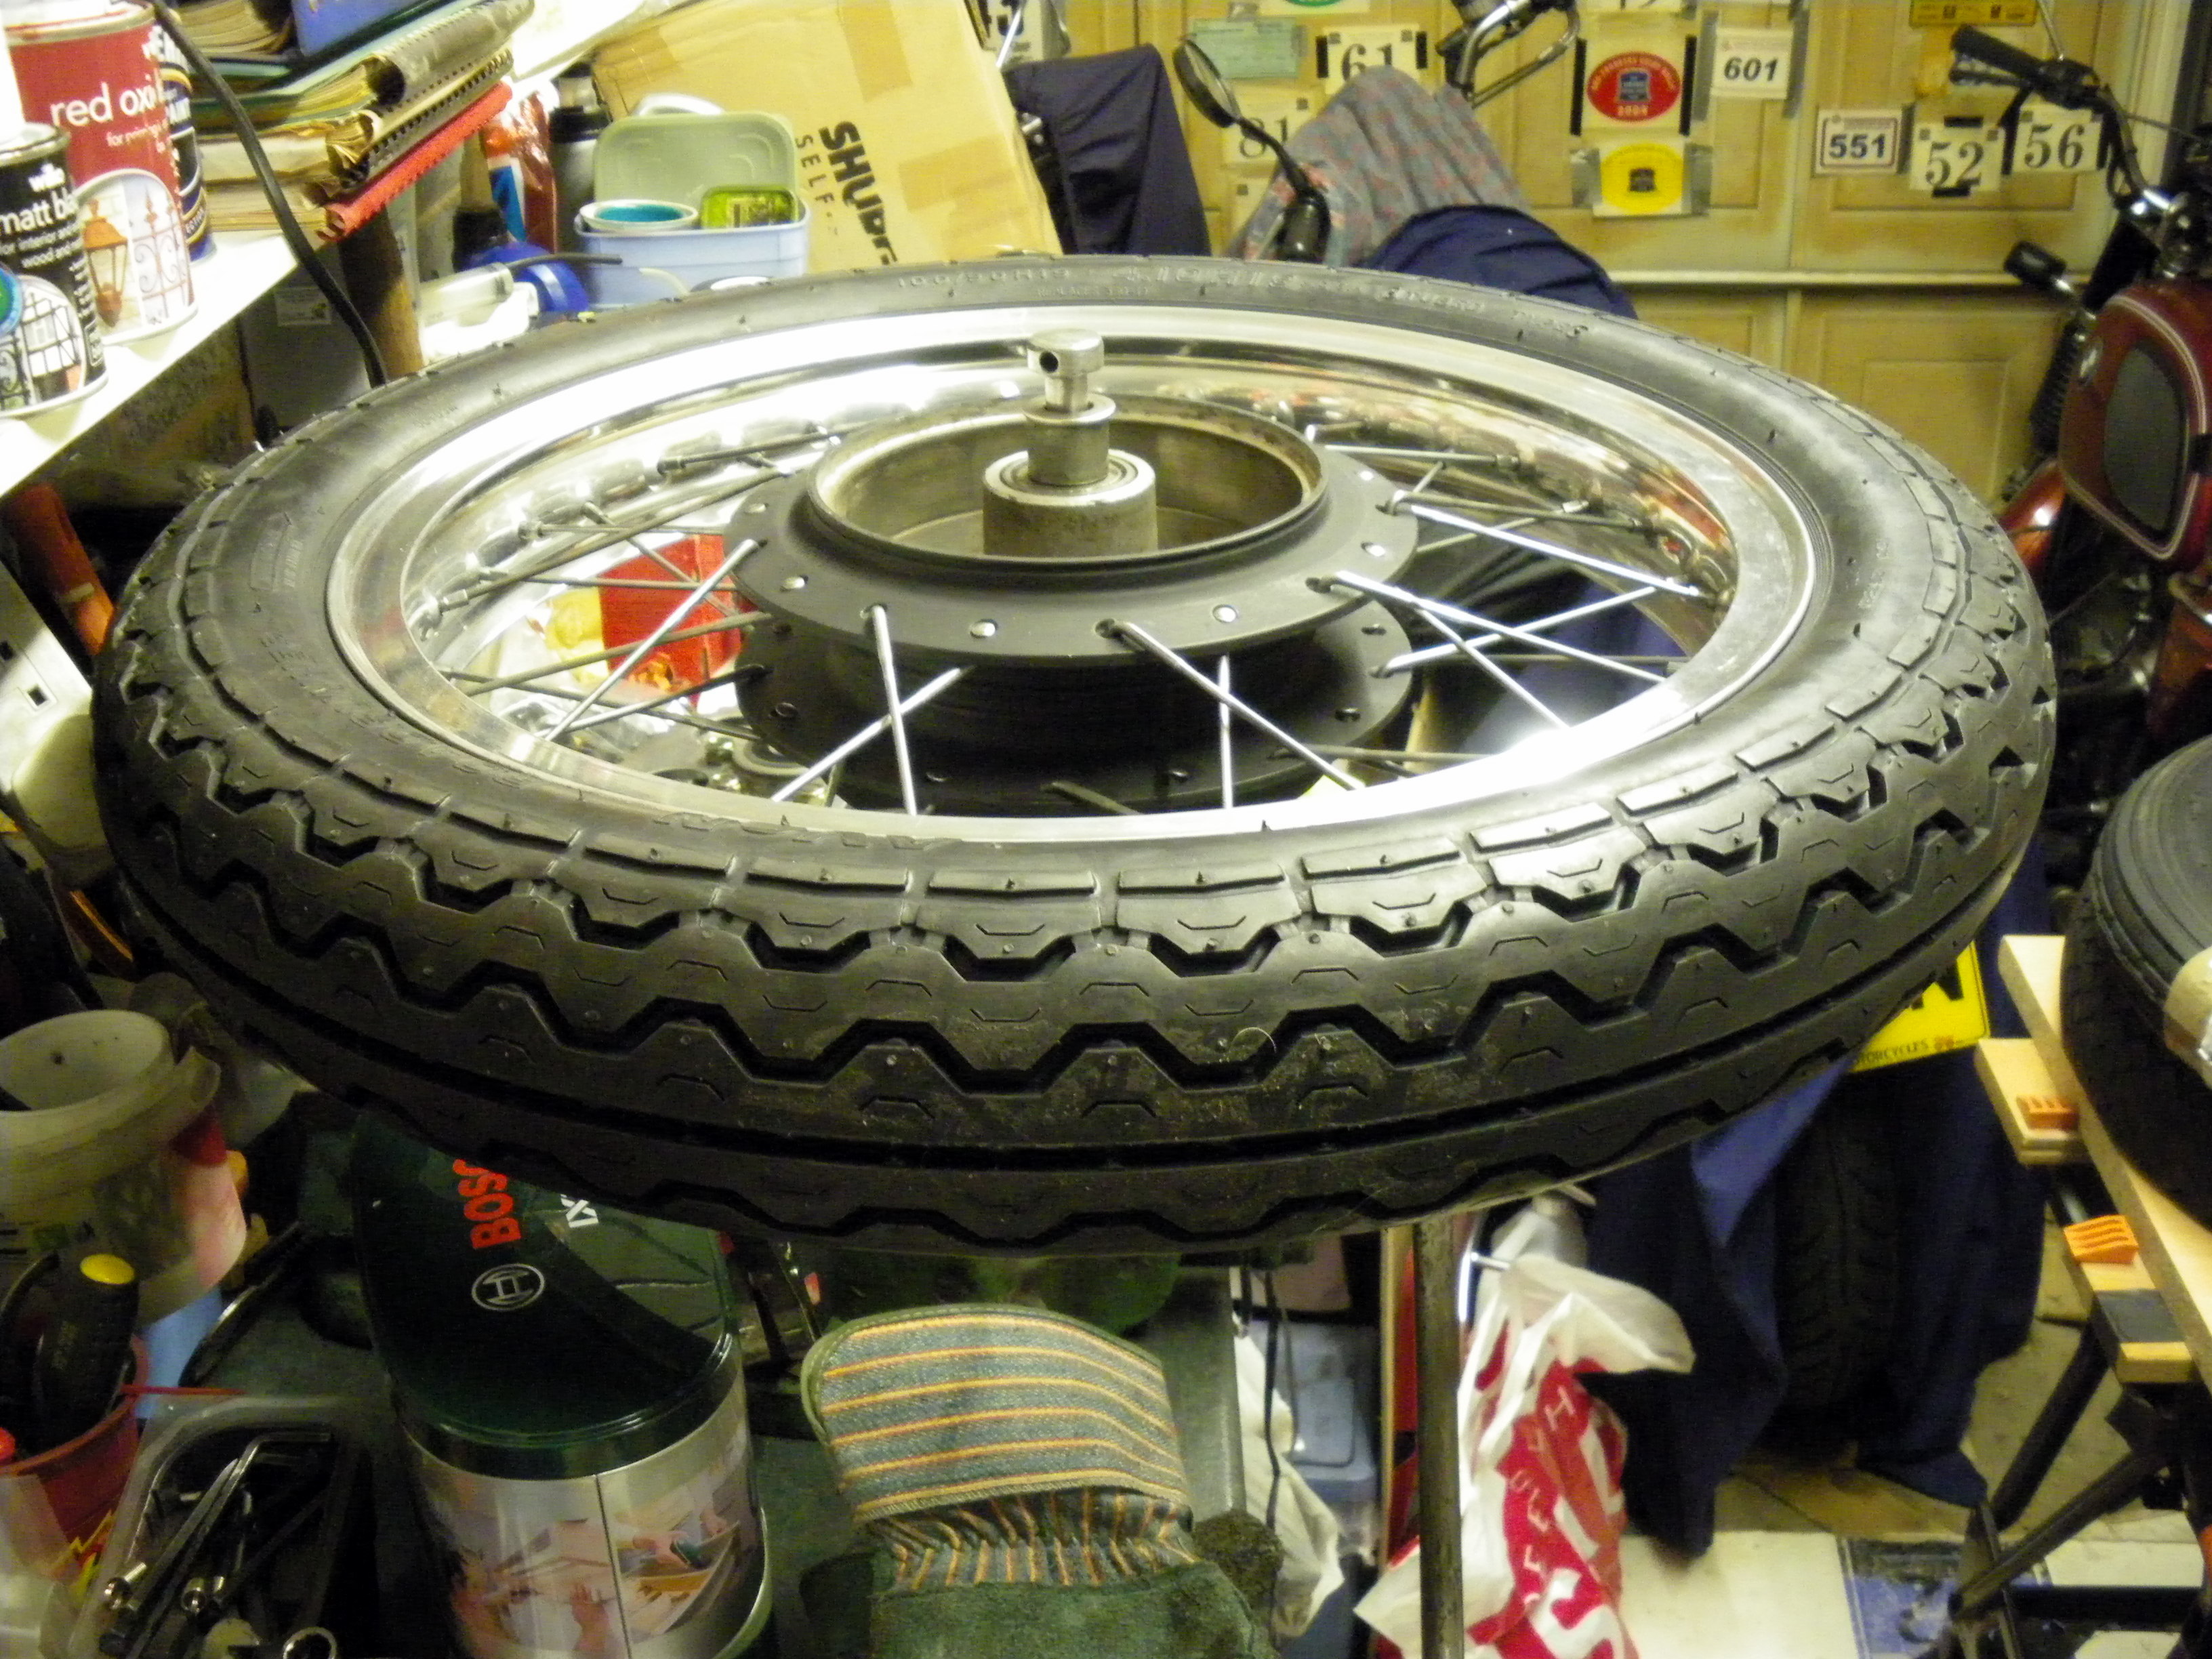
This is the rear Savage hub which originally had a 15 inch rim, being laced to a 19 inch. Amazingly, after a couple of false starts, Martyn found a set of 18 inch Norton spokes were just what was needed.

By mounting the wheel spindle vertically in the vice, he could easily check run out on the assembled wheel and tyre.
Manx Nortons don’t have horns, so he hid Manki’s horn behind the side panel.

The rear tank mount is actually a Hoover belt. The front one is a short length of inner clutch cable inside a plastic sheath. You can also see the engine breather pipe and the front seat mounting hole.
Front brake torque arm development: the sums said the front one was strong enough in aluminum but Martyn didn’t like the look of it so he made the second one out of stainless steel. He didn’t like the angle that was necessary so finally he made the one at the back – safe as houses.
The front end without the flyscreen: you wouldn’t think those are gpz500 forks. The headlamp ears are from an early 70s Suzuki 2-stroke and the speedo cup is from a 60s BSA. Fitting Kawasaki forks to a Norton frame just required an insert to make the steering head tube a bit longer to match the Kawasaki steering stem. A nice new set of taper roller head bearings finished the job.
The gearing was so far out with the bigger rear rim and new sprockets that he had to recalibrate the speedo. The original 100mph scale was replaced by a 120mph scale printed from Martyn’s computer. Subsequent road tests (against a lad’s R1) showed it was still under-reading by 10mph at 70 so this year he made another one. Actual top speed is about 95 – not bad for a 30hp bike!
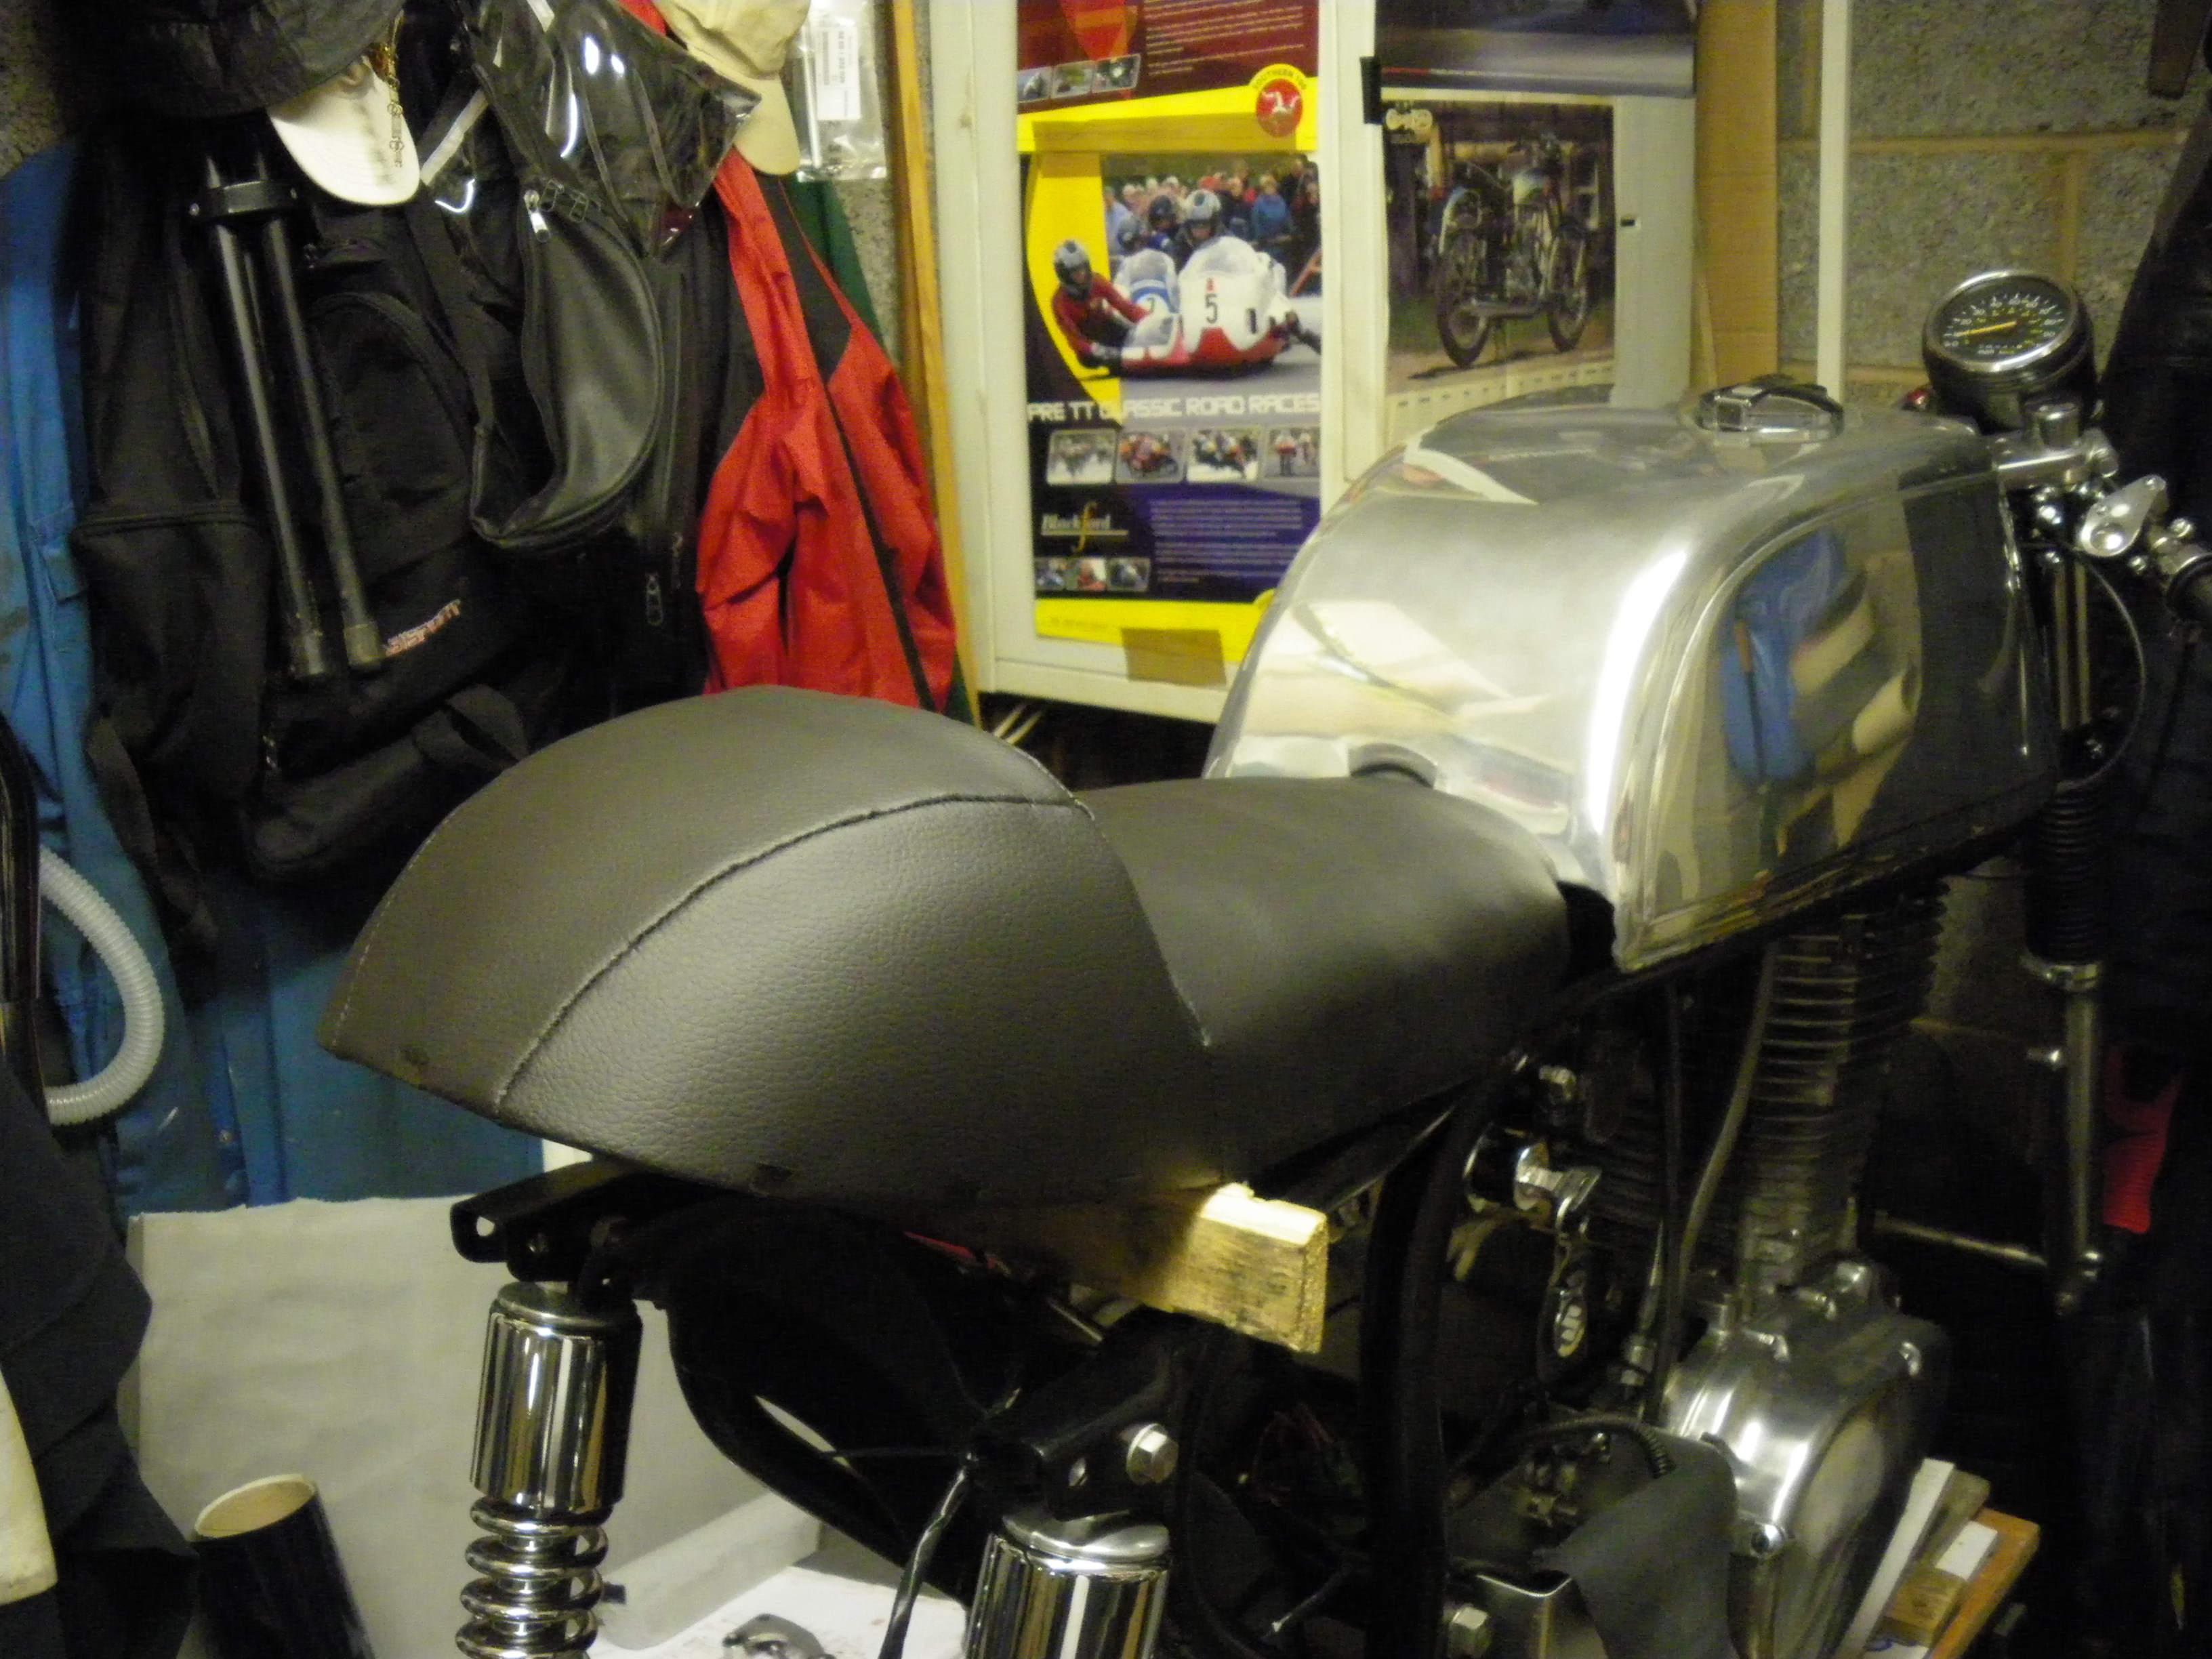
Everybody uses the same off-the-shelf seats so Martyn decided to make his own, starting with a fibreglass race seat base.

After cutting some foam for the seat Martyn made some newspaper templates of the shape of the seat and cut out the upholstery.
Martyn’s wife’s sewing machine was, uh, off limits, so he had to sew the bits together by hand – the trick (Martyn offered) is to do it inside out so when you invert it the seams don’t show.

The seat, almost finished, waiting for a trim round the edge to hide the clips.
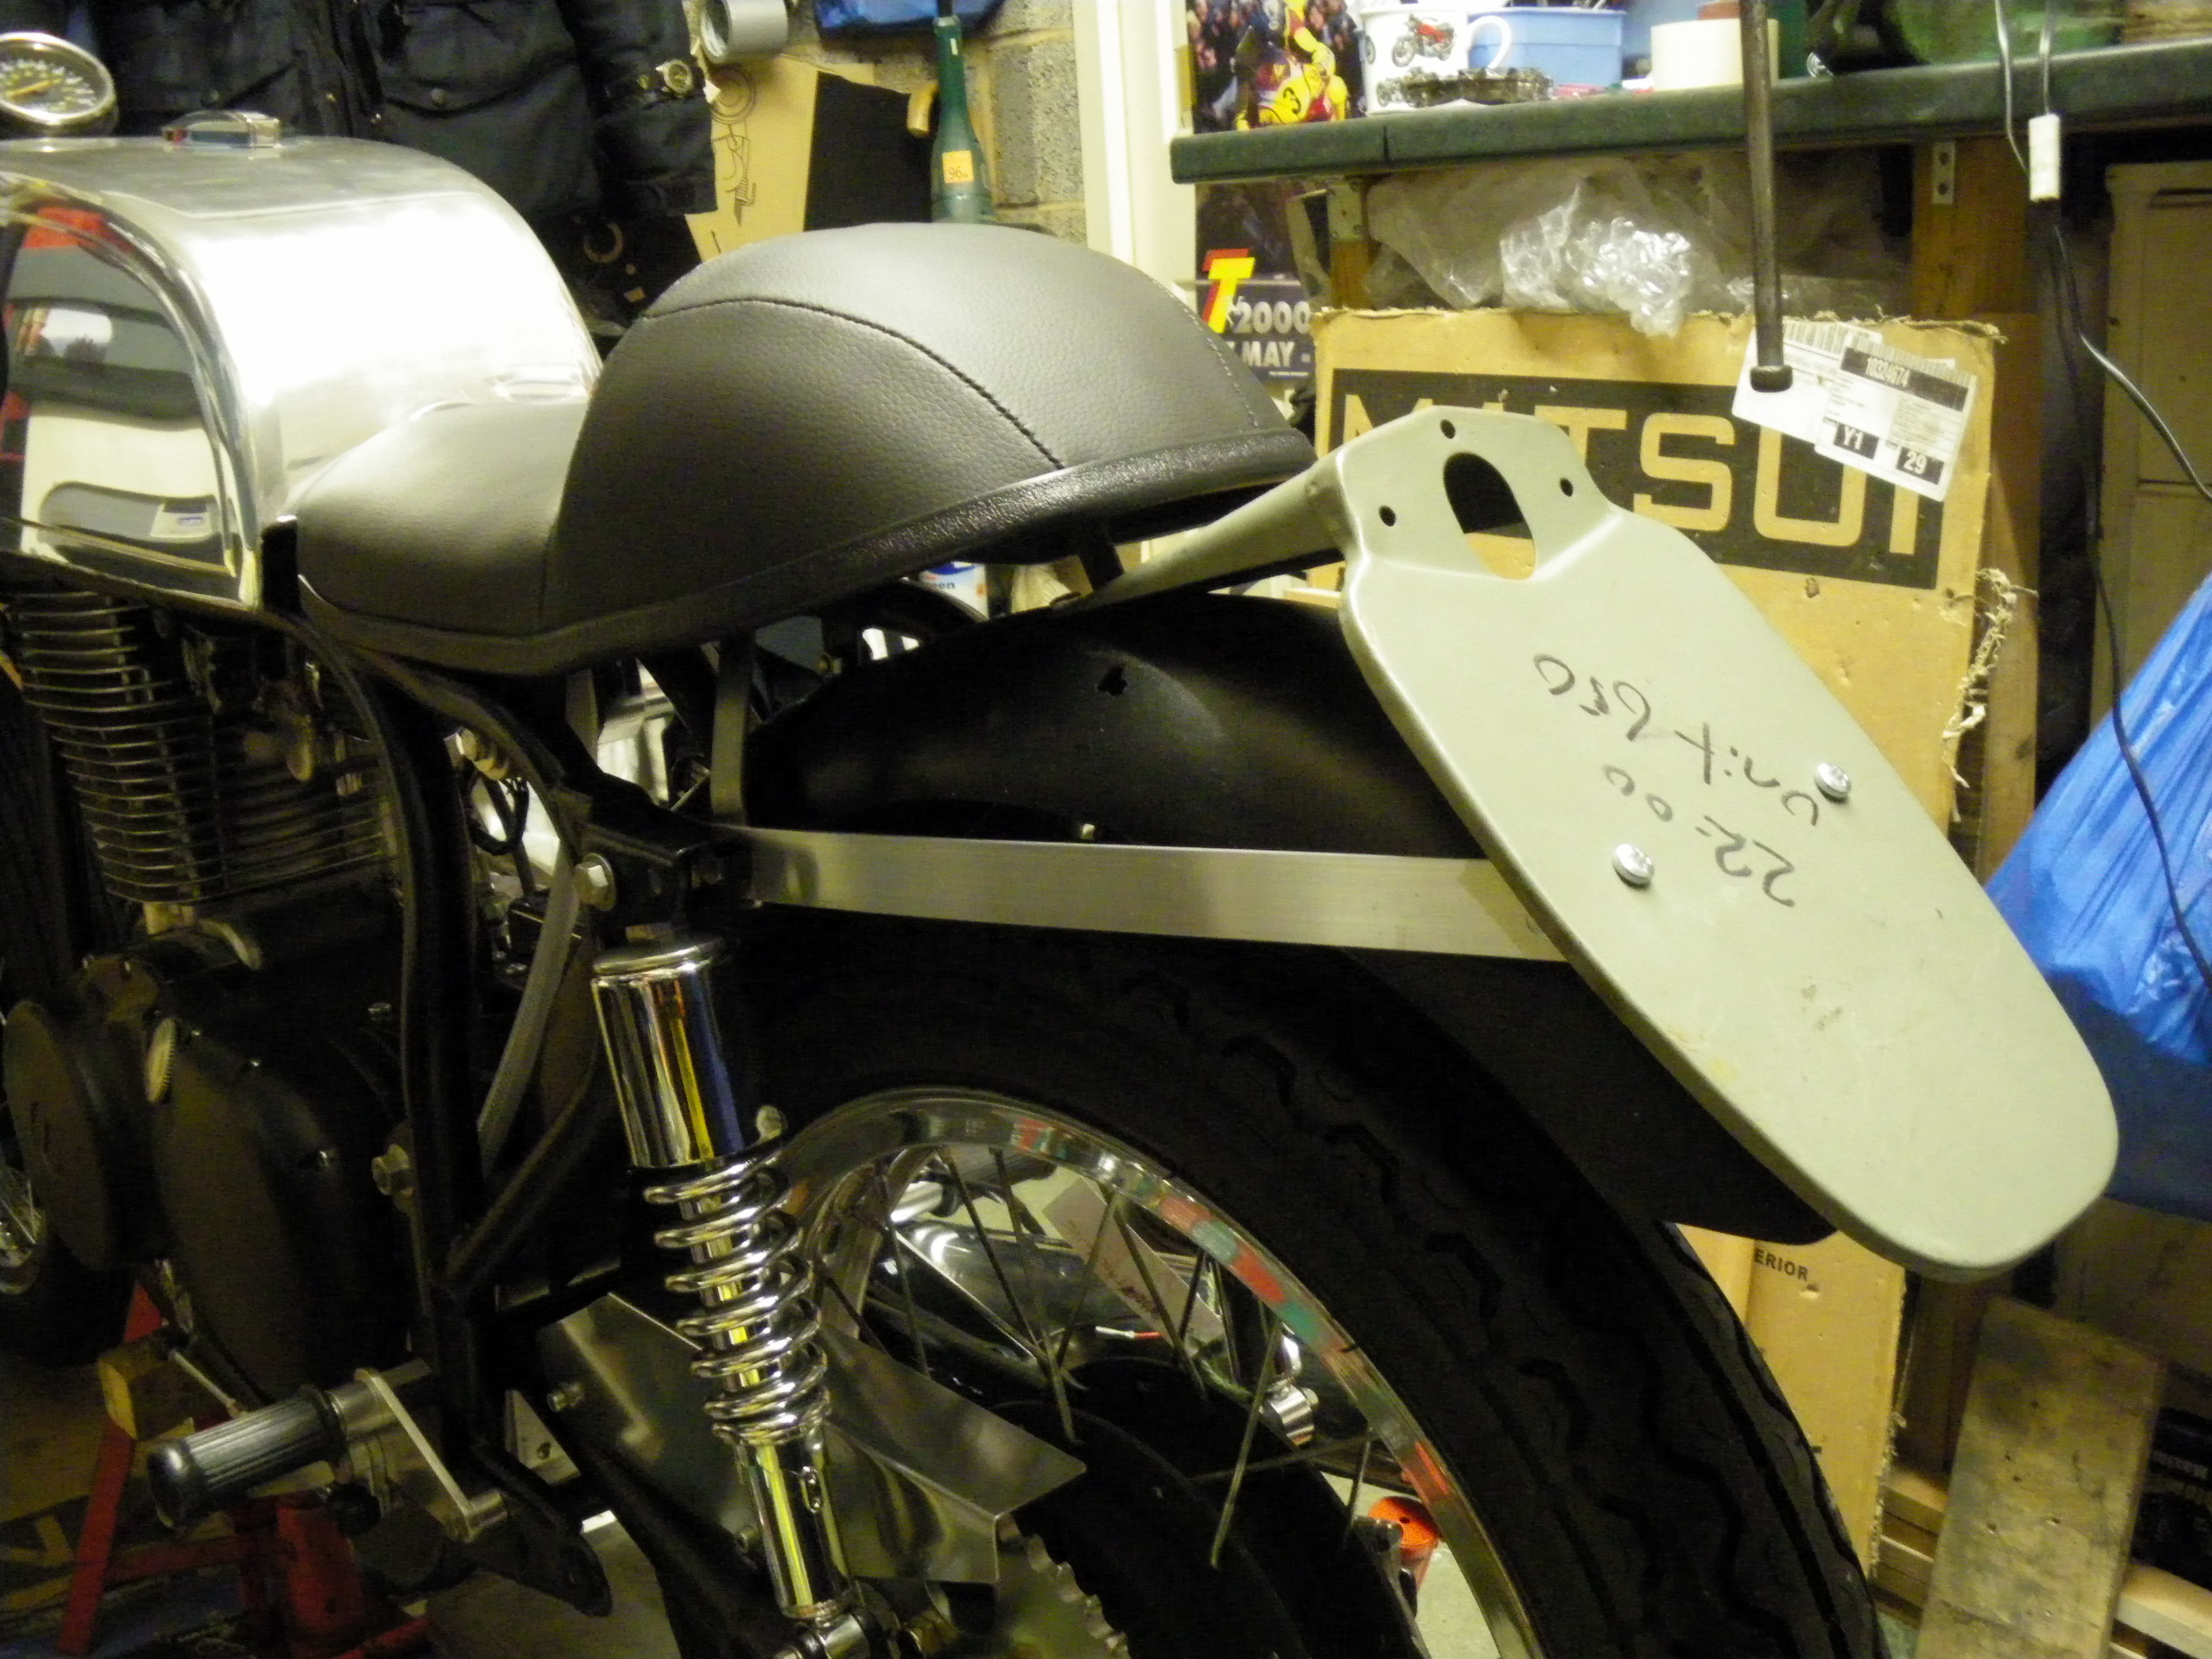
Lots of people run illegal rear mudguards but Martyn wanted to cover the tyre properly so a 60s Triumph number plate and a cut-down plastic mudguard from a trials bike did the job. The front mudguard is a Manx replica in fibreglass, mounted on a home-made stainless bridge.
First time out of the garage, in Feb 2012, 14 months after starting the project, with only the side stand left to make.
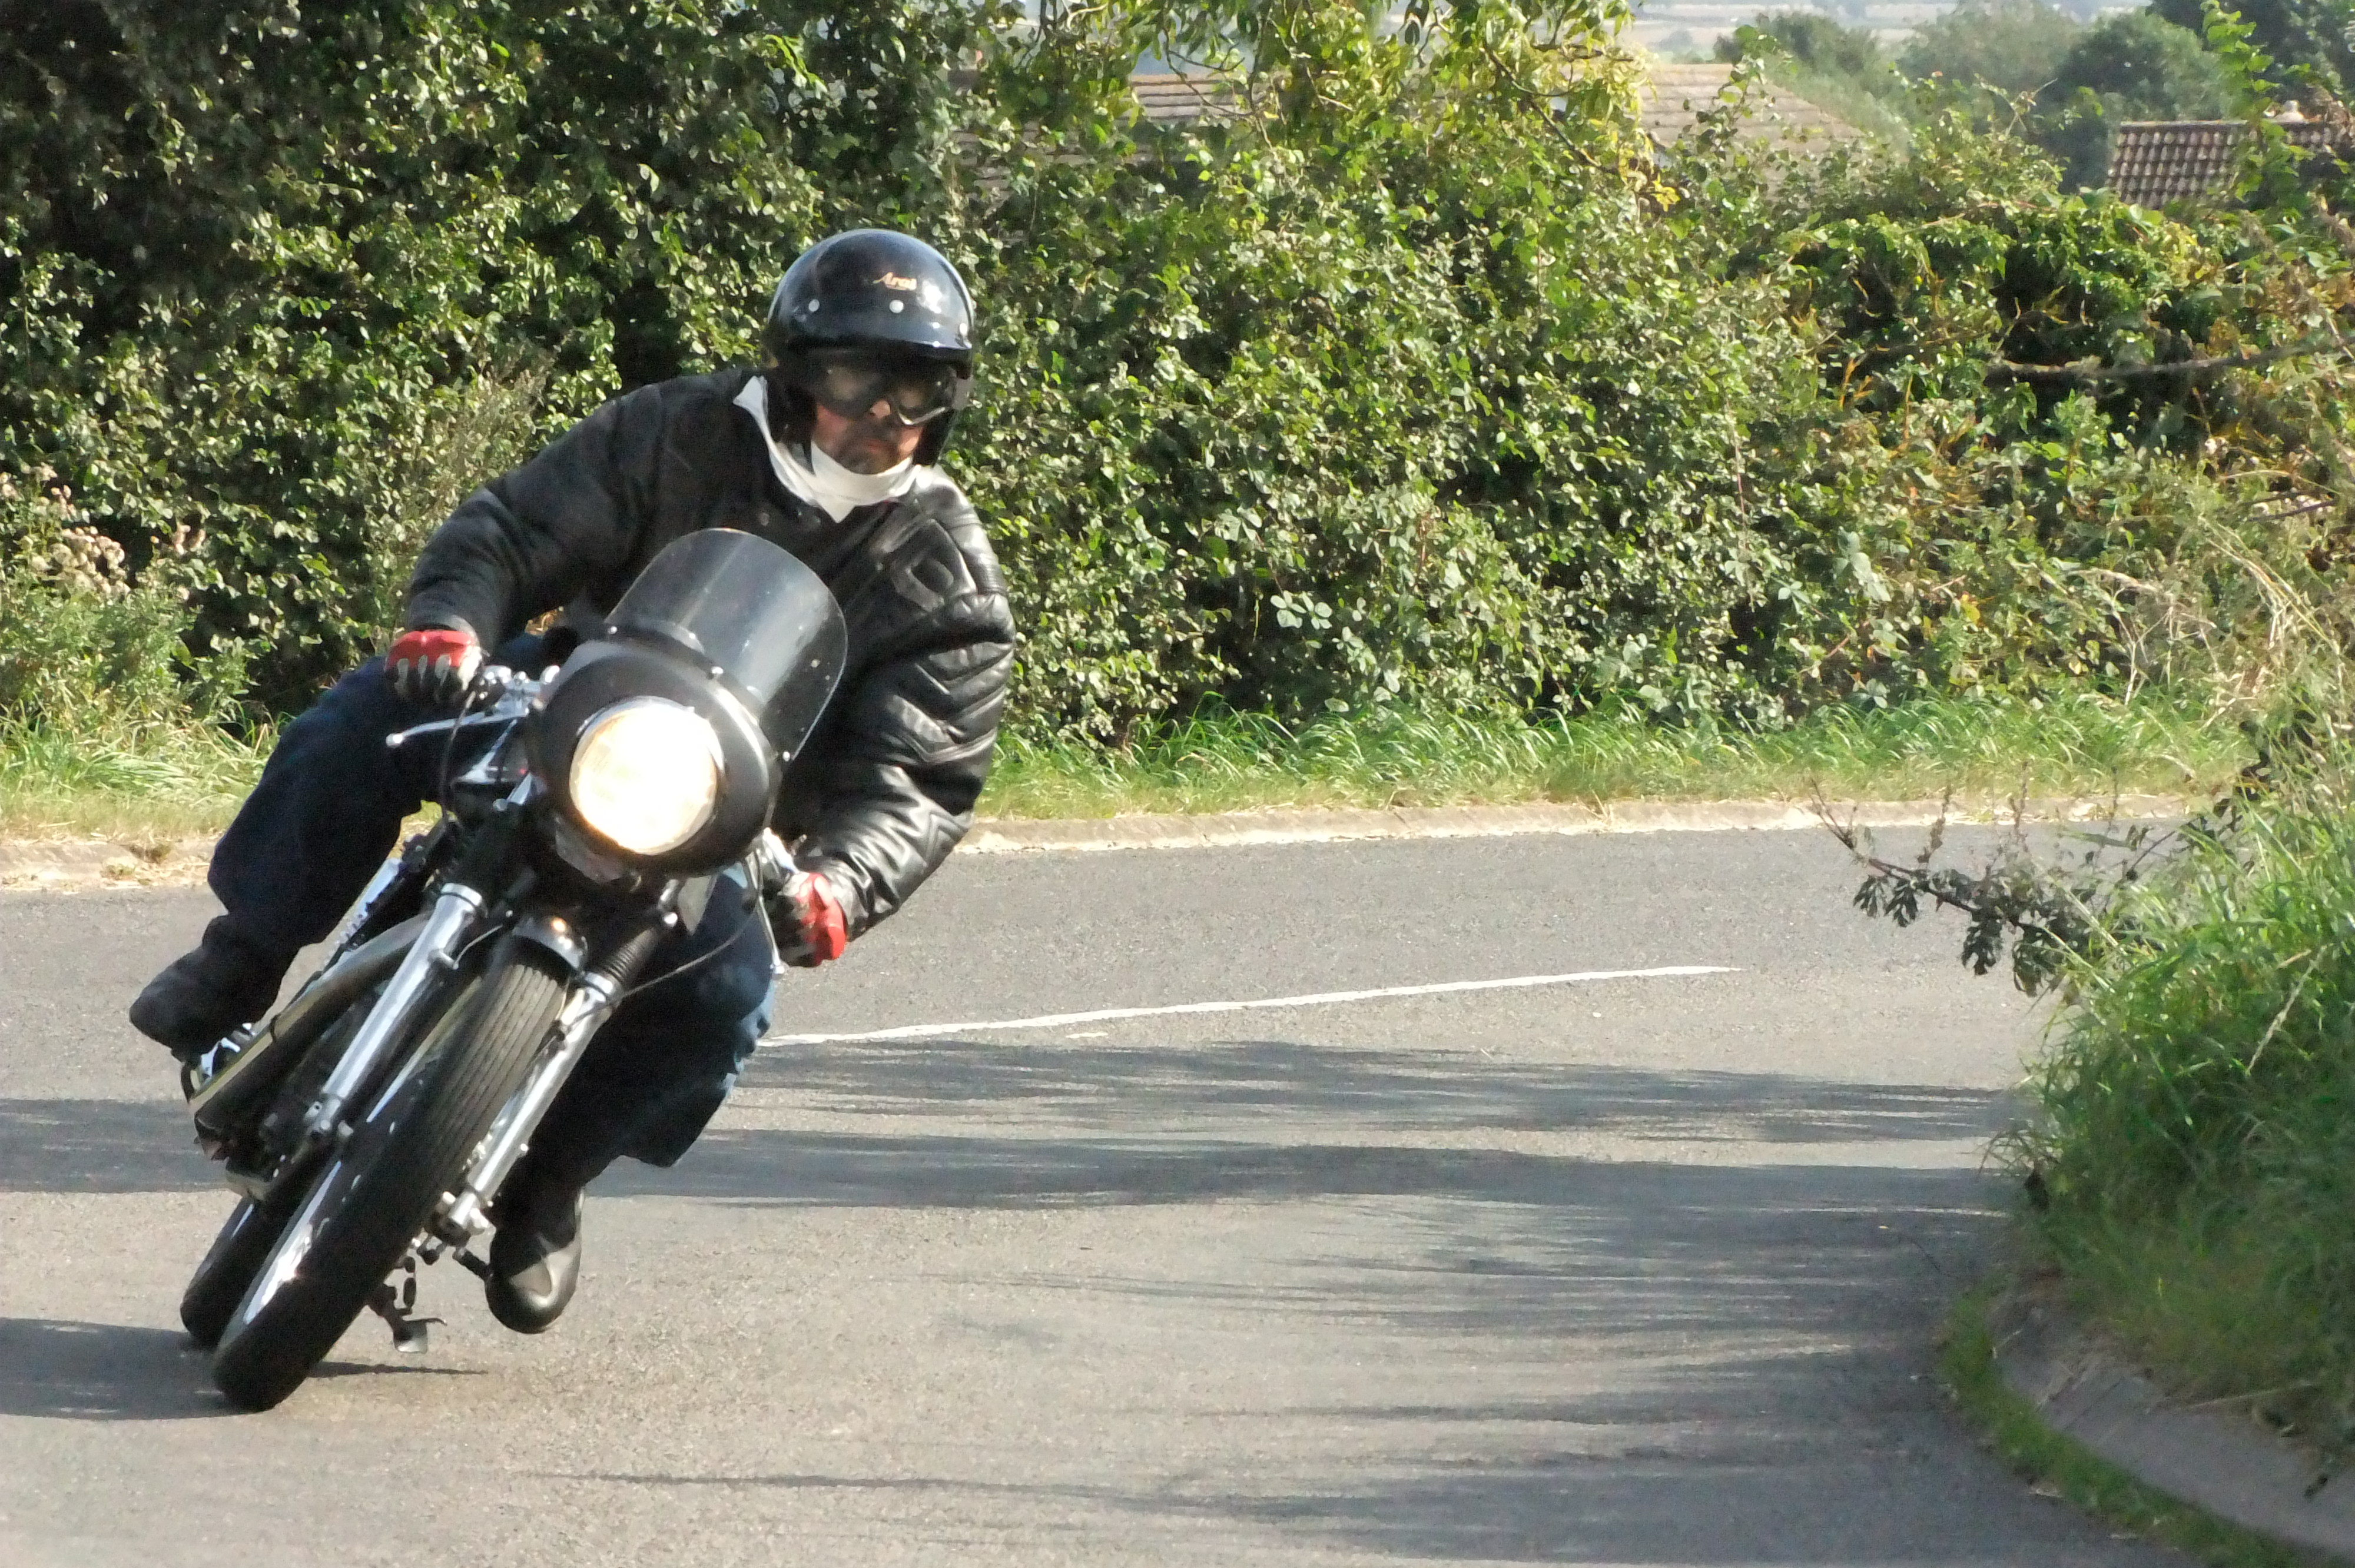
First ride in March 2012. The only issue was chain clanking against the primary cover – sorted by taking the cover off and relieving it a bit.
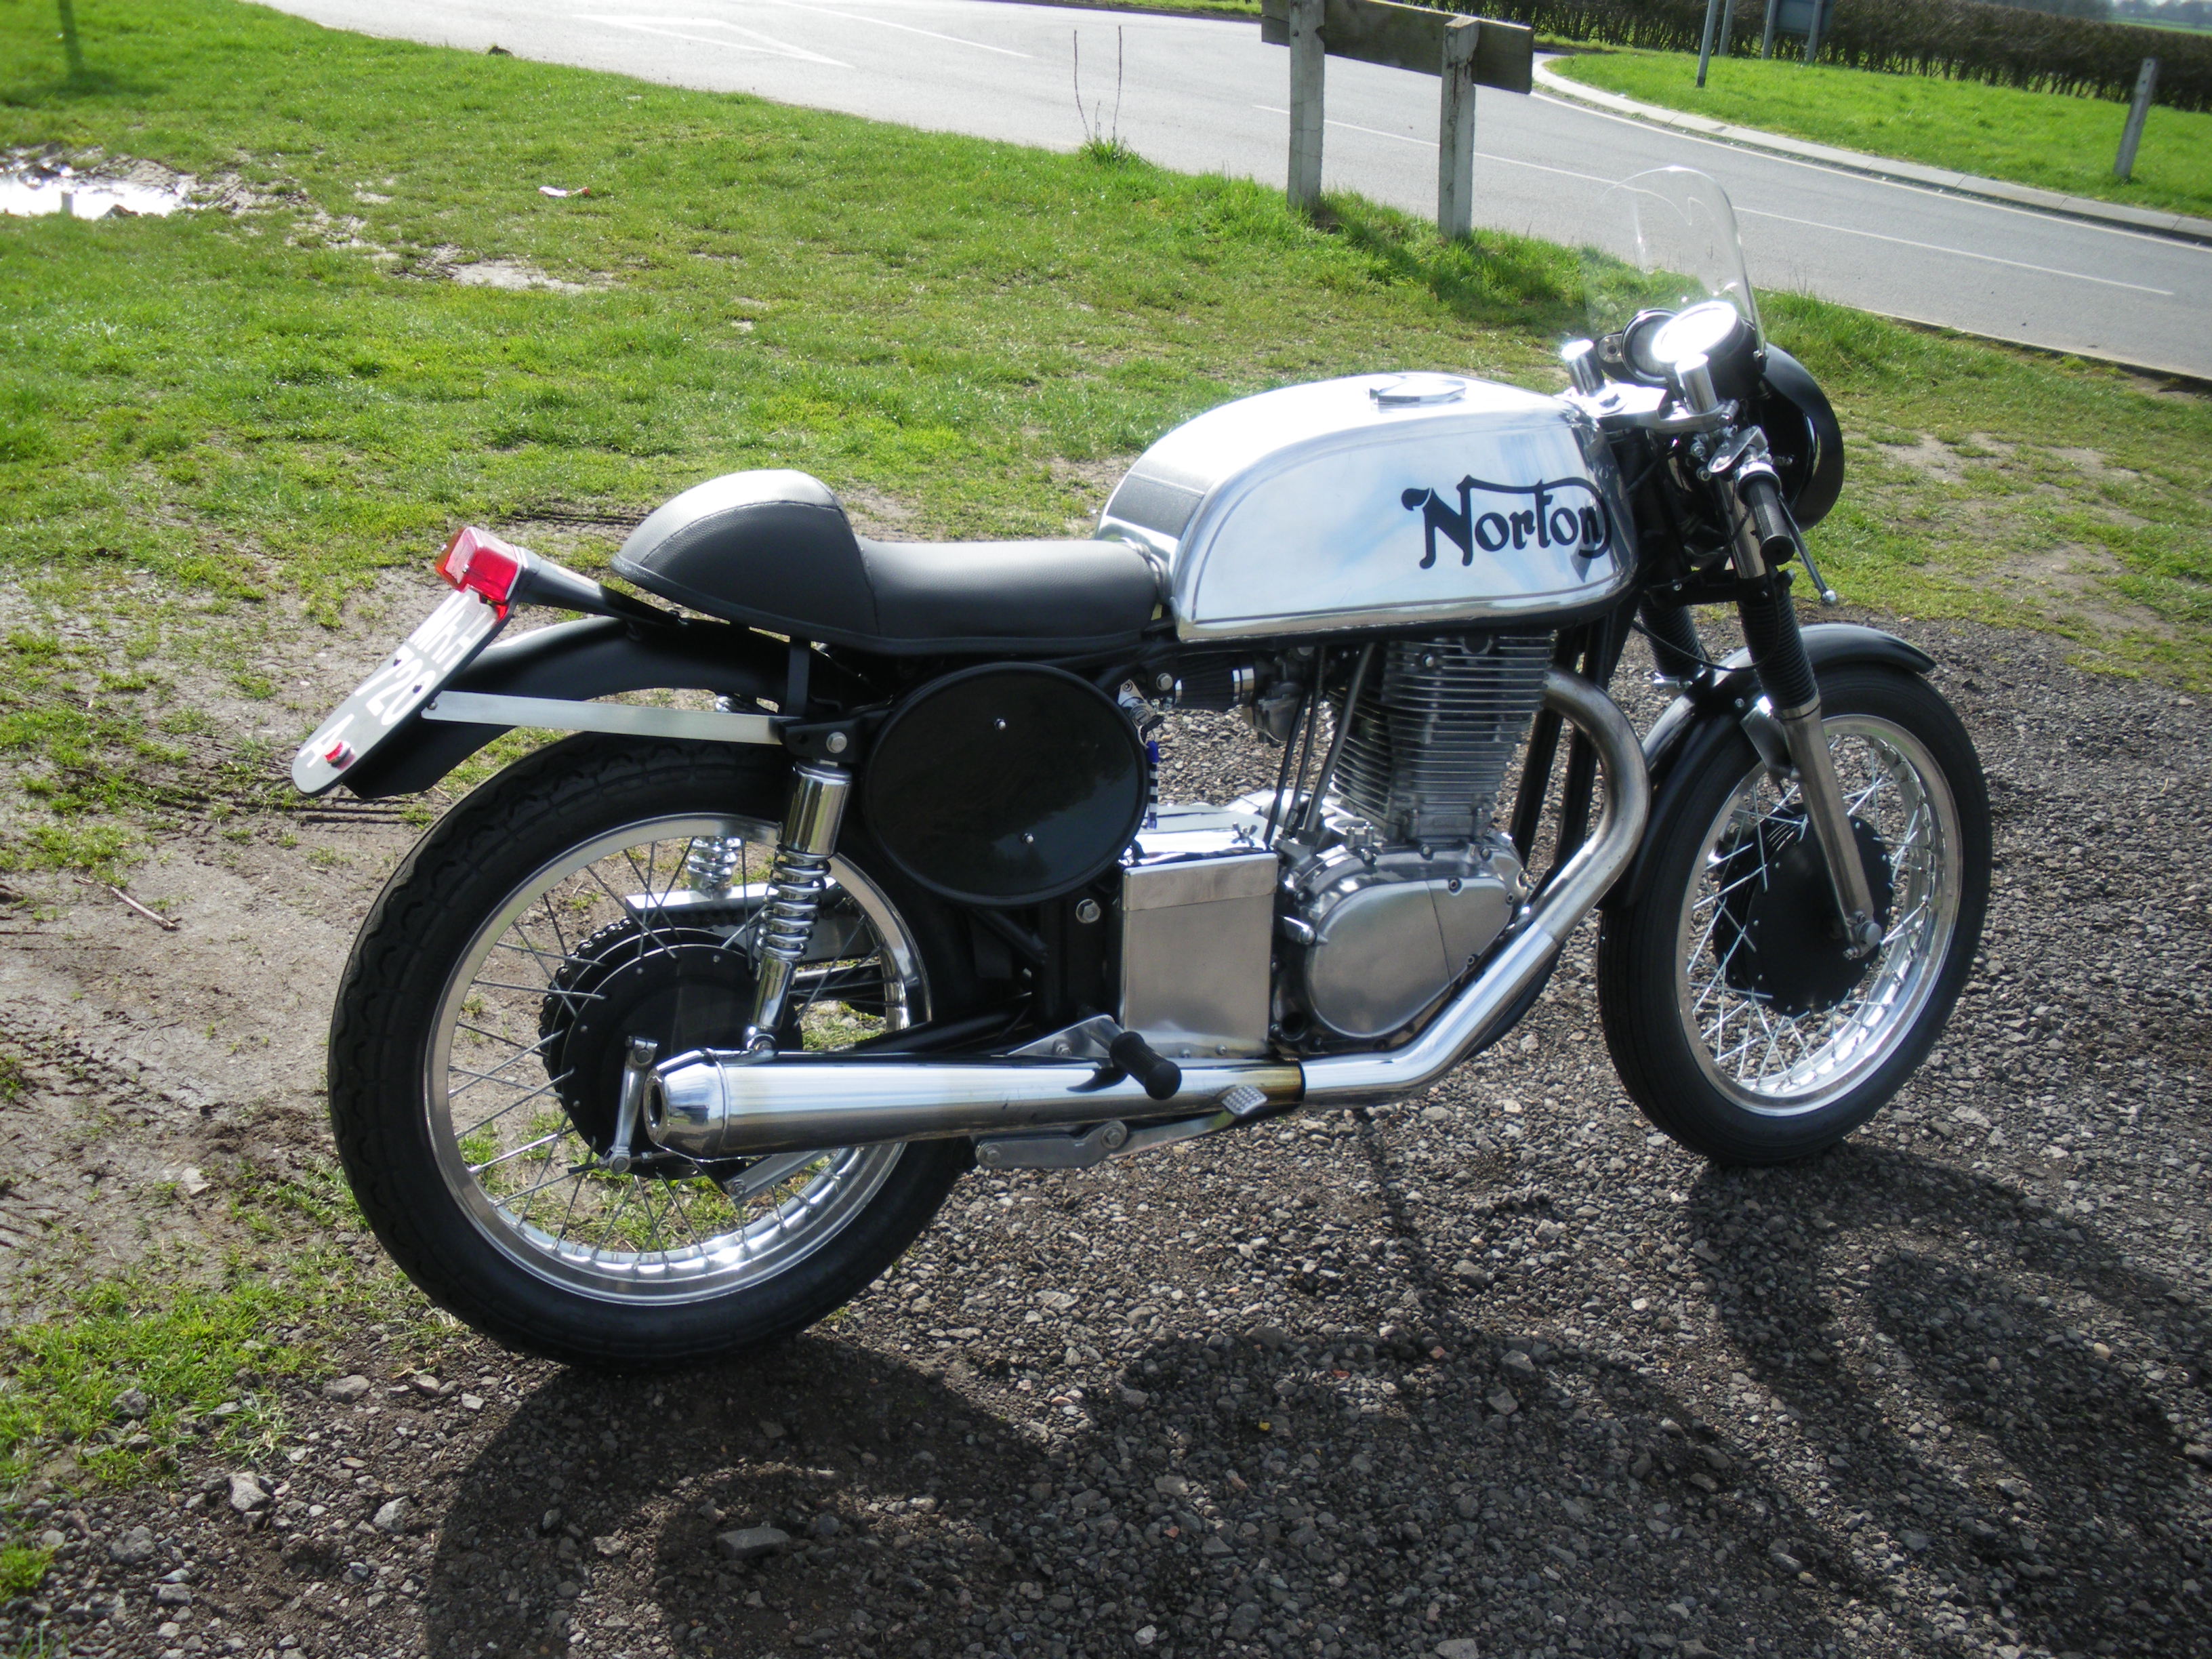
Another shot from that first ride

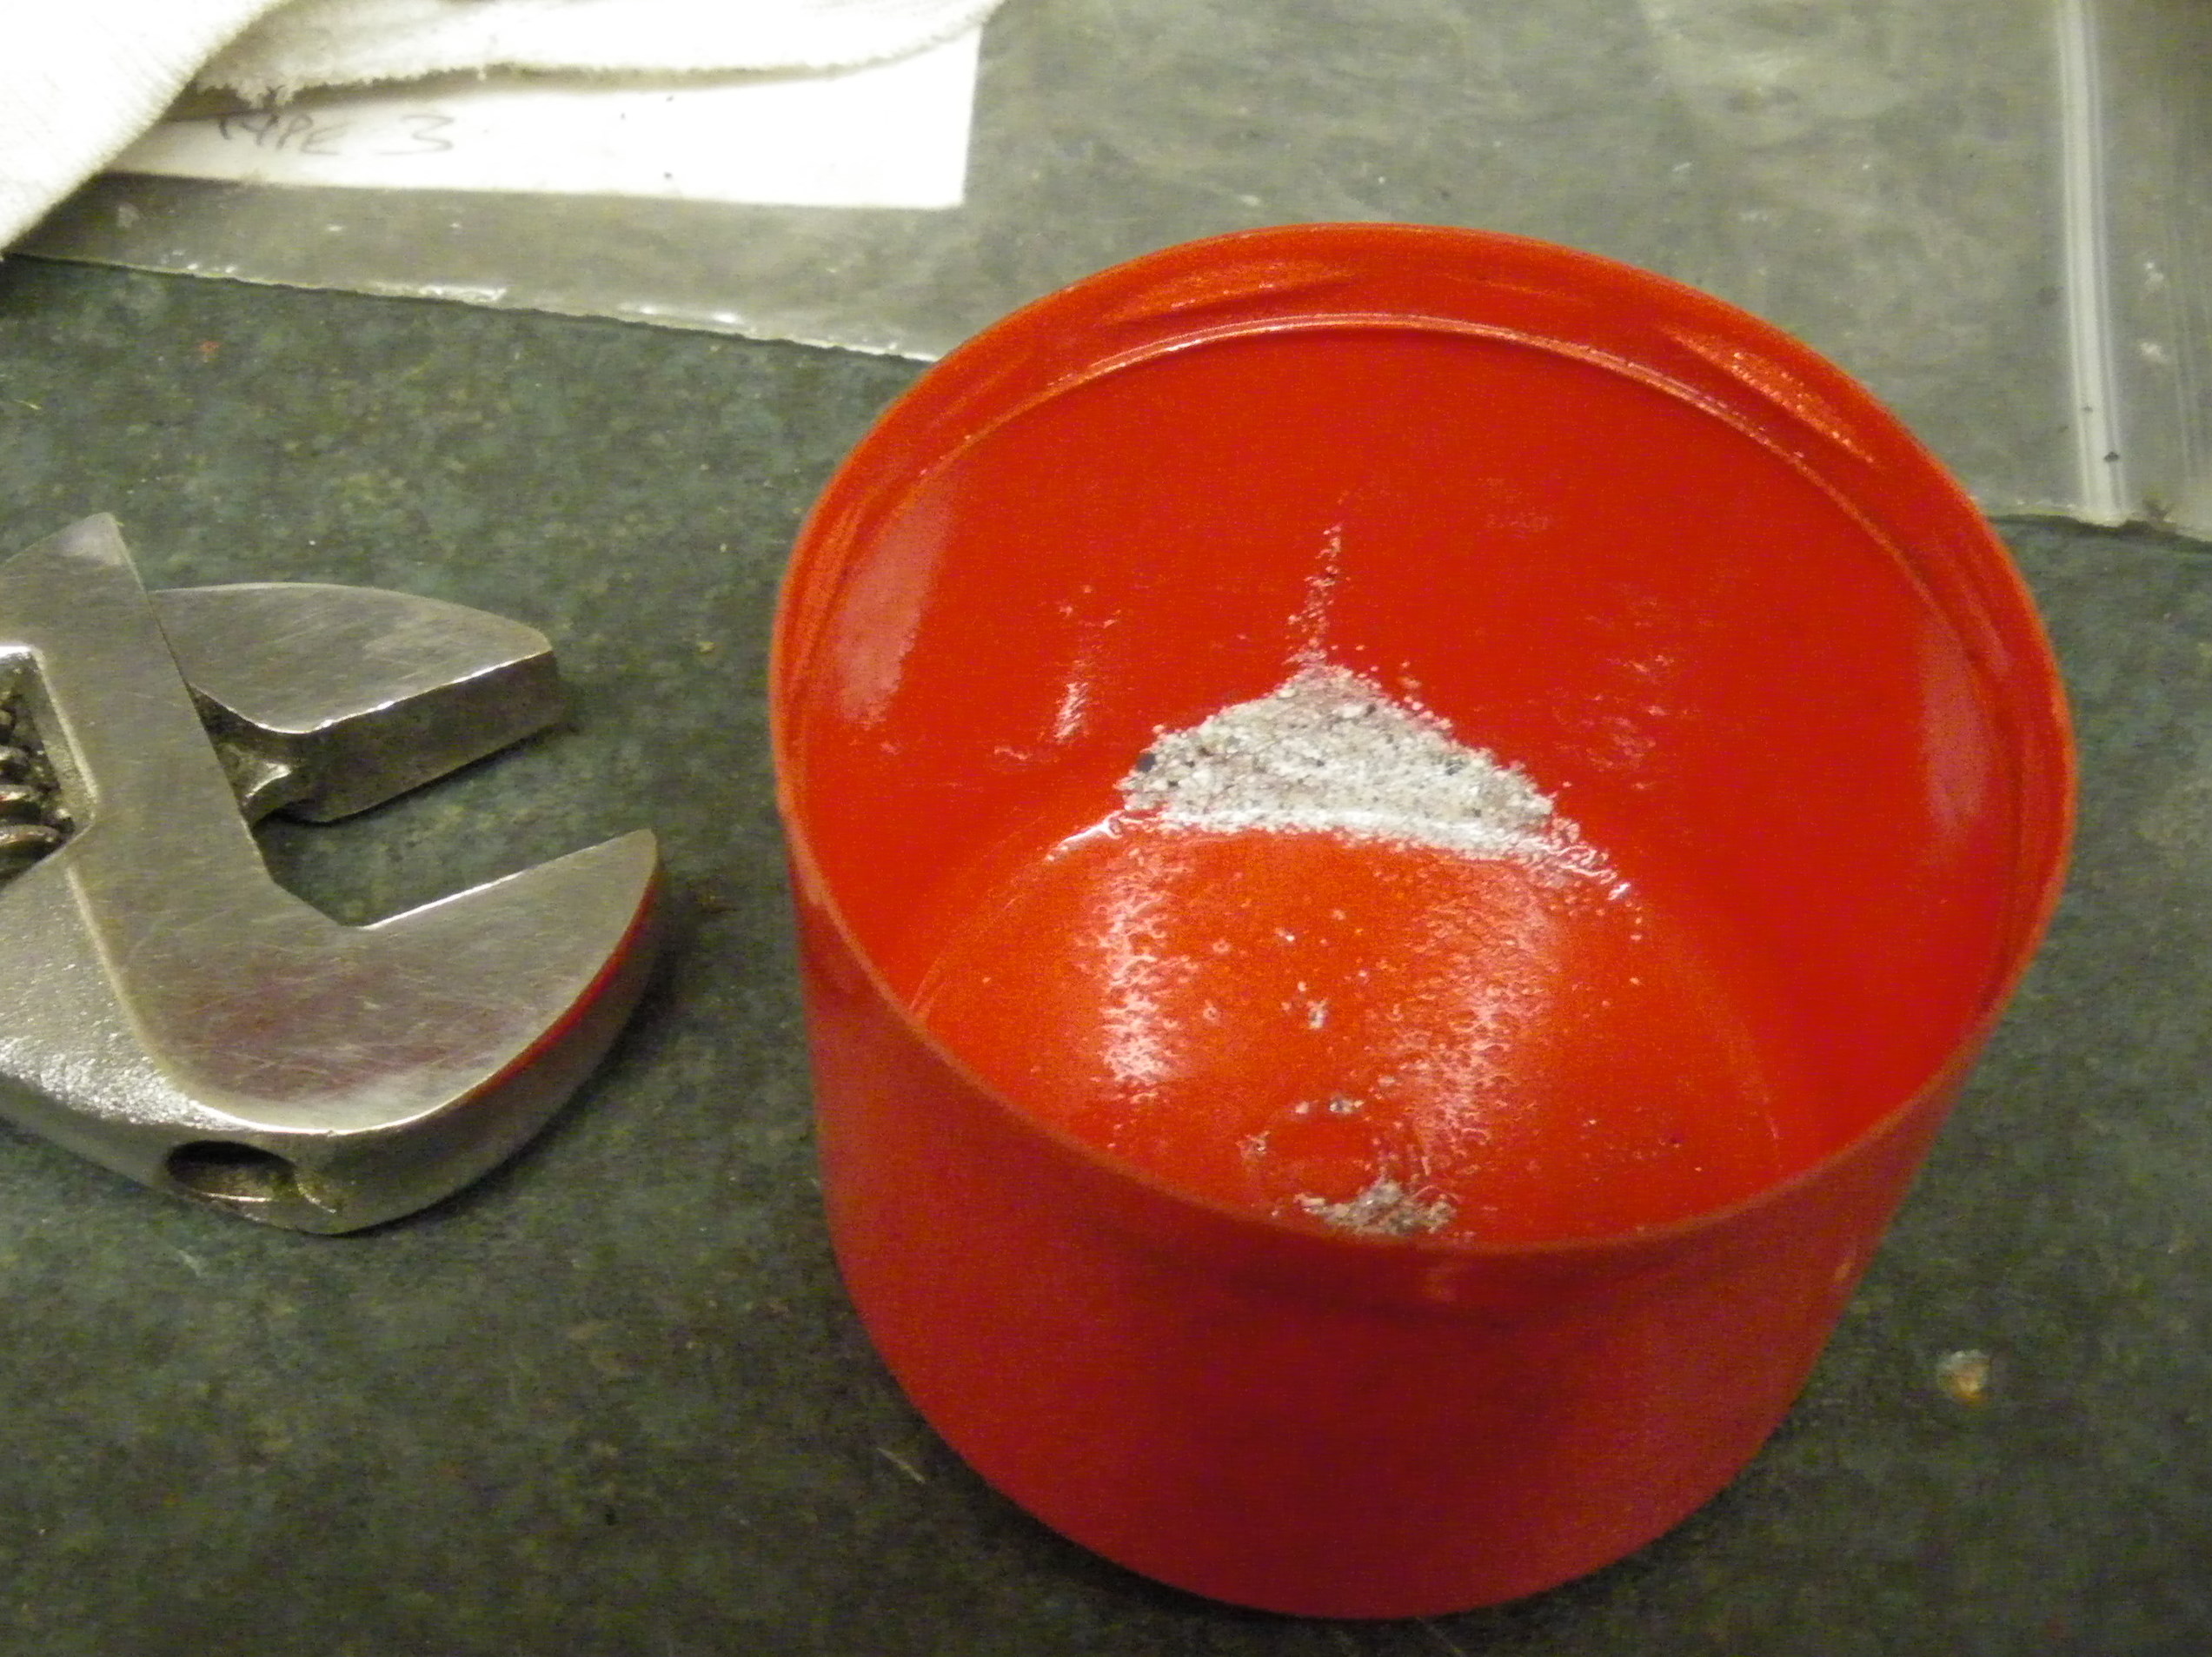
After a few rides, the bike started to get slower and slower, until it would only manage 50mph. Martyn traced the problem to this debris found in the fuel filter and carb. It’s flux from the ally tank. Martyn admits that evidently he should have rinsed it thoroughly with water before use (it was a NOS tank made in the 80s). The only cure was another carb, which he managed to find after a month or two and transferred the richer jetting over.
With performance now restored, Martyn enjoyed a good riding season in 2012, visiting various shows, and made the MCN top 6 bikes at Jack’s Hill Ton-Up Day, including a photo in their paper.
For 2013 the main upgrade was a shinier exhaust pipe and a new mega that was a lot louder than the first one. Manki now roars like a proper Manx, with that huge growl as you shut the throttle. 2014 has been free from any dramas – just enjoying the bike!
Well done Martyn. Thanks for taking the time to tell your story to Motorcycle Melee and happy riding!