There is something universally recognizable with the Kenny Roberts-style Yamaha yellow paint scheme.
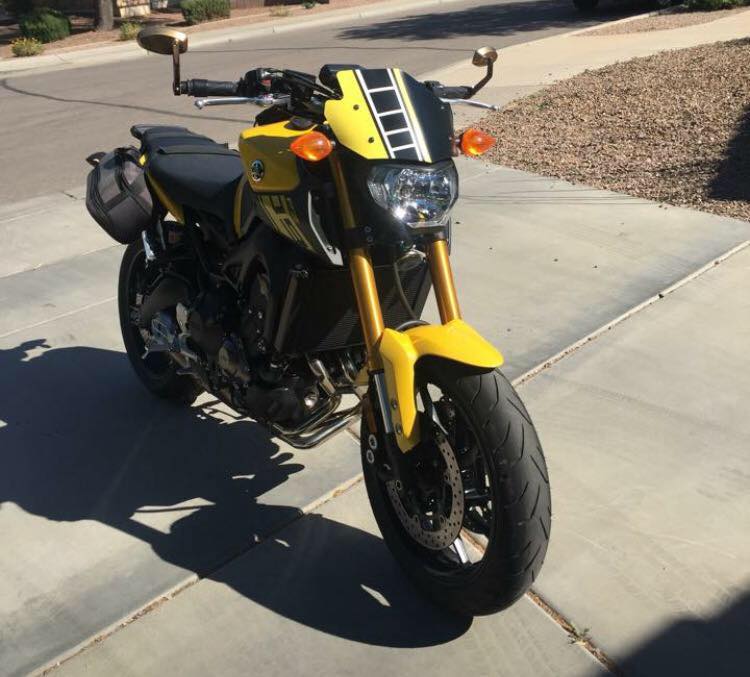
When I had the opportunity to purchase a 2015 Yellow Yamaha FZ-09 I pictured those Kenny Roberts racing motorcycles that had the tell-tale yellow, white and black moniker. The strange part of the FZ-09 is the gap between the top of the headlight and the instrument gauge–there, in that gap is the array of wires and cables that are exposed – perfect spots for bugs to go and die. So I needed a simple fairing to cover that area up and offer a bit of style at the same time.
I found just such a fairing from PJ’s Parts – the Fabbri Gen-X Sport Screen. This little beauty did everything I needed-protects from dead bugs accumulating in those wires and offers a bit of style in the naked bike look. The one thing it lacked was color. Being a fan of the Kenny Roberts Yamaha Yellow paint scheme I set out to add just enough color to increase its wow factor.
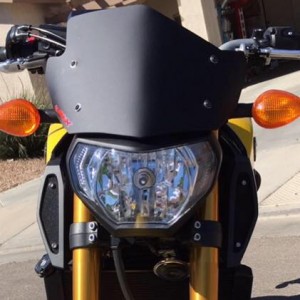
Here’s what the fairing looks like from the store – nice, clean, small — pretty darn cool. Nevertheless, I wanted this to better match the yellow paint and incorporate the Kenny Roberts Yamaha Yellow striping theme. So I determined that I didn’t want the entire fairing painted yellow for fear that it would be far too overpowering. Instead I wanted an asymmetrical design to go along with the asymmetrical design of the fairing itself. That’s one of the nifty parts of this fairing – it has one side a bit taller than another – a combination of awesome design and functionality (the taller portion blocks the bottom of the instrument gauge from the dead-bug syndrome).
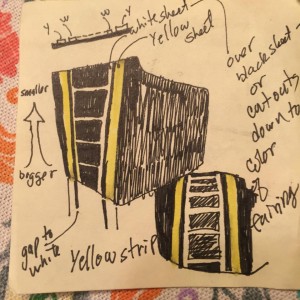
So I set out on a Google search to see the variety of different implementations of this Yamaha yellow paint scheme. There was much to enjoy during my search and I determined I would have half of the fairing remain black and the other half painted in the yellow Kenny Roberts stripe. As with any design concept I resorted to top-of-the-line design tools to render my concept: a yellow sticky note and an ultra-thin black pen. My concept was to have the ‘ladder’ stripe running vertical from the bottom to the top with yellow on either side. Here was my ‘professional’ rendering using those specialized art tools.
Next was how to paint the fairing so I could achieve my design. The most challenging part to figure out creating that white ‘ladder’ effect. To do this I resorted to the MacGyver in me – using a 1.81″ wide roll of blue painters tape I purchased at Home Depot. Starting at the bottom, I measured where I wanted the stripe and used a simple N0. 2 school pencil to mark small tick marks where I wanted the stripes to be. From there I applied a piece of the blue painter tape from the bottom to the top along the right edge. To achieve the effect of the stripe ‘widening’ towards the top, I simply applies another piece of blue tape starting at the bottom but angling slightly to the left as I moved to the top of the fairing. After that, I made pencil marks to indicate the ladder ‘rungs’ going up the stripe. Finally, using a very sharp utility knife and a plastic ruler, I cut out the rungs.
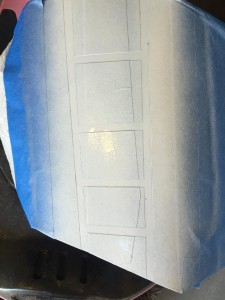
This gave me my white ladder area. I simply spray painted a gloss white primer/paint combination paint – two coats with a 20-minute wait between coats. Here’s what that looked like.
I let that sit for about an hour so it could cure before I taped off the other parts for the yellow paint. That was a little tricky because I didn’t want to apply blue tape directly onto the fresh white paint. So I used some copier paper and cut it to fit over the newly-painted white sections. then I taped off the left and right edges to give me that little black vertical strip beside the ladder strip. Turns out that my 1-hour wait was not enough time as some of the paper stuck to the white paint near the top of the fairing. So, I was up until nearly midnight scraping off that stuck-on paper, re-taping and gave it a quick burst of white spray paint – problem solved. I left that overnight to cure.
The next day was matte finish clear coat day. I applied 5 to 6 thin layers of a matte clear coat with anywhere from 20 minutes to a couple of hours between applications. the final application was a heavier coat to ensure an even distribution of clear coat.
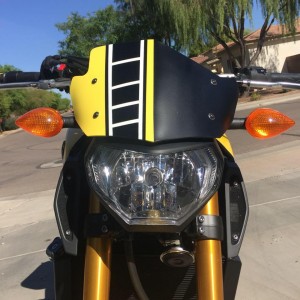
The finished product turned out better than I hoped. It’s not perfect, but only a recovering perfectionist — such as myself — would notice the imperfections. In the end the fairing now has a historical tie back to the Yamaha yellow Kenny Roberts racing days. Here’s a couple of shots of the finished product.
