


Here’s the metamorphosis of my 2012 Yamaha FZ6R from the stock sport bike to the Streetfighter. After a nearly 5-month hiatus from riding a bike (I traded in my cafe racer style 2011 Triumph Bonneville on a mini cooper) I had to get back on 2 wheels.
I searched for a reasonably priced used bike that had a solid reputation — the 2012 FZ6R fit the bill (from Victory BMW – Chandler, AZ). The challenge was that I really didn’t like the full-fairing look–so I decided to transform it into a streetfighter. Here’s what the bike looked like in its full stock setup.

My 2012 Yamaha FZ6R — in its stock setup
I found some solid inspiration on the FZ6R Forums so I wanted to chronicle my bike’s transformation to help anyone else out there who is wanting to make the same changes. I’ll offer the process I took in as much detail as I can and also describe the modifications I completed. Let me start by listing the modifications I ended up making.

The Streetfighter Version
My goal with this FZ6R streetfighter transformation was to spend as little money as possible and get the look I wanted. Some initial ideas and challenges I had were:
- I didn’t like the stock headlight
- I didn’t like the hand position in the stock handlebars
- I wanted bar-end mirrors – for style and better rear-view vision
- I needed an easy way to mount a new headlight without having to remove the top triple tree
- I like my headlight to point in the direction I’m twisting my handlebars
- I didn’t want to cut any wires for either the headlight or the turn signals.
Here’s the list of modifications I ended up making: (links to where I purchased are included in the parentheses).
- Removed all the existing fairings (see explanation below).
- Replaced the stock headlight with a 7-inch round headlight ($70.00 – Dime City Cycles)
- I used a simply steel headlight bracket to attach the headlight ($15.00 – New Egg) – NOTE: FZ6R forks are 41 mm in diameter.
- I relocated the stock turn signals to a rather interesting location (I had to take them apart a bit for this to work – but it was really easy).
- I replaced the stock handlebars with 7/8″ Black Aluminum Ultra-Low Renthal Superbike Handlebars ($65.00 – Dime City Cycles)
- I added Dime City Cycles aluminum oval bar-end mirrors ($45.00 – Dime City Cycles)
- I relocated the stock speedometer using corner braces from Lowe’s Home Improvement (Stanley, S838-987/DPB115 — $3.27 ). NOTE: these were 2 1/2″ x 5/8″ — the width was important — see @@ explanation below.
- I added a universal cafe racer bikini front fairing flyscreen. ($70.00 eBay). NOTE: This is unpainted – I had to buy spray paint and a urethane clear coat.
- Any color spray paint will work. For the clear coat – I recommend the SprayMax 3680061, 2K Urethane Clear Coat, Aerosol ($18.00 – R & E Paint Supply)
- NOTE: The paint started to have small bubbles – I attribute this to NOT using a primer before applying the first coat of red spray paint. LESSON LEARNED — use a primer before painting.
Here’s How I Did It:
I started by removing all the original plastic fairing parts. This proved a little more challenging that I originally thought. The hardest part was figuring how to get the top portion off. The bottom portion was easily removed by unscrewing several 4mm hex bolts from the bottom half of the fairing (see pictures). I started by removing the bolts holding on the two side panels – on top. They came off pretty easily. After that I removed the bolts holding on the bottom panels. There is a clip that holds the two bottom halves together – in the front bottom area directly in from of where the header pipes bend (see picture). The bolts were either 4mm, 5mm or 6mm–ensure you look underneath the bottom fairing pieces to see all the bolts–especially on the left side. When removing the side panels – ensure you un-clip the plastic clips holding the turn signal wires — see picture.
To remove the top portion required removing the bolts that held the headlight assembly (see video link below). Once I removed that I had to remove the bolts that were holding the mirrors onto the top plastic portions. After that I was able to remove the entire top fairing assembly. This exposed the metal brackets that held the headlight assembly and the speedometer (see video link and photo below). To remove that I had to remove the nuts that were holding on the brackets to the steering head — see picture and video below. I removed that bracket system and – this is important – screwed the screws back into the bottom of the speedometer assembly – I reused these to reattach the speedometer.
The final look is a little disappointing because of the flat steel braces that appear to be engine mounts. And there are some braces that stick out where the fairing was attached just below the gas tank emblem (see below for how I capitalized on those braces though!).
Photos for fairing removal:

Bolts to Remove upper/lower sections

(inside fairing panels)

of Lower Fairing.
(Directly in front of header pipe bend)

Two bolts on steering head – remove to unfasten bracket.
Video about removing the top fairing to include the headlight assembly:
Removing the top fairing to include headlight assembly
View of headlight/speedometer frame after removing top fairing section
Installing the new parts.
Speedometer: This was the trickiest part of installing new parts – because there was no off-the-shelf bracket to use. The fortunate part is that there are two convenient bolts under the top triple tree you can use to attach brackets. If you look down at the triple tree you’ll see a wiring guide. If you follow that guide to the underside of the triple tree you’ll see the two bolts holding it in place. @@The only challenge (you’ll see when you look) is that there is only about 3/4 ” clearance to fit something where the bolt is. My first attempt at a bracket was to use the L-shaped bracket system you might use when building shelving in your garage. This took some severe mashing of a hammer to get the bracket to fit into that 3/4″ area and when it was done it look stupid. I even spray painted it black and it still looked stupid. So I continued my search and found a superb bracket at Lowe’s (see list above). This L-shaped brace was 5/8″ wide and fit perfectly. The challenge was it was L-shaped and wouldn’t be the right shape to attach the speedometer. So I took to the hammer mashing again — with my original intention of smashing it flat. When I hit it with the hammer for the first time, the brace bent in a serendipitous shape – sort of an elongated “Z” shape that worked very well to position the speedometer at an angle that makes it easy to see when riding. See pictures below. I attached one end to the underside of the triple tree and the other end to two existing screws in the bottom of the speedometer. The position is fantastic. One note: ensure you refasten the ground wire that was attached underneath the speedometer — see pictures of where I attached mine.

Custom bracket attaches to underside of triple tree


The Speedometer Bracket

A nifty bracket for the speedometer – angled
Headlight: I did not like the stock headlight’s shape so I opted to try a 7-inch round headlight and think the look is nice and brawny. Attaching the headlight with the

with Headlight Attached
headlight bracket took a little bit of massaging the bracket. The bracket is designed to fit 38 – 42mm forks and the FZ6R’s forks are 41 mm. The brackets needed to be lightly pounded to fit the forks. What I did was position the brackets on the forks then give several solid taps of the hammer to get the curve to fit the curve of the fork. Then I had to tap the end of the bracket where the 2 slots are located to get it bend around the rear of the forks. Once tightened, the headlight brackets seemed solid.
The headlight itself was a piece of cake because it has a wiring harness that plugs directly into the FZ6R’s existing wiring–truly a plug-n-play setup. I had to go to Home Depot to get bolts and lock washers to attach the headlights to the brackets — the bolts are 8mm bolts — you can find these in the specialty fasteners section of Home Depot.
Turn Signals: I purchased after market signals from Dime City Cycles, but really didn’t want to mess around with splicing wiring — so I searched for a way to reuse the existing turn signals. I found that they were using a small bolt and nut to hold on the oval plastic housing. When I removed that nut and the “8” shaped washer I found that I could attached the stock signals.

Attached to Headlight Bracket
I originally attached the turn signals in the holes on the headlight bracket. But when I was at the dealership getting a new chain installed, I saw a Triumph Street Triple and noticed its unique placement of the turn signals. So on the FZ6R there are these awkward braces that are below the emblem on the gas tank that I was going to remove, but after seeing the Street Triple’s turn signals I decided to remount them from the headlight bracket to these braces — and I spray painted the braces black so they

Attached to Headlight Bracket
blend in better. Now the headlights are in a unique position and offer a bit of reflection off the gas tank to provide a bigger flash of light when the signal is activated.

Attached to braces originally holding the side fairings in place
(spray painted black)
Handlebars & Bar-end Mirrors: These were pretty much a swap out with little problems. The only thing I would recommend is NOT DRILLING any holes in new handle bars for the little dimple you will see inside the assembly for the turn signal switch/horn and the starter switch. I removed those plastic dimples using a Dremel tool with a round sandpaper bit. Once that dimple is removed you can place the assembly in any position that best fits — simply screw it down tight — it will not move around.
The Dime City Cycle bar-end mirrors come with a bar-end you can use to install the mirrors. I used these because they put the mirrors a little more outside my elbows/shoulders so I have a better view of behind/beside me. See pictures.
New Flyscreen/Fairing: The fairing was just what I needed to tidy up the front end and hide/protect the wiring between the headlight and the speedometer. The fairing comes unpainted so I painted it black with two red stripes and some gray pin striping to try and match the tank’s color scheme. If you opt to go this route I highly recommend the SprayMax clear coating — it provides a far tougher, superior coat to any clear coat you can buy off the shelf. To paint this I started with a 400 grit sandpaper to smooth out any roughness. Then I sprayed a red base coat. After 3 or 4 coats I let it dry over night. Then I taped out a fat and skinny stripe and painted the rest in a midnight black color. After that dried I removed the tape and used the SprayMax to provide the final clear coat. I used 4 or 5 coats.
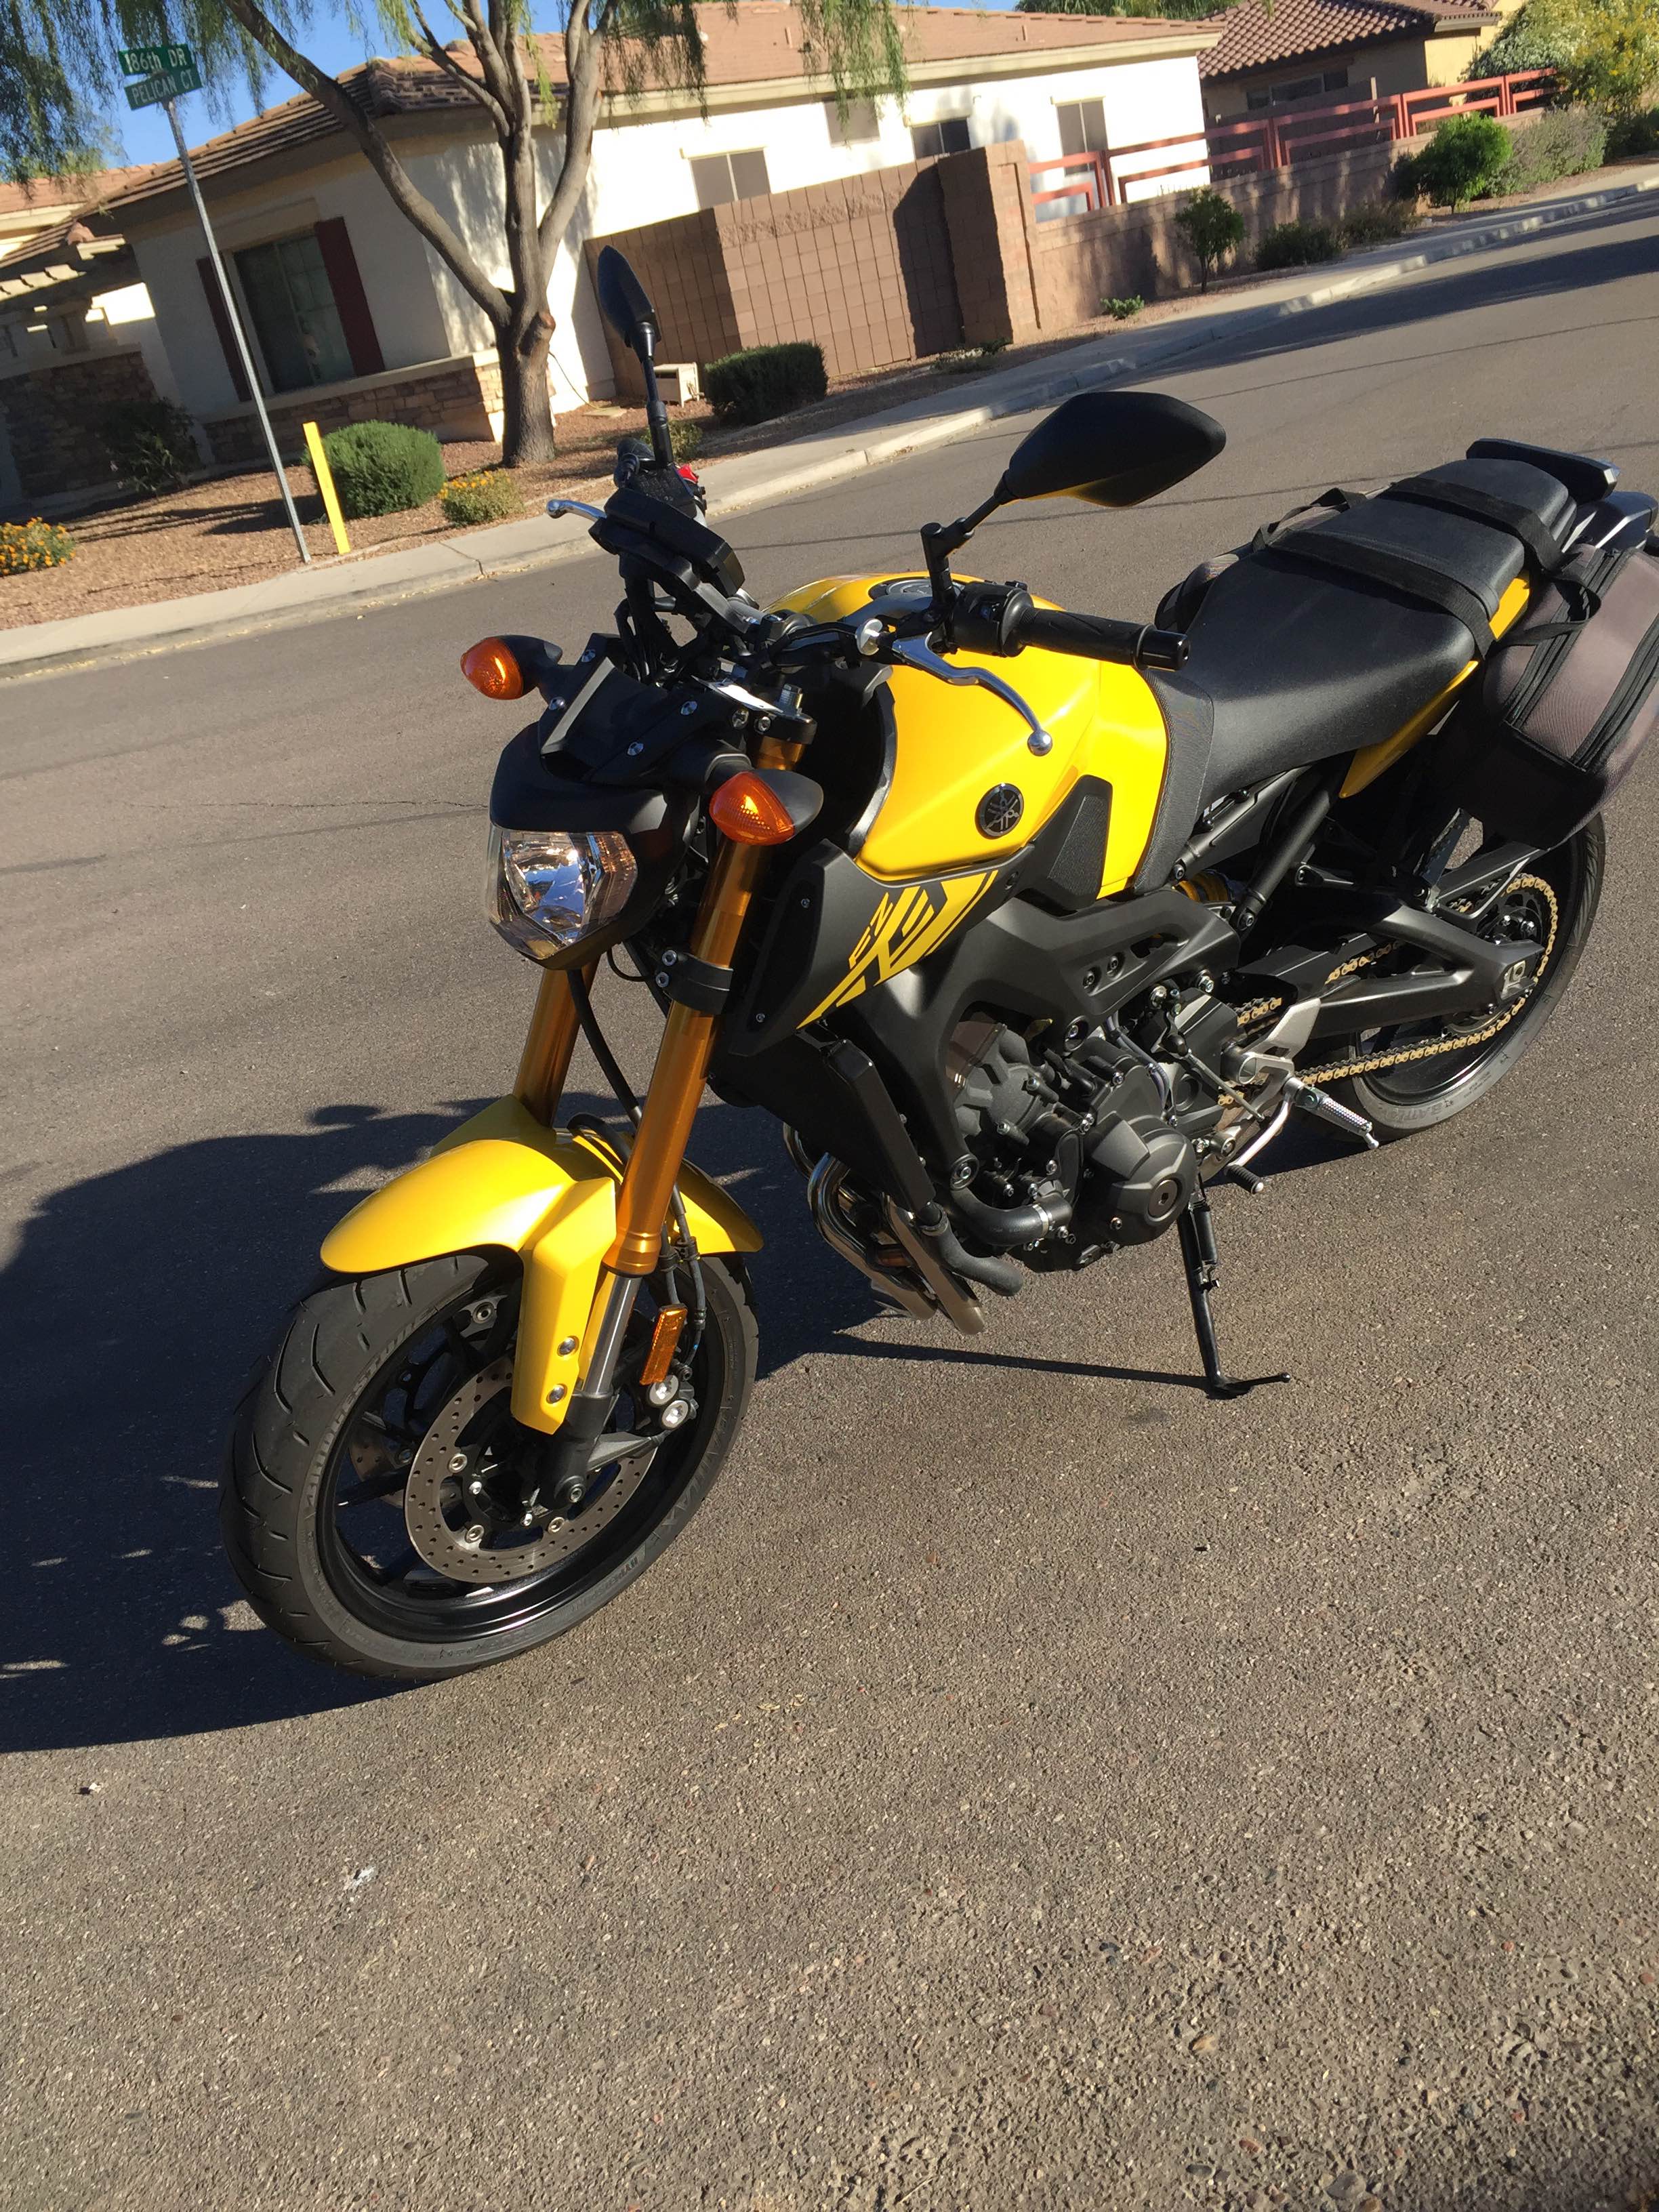
Here’s the final modification. Please leave comments if you have any questions.
2012 Yamaha FZ6R Streetfighter Mod – Completed Walkaround


Amazing job! Recently my bike was tipped over and the headlight and front fairings were severely damaged. I’m looking to attempt this conversion. I just want to thank you for taking the time to do this write up! I have a question regarding the speedometer’s ground wire. What did you use to attach it to the bracket? Thanks again for the write up!
Hi. Thanks for the positive comments.
I reused the screws that held the speedometer and placed the ground wire between that screw and the bracket.
How are those headlight brackets holding up? I’ve read they’re very cheap and been told to avoid them.
yesssss,
I was also concerned about how cheap these headlight brackets were. But once I installed them I have had no trouble at all. They are doing their job supremely!
Thanks,
Rick
MotorcycleMelee.com | the madness of motorcycle riding
http://MotorcycleMelee.com
Would this work with a 09 fz6r too?
@andr_s_roman:disqus – I think it would work on an ’09 model.
There are only 2 things I’d be concerned about:
1. the fork diameter – measure it before buying any headlight bracket to ensure the bracket will fit.
2. The bolts under the top triple tree where I attached the speedometer. Check under your 09 to ensure there are bolts holding on the cable management stuff.
Let me know how it goes.
Rick Forristall
Motorcycle Melee
Thank you . I will , hopefully soon !
How did you hide all the wires on the front?
Hi Tyler,
Which wires are you asking about?
The wires for the headlight/blinkers, gauge cluster. Without my front fairing on it looks like my bike woke up with a bad hair day. Looking for somewhere to hide them
Sorry, I’m hiding them with the bikini fairing.
Nice job! Just picked up a wrecked 2011 FZ6R, Gonna see what kind of modding I can do. Thinking something along the lines of I think they call it a tracker. But with like some military colors.
Wow! You’ve did a awesome job on this bike.
I just bought a damaged 2013 and wanted to convert it to the european naked model but the original parts are way too expensive.
Your solution looks so good that i might want to give it a try!
Is there a way i can contact you if i run into problems with the conversion?
Best regards,
Gunnar
The Netherlands